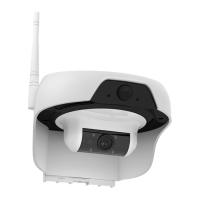
1. Please make sure all parts are included.
• WiFi Camera with built-in battery
• Mounting Wall Bracket
• 3 x wall screws & 3 x expansion screw set
• USB Cable & Power Adapter
• 1 x mounting screw &
1 x plastic gasket
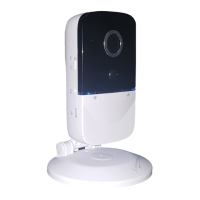
2. Fully charge your camera before use.
• Connect the power cable to camera.
• For initial charging, the camera must be
fully charged which takes about 4 hours.
• Turn on the power switch.
• The yellow LED light will be on to indicate
that the battery is charged.
For more detailed instruction, Visit our support site For video demonstration. www.solocameras.com.
For tech support, email us at support@solocameras.com Or, call 201-934-1654.
1. Content & Parts
2. Charging Camera
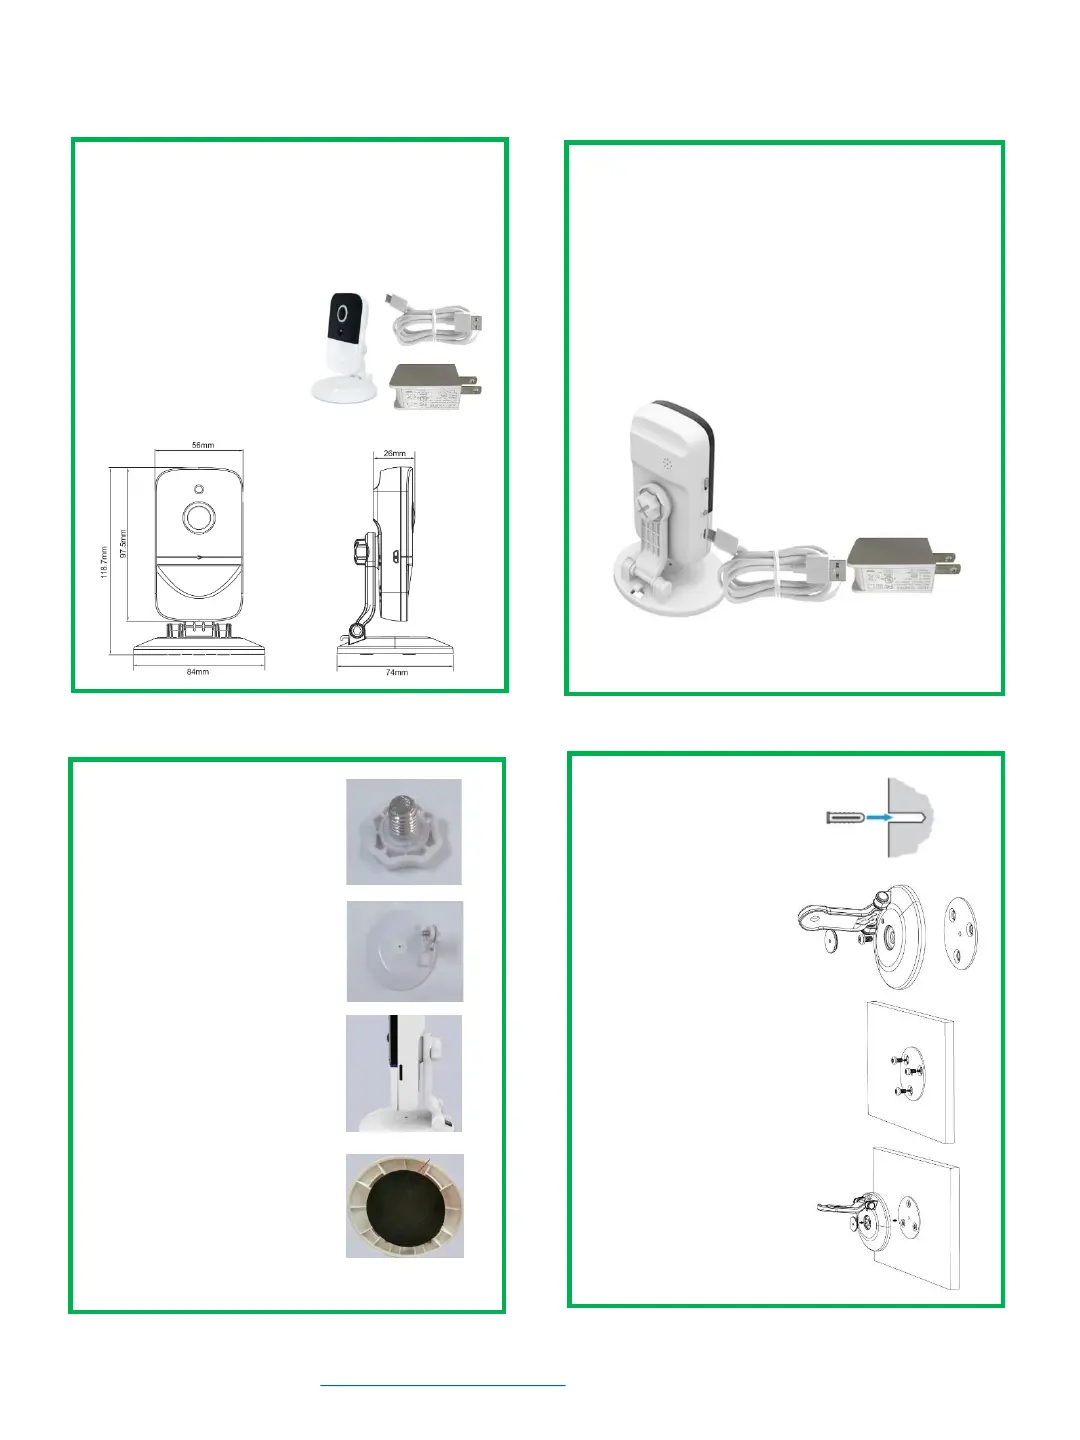
3. Bracket Assembly
4. Wall Mount Installation
C330 Installation Guide
Parts & Description
4.1. Drill holes on the
wall and insert green
expansion screws into
the holes.
4.2. Remove screw
cover and unscrew to
detach the camera
mounting base.
3.1. Insert the clear
plastic washer into
camera mounting screw.
4.3. Align the holes of
the mounting bracket
with the expansion
screws and secure the
bracket.
3.2. Set the mounting
screw into bracket.
3.3. Tighten the mounting
screw and adjust bracket
angle to finish bracket
assembly
4.4. Screw back the
camera base. Adjust
bracket angle to a
desired position.
2
3.4. If necessary, peel off
the sticker from bottom
of the mounting bracket
to stabilize the camera.
 Loading...