EasyManua.ls Logo

freecam C330 User Manual

freecam C330
2 pages
To Next Page IconTo Next Page
Page #1 background imageLoading...
Page #1 background image
1. Download “Doby” from App store for
iPhone or Play store for Android phone.
Make sure your smartphone is
connected to the Wi-Fi router.
Register to create an account and log in.
Open the app and “Click “+” button on
the bottom right corner to add camera.
2. Turn on the power switch after
removing the safety cover.
Blue LED light should be blinking.
If not, press and hold the WiFi key for
about 5 seconds until the WiFi indicator
blue light is blinking.
3. While WiFi LED is blinking.
Tap [Yes] to enter WiFi setup page.
Tap on the searched camera.
Enter WIFI Password.
More detailed instruction, Visit our support site For video demonstration. www.solocameras.com
For tech support, email us at support@solocameras.com Or, call 201-934-1654.
1. Download App
2. Turn on the Power
3. One Key WiFi Setup 4. Live View
4. Tap on the camera from the list.
Tap to play live view.
Tap on Protection for alarm setting
Tap on Playback to see recorded
video.
C330 Quick Setup Guide
Micro SD
card slot
Power
Switch
WiFi Key
Question and Answer IconNeed help?

Do you have a question about the freecam C330 and is the answer not in the manual?

freecam C330 Specifications

General IconGeneral
Two-way AudioYes
Weather ResistanceIP65
Night VisionYes, up to 10 meters
Lensf/2.0
StorageMicroSD card (up to 128GB), Cloud storage
Operating Temperature-10°C to 50°C
Wireless2.4GHz Wi-Fi
Connectivity2.4GHz Wi-Fi

Summary

Download and Install the Doby App

App Store Download and Account Setup

Download the "Doby" app, connect to Wi-Fi, register an account, and log in.

Powering On the Camera

Power Switch and WiFi Indicator

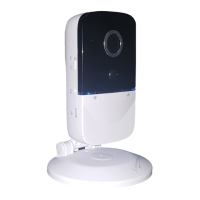
Turn on the power switch and ensure the blue LED blinks. Press WiFi key if needed.

WiFi Connection Setup

Entering WiFi Credentials

Tap "Yes" to enter setup, select the camera, and input the WiFi password.

Accessing Live View and Features

Live View and Recorded Playback

Tap the camera to view live feed, access alarm settings, or watch recorded videos.

Package Contents and Specifications

Included Parts List

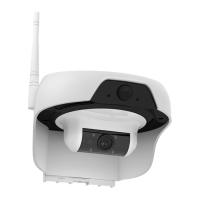
Verify all included parts: WiFi camera, mounting bracket, screws, USB cable, and adapter.

Initial Camera Charging

Charging Procedure and Indicator

Connect the power cable and charge fully for about 4 hours. Yellow LED indicates charging.

Bracket Assembly

Camera Mounting Bracket Assembly

Assemble the camera mounting screw with the plastic washer and bracket.

Wall Mount Installation

Mounting Bracket Installation Steps

Drill holes, insert screws, detach base, align bracket, and reattach camera base.

Related product manuals