1 2 3
Suction Cycle
40:00
1 1
100%
1 2 3
Suction Cycle
40:00
5
TURBO
100%
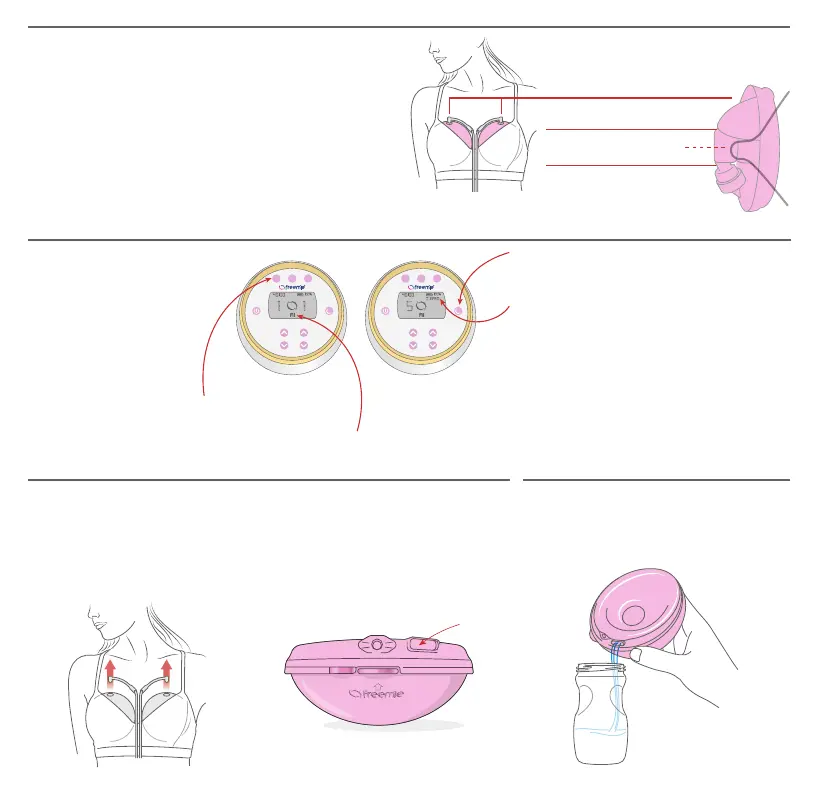
Ready to Pump
7
After Pumping
9
Tubing and pour spout should be
upright at the 12 o'clock position.
Place Cups in your bra:
1: Bra fit is critical for proper use. Enough pressure is needed
to seal the Flange against the breast while too much
pressure may cause low output.
2: Before choosing a bra, pump by holding the Cups in place
with your hands. Then try several of your bras to find one
that most closely holds the Cups like your hands.
3: It may be necessary to adjust your bra to find the best fit
for you. A sports bra or stretchy nursing bra can work well.
1: Turn the pump o.
2: Pull Tubing from the tops of the Cups
to disconnect.
3: Carefully remove Cups from your bra.
Milk Transfer
Pour Spout
Center Flange opening
over the nipple.
Cups may be set flat before
transferring milk to storage.
When set flat, Cups may gently
rock and then naturally balance.
Pour milk quickly and confidently into
a storage bag or bottle of your choice.
Practice with water first.
Pump Controls
8
Suction Setting
1=Low
5=Strong
Cycle Setting
1=Fast
10=Slow
3 Customizable Memory Settings
Press and hold numbered buttons
to save your favorite settings. Appears on screen as M1, M2, or M3.
You may find it helpful to start with a weaker
Suction and faster Cycle to trigger the
Stimulation Phase and adjust to a stronger
Suction and slower Cycle as you move into the
Expression Phase.
Minimum
Setting
Maximum
Setting
Timer Feature
Timer counts down from 40:00 minutes.
Press button to change in 5 minute increments.
Turbo: Slowest suction and release cycle
(press Cycle up one time after 10).
 Loading...