First Steps
_ll g08d0006
g08i0036
DISCARDTbi_C4)<RATING
_C_WSAND<2)WOOb_ASES
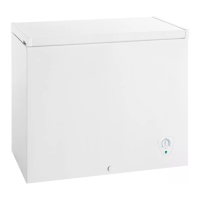
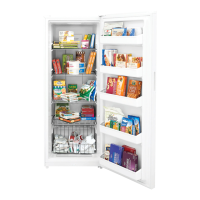
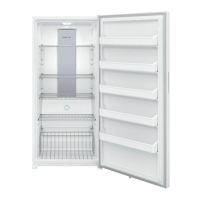
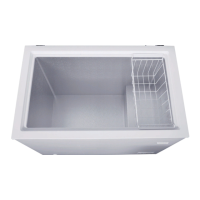
U%packingar_ Leveling -UprightFreezers
_/---- Base PanelScrews g09d0011
...... I _" Base Panel
Bcrews
Hinge
Figurel
g08i0044
CAUTION: Toallow doorto
close and seal properly, DO NOTlet
food packages extend past the front
of shelves.
Before starting the freezer, follow these inportant first steps:
Installation
• Chcoseaplacet_bmtisnearagrcundedelectrical outlet.
• Forthemosteffici_qtq0e2Taticn,thefreeze_shculdbelccatedwheresurrmtnding
te_peratureswillnot _<ceedll0OF (43oC).Ten%ce_raturesof32OF (0oC)andbelcw
will NOT affect freezer operation. Additional _ressor heaters are not
recommended.
• Allowspaceazrxlndthetnitforgoodaircirc_ulaticn.Leavea3inch (75ram)_ce
<11a]isiclesofthefreezerforadequatecirculation.
L ling
Thefreezermusthaveallbottomcorn, srestingfirmlycna solidflocr.1hefloormust
be stmcngencugh to supporta fully loaded freezer.Check the cabinetwith a level
from side to side. After discarding the crating screws axldwood base, level the
To Level Upright Unit:
Cnoe leveled,slightlyraiseadjustmentof frontfeetsothe doorcl_ easilywh_l
opened ak_ut halfway.
To Level Chest Unit:
If needed, add metal or wood shims between feet pads and floor.
Cleanir_
• WasharryreTmTvableparts,th_freezerinterior,andexteriorwithmilddst_t
and warm water. Wipe dry. DO NOT USE HARSH CLEANERS ON THESE
SURFACES.
• Donotuserazorbladesorothersharpinstruments, whichcanscratchthe
appliancesurfacewhen_ ao]_esivelabels.Anyglue leftfromthetape can
be removed witha mixtureof warm water andmi iddetergent,or tcuchthe residue
with the sticky side of tape already removed. DO NOT Pd_MDVETHE SERIAL
PLATE.
Door Removal (uprightmodels)
Ifdoormustbe removedtofitthroughnarrowdoolq_ays:
i Gentlylayfreezercnitsback,cnathrowru_orblanket.
i Removebasepanel (somemodels)byunscrewingtwoscrewsfromfrcntofbase
psnel. (FigureI)
& Attcpofcabinet, lifthioplastichingecoverardfold
had<. (Figure2)
& Use a Phillips®sc_iver to loose__d reti@t_
screws on top hinge to insure a secure assembly and
preventhingeslivimge,
Remove top hinge frc_1cabinet. Lift door off lower
h pin.
6 After door is removed, remove the two screws frc_
bottca_hinge.
7. Toreplacedoor, reverseabc_eorder.
SCR[WS g08i0002
TQP _
NINGE _
£R
UPRIGHT_REEZE£DOORADJUSTM£NTS
Fi_2
Door Adjustment
Ifdoorgasketdoesnotseal,adjustscrewcxl
bottomedgeofdoor:
• Ifdoordoesnotsealcntop,seeFigureA.
• Ifdoordoesnotsealonbottcrn,see
FigureB.
B
,i,,,,i,i'i
i
/
___ g08d0011
TIG_ KIN
Shelf Front
3