Do you have a question about the FUJICA ST701 and is the answer not in the manual?
Explains the camera's TTL exposure meter system using silicon photocell receptors for accurate light measurement.
Instructions for opening the camera back and inserting film into the chamber and take-up spool.
Steps to set the frame counter to the starting position before shooting.
Guide on adjusting the shutter speed dial for desired exposure settings.
How to use the viewfinder and focusing ring for sharp images and composition.
Instructions on using the exposure meter switch and aperture selector for correct exposure.
Guidance on holding the camera steady and gently pressing the shutter release.
Steps for opening the battery chamber cover using a coin.
How to insert mercury batteries into the chamber with correct polarity.
Method to verify correct battery insertion and function via the viewfinder needle.
Instructions on lifting the rewind crank to open the camera back.
Detailed steps for inserting the film cartridge and threading the film.
How to secure the camera back after loading film, ensuring proper film engagement.
Procedure to set the frame counter to the initial position for accurate shot counting.
Using the viewfinder and focusing ring to achieve sharp image focus.
Utilizing the viewfinder's coverage for composing the shot.
Activating the meter by pressing the switch while pointing at the subject.
Adjusting the aperture ring until the meter needle is centered for correct exposure.
Troubleshooting steps if meter needle is not centered, suggesting shutter speed adjustment.
Techniques for stable camera handling to prevent motion blur.
Gentle pressing of the shutter release to avoid camera shake.
Advice on using a tripod for close-ups or slow shutter speeds to prevent shake.
Activating the rewind mechanism by pressing the button on the camera's underside.
Winding the film back into the cartridge using the rewind crank.
Releasing the camera back to remove the film cartridge after rewinding.
Explains how the meter measures light passing through the lens to the film.
Details the photocell and FET circuitry for sensitive and accurate light measurement.
Explains how aperture selection affects the measured light for accurate exposure.
Notes that exposure correction is not needed for close-ups with this meter system.
Describes the extensive range of exposure values the meter can measure.
Adjusting exposure for subjects against bright backgrounds to avoid underexposure.
Correcting exposure for subjects in spotlighted scenes to prevent overexposure.
Adjusting exposure for documents with large white areas to ensure proper capture.
Recommends using an eye cup to prevent reflections from affecting meter readings.
Defines depth of field and its influencing factors like aperture and focal length.
Explains how to use the depth of field indicator on the lens barrel.
Explains the synchronization sockets and suitable shutter speeds for flash use.
Instructions on mounting flash units to the camera's accessory shoe.
How to calculate aperture using flash guide numbers for correct flash photography.
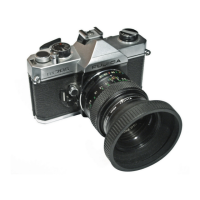
Using close-up lenses to photograph subjects at very short distances.
How extension tubes increase magnification for macro and copying work.
Using extension bellows for adjustable close-up and high magnification photography.
Mounting lenses in reverse for extreme close-ups and magnification.
Adapting Leica mount lenses for close-up photography on the ST701.
Connecting the camera to a microscope for photomicrography.
Using a right-angle finder for easier viewing at low angles or on copy stands.
Employing the camera for film reproduction and extreme close-ups.
Importance of lens hoods for preventing flare and improving image quality.
Using optional lenses to correct viewfinder focus for visual impairments.
Mounting flash units or other accessories onto the camera's accessory shoe.
Using an eye cup for a clearer viewfinder image and preventing light leakage.
Protecting the lens front and rear elements and the camera body mount.
| power source | Two 1.3V mercury batteries |
|---|---|
| battery type | Mallory RM-400R, Ever-ready E400 |
| voltage per battery | 1.3V |
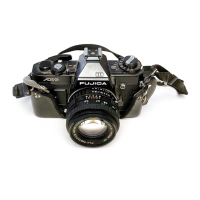
| normal lens | FUJINON 50mm F1.4, FUJINON 55mm F1.8 |
|---|---|
| distance scale 50mm | 1.5 feet (0.45m) ~ infinity |
| distance scale 55mm | 1.5 feet (0.45m) ~ infinity |
| viewfinder magnification | 0.96x with F1.8 55mm lens |
|---|---|
| exposure meter | Through-the-lens average light measurement |
| coupled range | ASA 25 ~ 3200 (1/3rd step), EV1 ~ EV18 |
| dimensions | 5.24 x 3.59 x 3.47 inch (133 x 91 x 88mm) with F1.8 lens |
|---|---|
| weight with F1.8 lens | 27.3 oz (780g) |
| weight body alone | 20.4 oz (585g) |