EN-8
ENGLISH
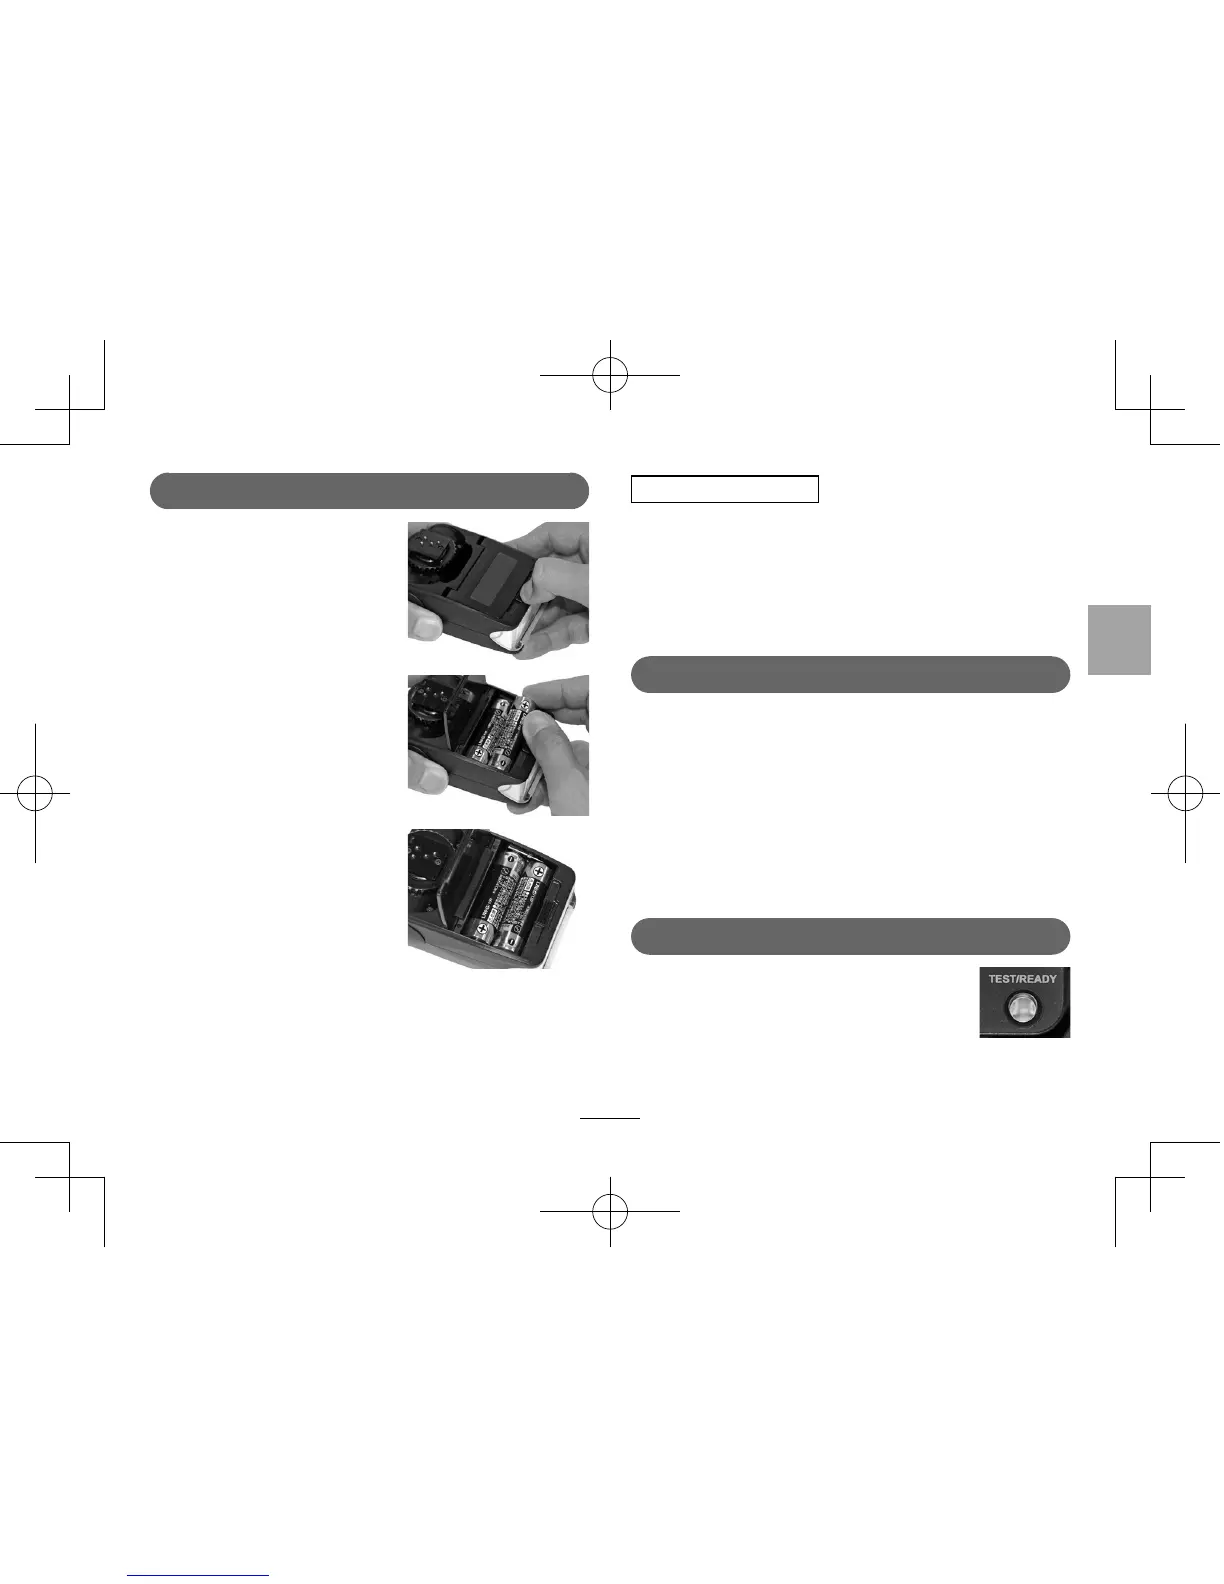
Installing the Batteries
q
Slide the battery cover release button
downward to open the battery compart-
ment.
w
Insert two new “AA”-size alkaline or NiMH
batteries into the battery compartment,
ensuring that the polarity indications “+”
and “−” are aligned correctly. The unit will
not operate properly if the batteries are
installed incorrectly.
e
Close the battery cover until it clicks.
Press the POWER switch to the “ON” posi-
tion. When the unit is switched on, it will
start charging with a slight humming
sound and the READY lamp starts to blink.
Now the unit is ready for shooting. (The
READY lamp stops blinking and remains
illuminated when the unit is fully charged.)
r
To switch the power o , press the POWER
switch again. The READY lamp will go o
and the unit will not ash.
* Be careful not to short-circuit the shoe
terminals while the unit is switched on
without being mounted on the camera.
Otherwise, unexpected ring or a failure
may result.
* It is recommended to use the NiMH (Nickel
Metal Hydride) batteries in order to de-
crease the charging time and increase the
ring count.
About the READY Lamp
The ring power may be insu cient immediately after lighting of the READY lamp.
To obtain optimum brightness for shooting, wait a few seconds before releasing
the shutter after the READY lamp comes on.
* Replace the batteries if charging takes over 30 seconds following a test ash
performed with the EF-20 not mounted on the camera.
Mounting the Unit on the Camera
Be sure to set the POWER switch to OFF before mounting or dismounting the unit.
If the POWER switch is left ON, unexpected ashing or a malfunction of the camera
may result.
q
Firmly slide the ash onto the camera’s shoe and turn the lock ring to the left to
x the ash.
w
Once the ash has been mounted on the shoe, the shutter speed will be auto-
matically set when both the ash and camera are turned on.
Now the camera is ready for ashing.
Test Firing
After the READY lamp lights steadily, press the TEST/READY
button to activate test ring. This allows you to con rm that
the ash res.


 To Next Page