9200 Eton Avenue
Chatsworth, CA 91311, USA
800.548.7241 • +1.818.435.1368
+1.818.435.1369 FAX
www.dolphinimaging.com
info@dolphinimaging.com
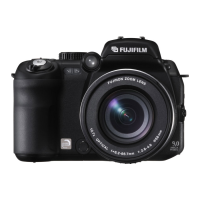
Fuji S9000 Camera Recommended Settings & Notes
(using Cobra ring flash)
Read this entire document before you start - This special documentation augments the Fuji S5000 Digital Camera Owner’s Manual. Specifically, it covers settings recommended
for dental imaging applications. For more details about the Fuji S7000 digital camera, please refer to the manufacturer’s Owner’s Manual./
--
Taking Facial and Intraorals Photos:
1. Turn On/Off dial to Capture mode (red camera).
2. Set mode wheel to M for ALL photos.
3. Turn the ring flash on and set it to Manual (M) mode.
4. Turn macro on
1
for ALL photos.
5. Make Sure AE-L dial is in center position.
6. Photo type:
o Facial - Speed: 400, F-stop: F5
2
o Intraoral - Speed: 4000 F-stop: F11
7. Keep the camera about 4 feet from the subject’s face for
facials and 10-14 inches for intraorals.
8. Zoom to the 100mm line on the lens. Frame subject in
LCD screen and focus.
3
9. Keep or discard the image:
o Keep: Press MENU/OK button.
Viewing/Deleting Captured Images:
1. Turn On/Off dial to PLAY (green arrow).
2. Use left and right arrows on back of camera to view
images.
3. Press the MENU/OK button, then use the Up/Down
arrows to select:
o ALL FRAMES: to erase all the images
o FRAME: to erase displayed image
o BACK: to cancel
SETTINGS (ALREADY PRESET BY DOLPHIN):
Menu Settings (To change press MENU/OK in M mode):
Self-timer: Off
White Balance: Auto
High Speed Shooting: Off
AF Mode: Center
4
Flash: +/- 0
Set: Use this to get to Setup Menu
Sharpness: STD
Saturation: STD
Contrast: STD
Bracketing: +/- 1/3 EV
Multiple Exposure: Off
External Flash: On
Quality Settings (To change, press F button in M mode):
Quality: 3-9M depending on time (the higher the longer
to load)
ISO: 200
FinePix Color: Standard
1
Macro. Press the left macro button on the side of the camera to turn the
macro on. You will see a flower icon on your LCD matching the one
indicated on this button. (p. 21, 56)
2
Shutter speed and F-stop. Depending on the level of ambient light in
your office, you may wish to adjust these settings. Increasing the speed by
turning the command dial on top of the camera will yield slightly darker
pictures; decreasing will yield brighter pictures. We do not recommend
going below 100 as this may produce blurred images. To change the F-
stop, hold down the +/- button on top of the camera while turning the
command dial. Decreasing the F-stop number will yield brighter pictures;
increasing the F-stop number will yield darker pictures. (P. 44)
3
Focusing. Press and hold shutter halfway to focus image. When image is
in focus, the camera will give a double beep and contract the AF frame ([
]). Without releasing, press the shutter all the way down to freeze the
image.
4
Auto Focus. The button labeled C-AF, S-AF, MF on the side of the
camera controls your auto-focus. This should be on S-AF.
Camera Settings (To change, select Setup from the menu):
Image Disp: Cont. (no preview available)
Shutter Volume: 2 Bars
Beep Volume: 2 Bars
Playback Volume: as desired
Frame No: Cont
LCD Brightness: 0 or center of scale
Media: CF picture card
CCD-RAW: Off
EVF/LCD Mode: 30fps
AE-Lock Mode: AE-L1
AF Illuminator: On
Auto Power Off: 2 min or higher
Format: this will format media
Date/Time: regional
Time Difference: if desired
Language: English
Background Color: This effects the color of menu bars
USB Mode: CF Card
Video System: NTSC unless you are overseas
Discharge: To fully discharge Ni-MH batteries DO NOT
USE THIS WITH ALKALINE BATTERIES.
Reset: Resets to Factory Default Settings.
Ring Flash Settings (ALREADY PRESET BY DOLPHIN):
Mode: M
Using Dolphin lightbox:
Mount the lightbox so its bottom is about 30 inches from
the floor.
Balance the bulb’s brightness by using paper filters (2-3
usually work).
Seat patient 1.5 to 2 feet away from lightbox.
Make sure the patient’s head is centered in lightbox.
DO NOT USE RED-EYE FLASH WITH LIGHTBOX
Imaging & Management Solutions