Do you have a question about the Fujikura 70R+ and is the answer not in the manual?
Procedure for powering on the fusion splicer and confirming operation modes, including recommendations for SM and other fiber types.
Sequence of operations for preparing optical fibers, including cleaning, stripping, and cleaving, with emphasis on cleanliness.
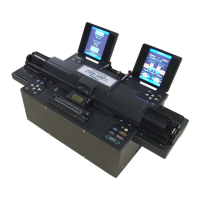
Process for loading prepared fibers onto the splicer, starting the automatic splicing sequence, and visual inspection during the process.
Instructions for correctly inserting the fiber holder into the splicer, noting the required orientation and direction.
Steps after splicing, including removing the spliced fiber, centering the protection sleeve, and centering the spliced point in the heater.
Guidance on adjusting the fiber coating edge to the holder edge when using a single holder.
Information on messages indicating potential splice loss and steps for electrode stabilization and arc reformation.
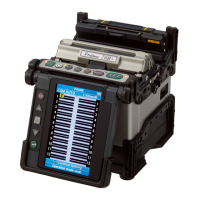
Detailed explanation of each key on the fusion splicer's keypad and its corresponding function.
Instructions for turning the fusion splicer ON and OFF using the ON/OFF key and associated LED indicators.
Specifications and guidelines for operating the splicer using the AC adapter, including input power and grounding.
Procedures for recharging the battery pack using the AC adapter and checking its remaining capacity.
Methods for cleaning V-grooves, fiber clamp chips, fiber cleaver, and objective lenses using alcohol and swabs.
Important warnings regarding cleaning, such as avoiding contact with electrode tips and using high-purity alcohol.
Guidance on when and how to replace electrodes, including the steps for removal and installation.
Actions to perform after installing new electrodes, such as loading fibers and executing stabilized electrodes and arc calibration.
Troubleshooting 'Too Long Fiber' errors related to end-face placement and cleave length.
Solutions for errors caused by dust/dirt on lenses or fiber, and issues with 'Cleaning Arc' time.
Addressing errors related to motor overrun, incorrect fiber positioning, and cleave angle/shape issues.
List of contact addresses and websites for Fujikura Ltd. and its authorized distributors for support.
| Splicing Method | Core Alignment |
|---|---|
| Typical Splice Loss (SM) | 0.02dB |
| Typical Splice Loss (MM) | 0.01dB |
| Typical Splice Loss (DS) | 0.04dB |
| Typical Splice Loss (NZDS) | 0.04dB |
| Return Loss | ≥ 60dB |
| Operating Condition (Temperature) | -10°C to +50°C |
| Applicable Fibers | SM, MM, DS, NZDS |
| Cladding Diameter | 80 μm - 150 μm |
| Coating Diameter | 100 μm - 1000 μm |
| Splicing Time | Typical 9 seconds (SM G.652 Quick Mode) |
| Arc Calibration Method | Automatic |
| Applicable Protection Sleeve | 60 mm, 40 mm |
| Electrode Life | 3000 arcs |
| Monitor | 5.7-inch LCD |
| Data Output | USB |
| Operating Condition (Altitude) | Up to 5000 m |
| Operating Condition (Humidity) | 0% to 95% (non-condensing) |
| Storage Condition (Humidity) | 0% to 95% (non-condensing) |