En-12
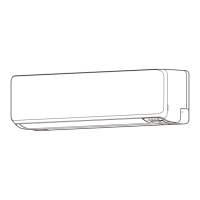
• Open the control box cover.
• Open the switch cover.
Open
Switch cover
Rotary switch
Example: “0”
Rotary switch Ex-
ample: “0”
CAUTION
Use an insulated screwdriver to set the dip switches.
Be careful not to make mistakes for switch settings.
(1) Indoor unit address
Rotary switch (IU AD × 1)....Factory setting “0”
Rotary switch (IU AD × 10)....Factory setting “0”
When connecting multiple indoor units to 1 refrigerant system, set the address at IU
AD SW as shown in the Table A
(2) Refrigerant circuit address
Rotary switch (REF AD × 1)....Factory setting “0”
Rotary switch (REF AD × 10)....Factory setting “0”
In the case of multiple refrigerant systems, set REF AD SW as shown in the Table A
for each refrigerant system.
Set to the same refrigerant circuit address as the outdoor unit.
Setting Setting range Type of switch
Indoor unit ad-
dress
0 to 63
Setting
example
2
IU AD × 10 IU AD × 1
Refrigerant
circuit address
0 to 99
Setting
example
63
REF AD × 10 REF AD × 1
Table A
Address
Rotary Switch Setting
Address
Rotary Switch Setting
Refrigerant
circuit
REF AD SW Indoor unit IU AD SW
×
10
×
1
×
10
×
1
000000
101101
202202
303303
404404
505505
606606
707707
808808
909909
10 1 0 10 1 0
11 1 1 11 1 1
12 1 2 12 1 2
.
.
.
.
.
.
.
.
.
.
.
.
.
.
.
.
.
.
99 9 9 63 6 3
Do no
t set the indoor unit address (IU AD SW) at 64 to 99. It may result in failure
.
(3) Remote controller address
i) 3-wire type
Rotary switch (RC AD SW)....Factory setting “0”
When connecting multiple indoor units to 1 standard wired remote controller, set the
address at RC AD SW in sequence from 0.
Setting Setting range Type of switch
Remote controller ad-
dress
0 to 15
Setting
example
0
RC AD
Example
If 4 indoor units are connected.
Remote
controller
Indoor unit
Indoor unit
Indoor unitIndoor unit
RC AD SW
0
RC AD SW
1
RC AD SW
2
RC AD SW
3
RC AD SW 0 1 2 3 4 5 6 7
Address 0 1 2 3 4 5 6 7
RC AD SW 8 9 A B C D E F
Address 8 9 10 11 12 13 14 15
ii) 2-wire type
Rotary switch (RC AD SW)...Factory setting “0”
Since the remote controller address settings are automatically confi gured, you do not
need to confi gure them.
If confi guring manually, it is necessary to confi gure both the indoor unit and the
remote controller. For details, please refer to the remote controller manual.
7.2. Custom code setting
Selecting the custom code prevents the indoor unit mix-up. (Fig. B)
(Up to 4 codes can be set.)
Perform the setting for both the indoor unit and the remote controller.
Fig. B
Code change
Indoor unit
Remote
controller
Confusion
A B C D
A B C D
• Custom code setting for indoor unit
Set the DIP switch SET 3 SW1, 2, referring to the Table B.
DIP switch “SET3”
SW
1
SW
2
SW
3
SW
4
ON
OFF
Table B
Custom code
A (Factory setting) B C D
DIP switch SET 3
SW1
OFF ON OFF ON
DIP switch SET 3
SW2
OFF OFF ON ON
9373370444_IM.indb 129373370444_IM.indb 12 29/11/2017 AM 11:48:4429/11/2017 AM 11:48:44
 Loading...