A
1)
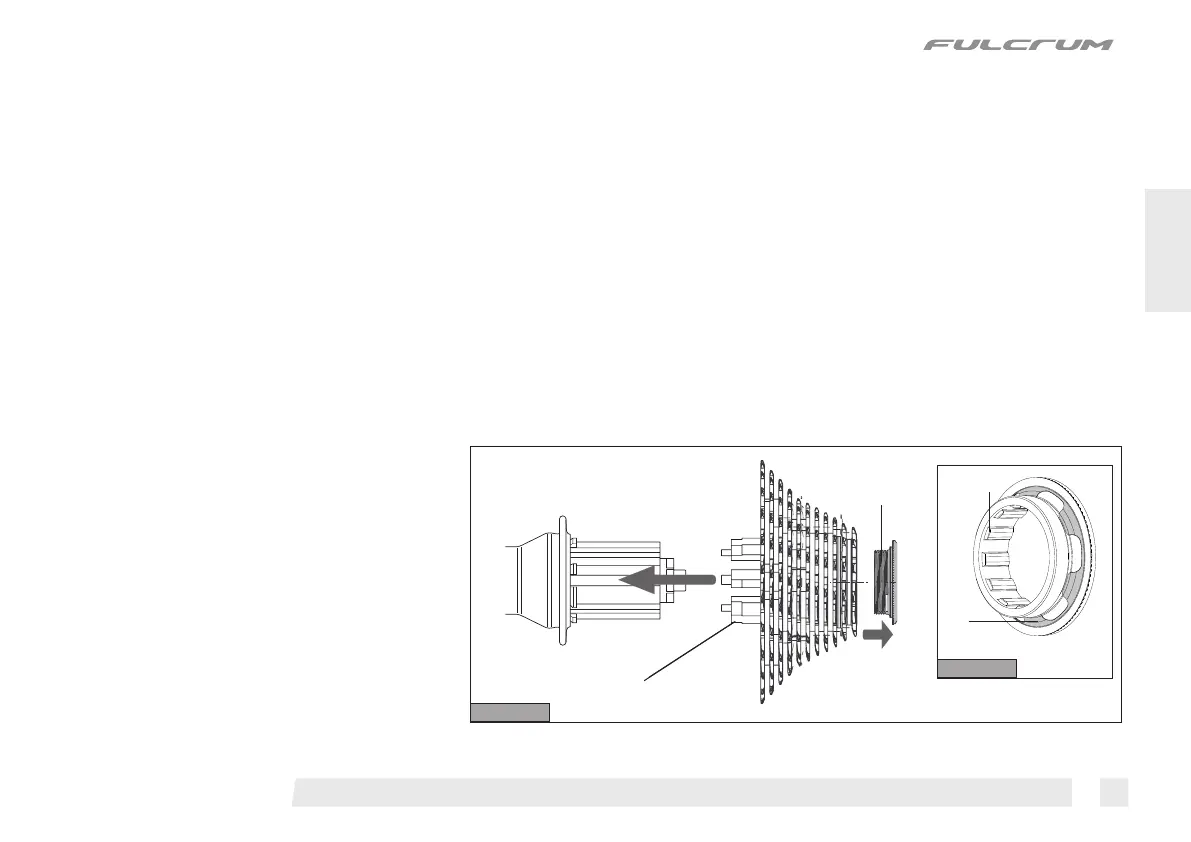
The sprockets are pre-assembled and timed on the plastic support
(A - Fig. 26). The ring G (Fig. 26) is provided with a preassembled washer
(H); ensure that it is positioned as in fig. 26.1
.
2)
Remove the ring (G - Fig.26).
3)
Insert the support on the side of the freewheel body, align the spline
patterns, press the sprockets onto the freewheel and extract the support
(A) from the hub (Fig. 26).
H
G
G
5.2 -
11s SPROCKETS of Campagnolo s.r.l. (on FW body for 11s sprockets of Campagnolo s.r.l. )
5.2.1 -
ASSEMBLY
A
Refer to the instruction leaflet enclosed with the 10s sprockets for all the assembly, disassembly, use and maintenance operations.
5.1 - 10s SPROCKETS
26
26.1
• If the REAR wheel is predisposed for HH10 through-axle mounting for 135 or 142 mm width follow the mounting instructions provided by the frame or bicycle manufacturer.
• If the REAR wheel is predisposed for HH12 through-axle mounting for 135 or 142 mm width follow the mounting instructions provided by the frame or bicycle manufacturer.
®
ENG
13
5 -
SPROCKET ASSEMBLY AND REMOVAL
 Loading...