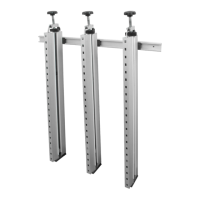
Before assembling the Panel Max, lay-
out and group all the parts so they can
be easily identied. Use the table be-
low and the drawing to the left to make
sure you have all the parts accounted
for before proceeding.
PANEL MAX
PARTS
Included
Spare Parts
No Description QTY
1
Slide Rail
1
2
Slide Attachment
3
3
Top Assembly Rest Clip
3
4
Top Pressure Knob
3
5
Hex Key Wrench
1
6
Top Pressure Assembly
3
7
Side Pressure Bars
6
8
Stock Protectors
6
9
Bottom Pressure Assembly
3
10
Stabilizing Foot
3
11
Nylon Washer (not shown)
3
12
Short Screws (not shown)
3
13
Long Screws (not shown)
3
Description QTY
Top Assembly Rest Clip
3
Springs for Pressure Assembly’s
6
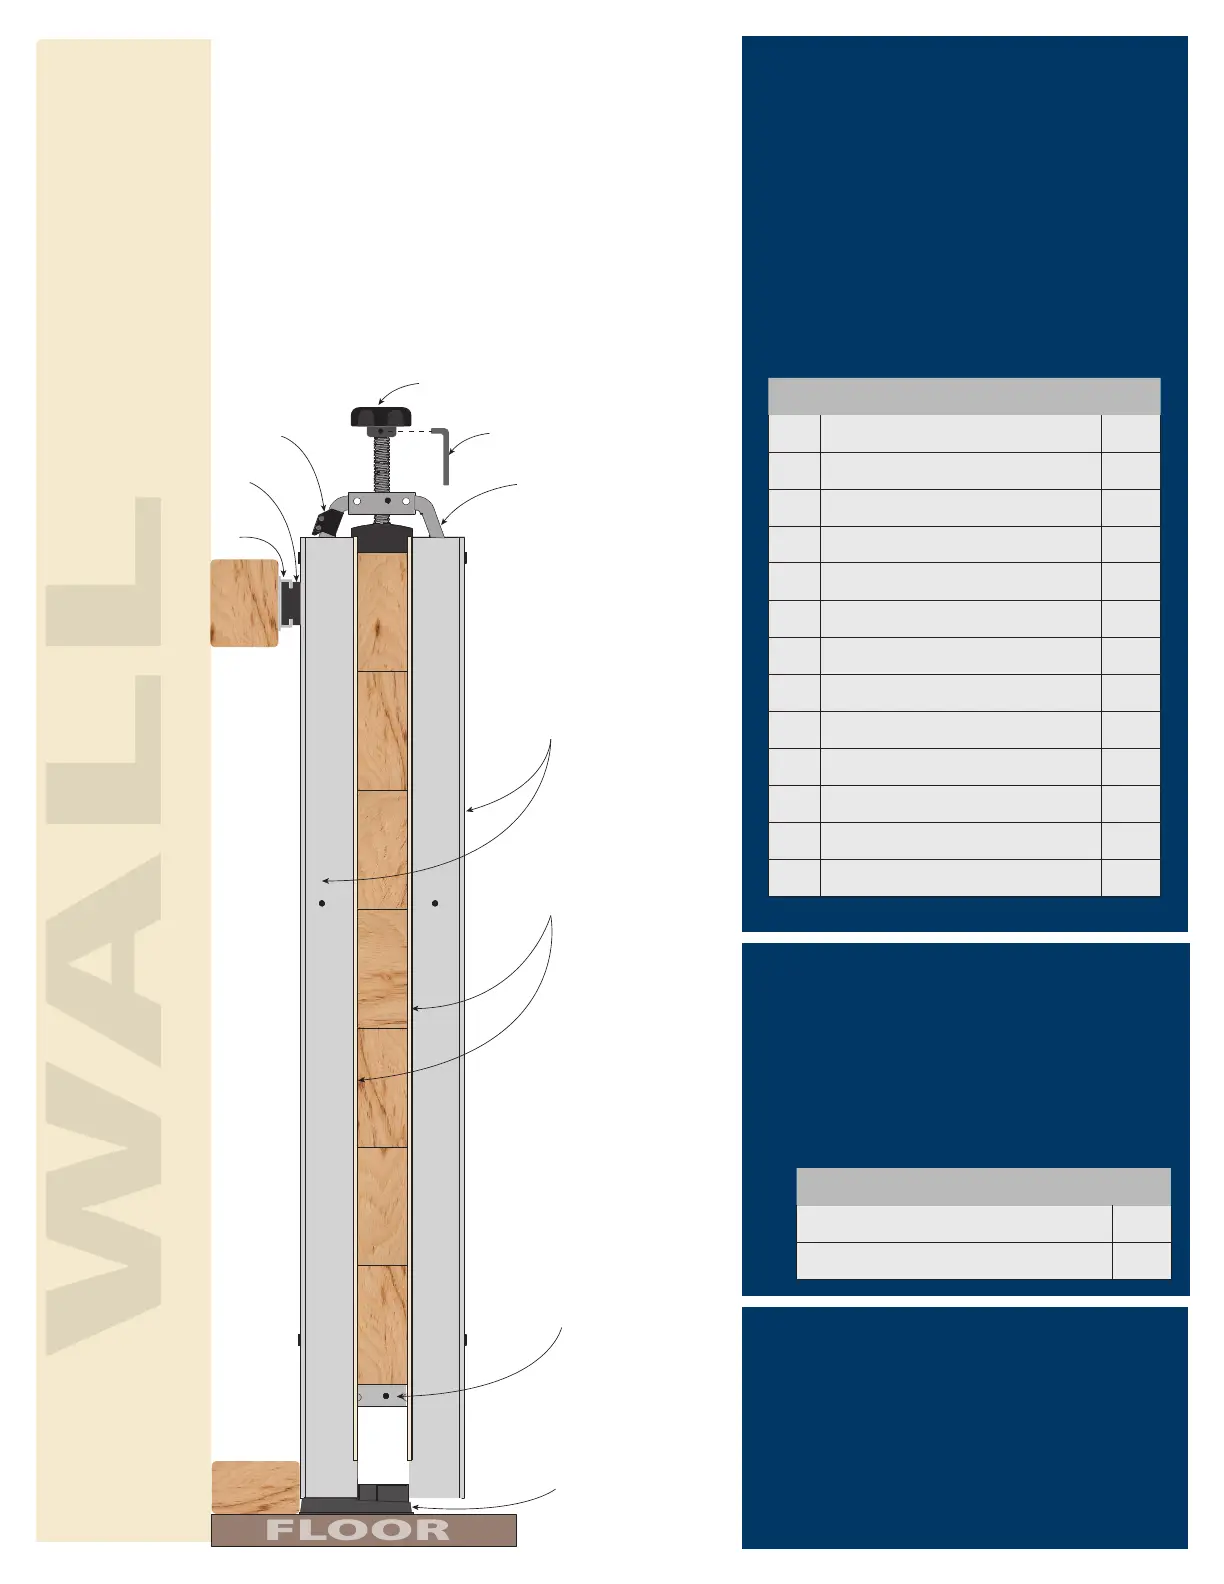
2. Slide
Attachment
5. Hex Key Wrench
6. Top Pressure Assembly
3. Top Assembly
Rest Clip
7. Side Pressure Bars
8. Stock Protectors
9. Bottom Pressure
Assembly
10. Stablilizing Foot
4. Top Pressure Knob
After you have checked the package
contents, attach the
Top Pressure Knob (4) to the
Top Pressure Assembly (6)
and secure the set screw using the
included Hex Key Wrench (5).
Attach two Stock Protectors (8) to
each Side Pressure Bar (7)
Included spare parts in case of
accidental loss or damage.
PANEL MAX
GLUE PRESS
 Loading...