EasyManua.ls Logo

FUQIDO 1325 User Manual

FUQIDO 1325
2 pages
To Next Page IconTo Next Page
Page #1 background imageLoading...
Page #1 background image
Congratulations, you are now the owner of a brand
new FUQIDO chair!
Before enjoy the comfort chair, you have to put it
together. This assembly guide will take you through
the basic assembly process. To make sure your
assembly goes smoothly, please follow the assembly
instructions, and especially the important
safety information.
It is possible to assemble the chair by your own,
while having a second person to help you
makes it more easier.
And please check if there are any missing parts from
the package before start. If there be any issues,
please don't hesitate to drop us an email and we'll
help you out ASAP.
ASSEMBLY DRAWING
MODEL:1325
Assembly video
Contact us if you have
any issues
Mind the important
safety information
Having a friend to help
makes assemblyextra-easy
Seat Cushion *1
Cylinder and Cover set *1
Star Base *1
Casters *5
Mechanism *1
Back Pillow *1
Angle Adjustor *2 (L/R)
Lower Adjustor Cover *2(L/R)
Upper Adjustor Cover *2(L/R)
Head Pillow *1
Back Cushion *1
Arms *2 (L/R)
Wrench *1
[ ]
O
[ ]
B
[ ]
K
[ ]
D
[ ]
L
[ ]
E
[ ]
G
[ ]
H
[ ]
I
[ ]
J
[ ]
F
[ ]
A
[ ]
C
Small Bolts *4
[ ]
N
Big Bolts *20
[ ]
M
E-mail: service@fuqidochair.com Web: fuqidochair.com Tel: +1 909 365 6188
FEATURES
Height Adjustor
Tilting
Angle Adjustor
Lock
90°-135°
Tilt Tension
Unlock
Before you get started, a few pointers:
Question and Answer IconNeed help?

Do you have a question about the FUQIDO 1325 and is the answer not in the manual?

FUQIDO 1325 Specifications

General IconGeneral
BrandFUQIDO
Model1325
CategoryIndoor Furnishing
LanguageEnglish

Summary

Chair Features and Adjustments

Height Adjustment

Mechanism to adjust the chair's height.

Tilting Mechanism

Functionality for tilting the chair backward or forward.

Angle Adjustment

Feature allowing adjustment of the chair's angle.

Assembly Instructions

Step 1: Base Assembly

Attach casters to the star base and insert the cylinder.

Step 2: Attach Mechanism to Seat

Secure the mechanism to the seat cushion using big bolts.

Step 3: Attach Armrests

Connect armrests to the seat cushion with big bolts.

Step 4: Connect Seat to Cylinder

Align and press the seat cushion onto the cylinder.

Step 5: Attach Angle Adjustors

Fix angle adjustors to the seat cushion with big bolts.

Step 6: Connect Back and Seat Cushions

Join the back cushion and seat cushion using big bolts.

Step 7: Adjust and Tighten

Balance and fully tighten all bolts.

Step 8: Attach Adjustor Covers

Install upper and lower adjustor covers with small bolts.

Safety and Maintenance Guidelines

General Safety Precautions

Do not stand on chair, use as stepladder, or use with more than one person.

Usage and Care Instructions

Regularly check bolts, clean with damp towel, and adhere to weight limit.
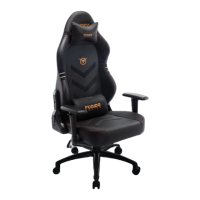