Page 4
7) LCD Display - This LCD displays system Information for the operator, like real time receiver
ongrade offset and auto / manual control settings. This display is also used for menu settings while
conguring the system at installation.
8. On-grade Offset - Controls the offset of the receiver’s on-grade. If you wanted to adjust the on-
grade setting by 54mm, you would do it with this control knob.
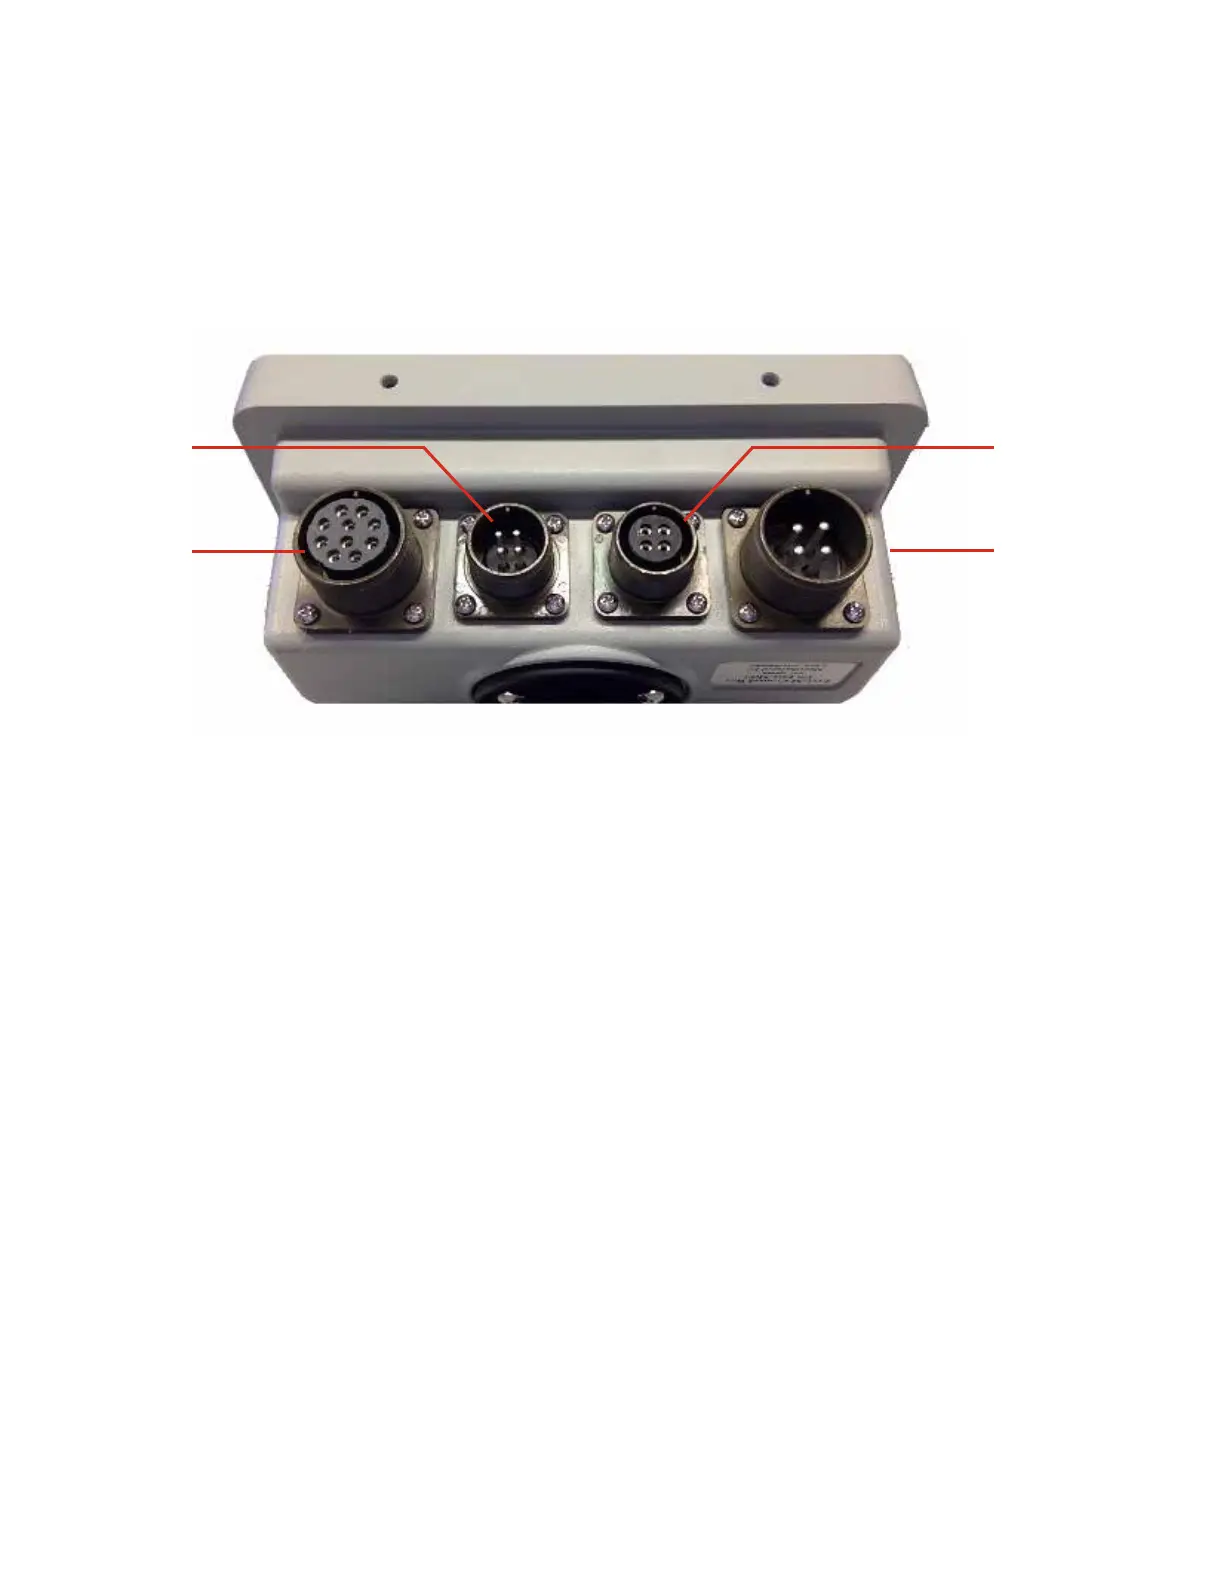
1 - Valve Cable Connector - This is where the valve is connected to the control box.
2 - Remote Switch Connector - Optional. The remote auto/raise/lower toggle switch
assembly plugs into the control box via this connector.
It allows you to manualy control the hydraulic cylinder as
well as the auto/manual functionality from a remote
location.
3 - Communication Connector - Receiver and other possible external devices plug into the
control box via this port, their signals are transferred to the
control box via this 4 pin connector.
4 - Power Cable Connector - This is where the battery power is connected to the
control box.
2
1
4
3
 Loading...