51834295_V_1_7.DOC
56/60
pressing the button again the black-out effect is switched off, its LED glows at half intensity again, and on the
display the ‘BLACK-OUT OUT’ caption will appear for a short time.
Another function of the button is to switch the controller on and out (POWER function). When pressing it for a
long time the switched-on controller is switched out.
Launching the programs:
After pressing the PROGRAM button the programs can be launched on buttons 1-32. After launching the
program its LED starts flashing, indicating that the program is running. The display indicates the number of
the running program which is in the current group as well as the scene number. If you select another group,
the LED indicating the program having run until that time will be flashing at half intensity indicating that the
program belonging to it is running, but not in the current group. If such a program has already been running
in another group, it can be launched as well, the difference is that the program will take up the speed and
scene shifting time of the current group.
The programs which are being created can be masked. Specify which units should be part of it. When
launching a program, the units belonging to its mask will run according to the launched program. If a unit has
been running in another group so far, it will leave that group and only the remaining programs will belong to
that program. This is called unit robbery. If all the units have been robbed from a program by program
launchings in other groups, the program automatically stops, its LED will not flash any more.
If the program button is pressed and held and any of buttons 1-32 is pressed, the program belonging to it will
not start. The controller only displays the name of the program in the lower line for a short time. This way the
program can be identified easily and there is no chance to launch a wrong program accidentally!
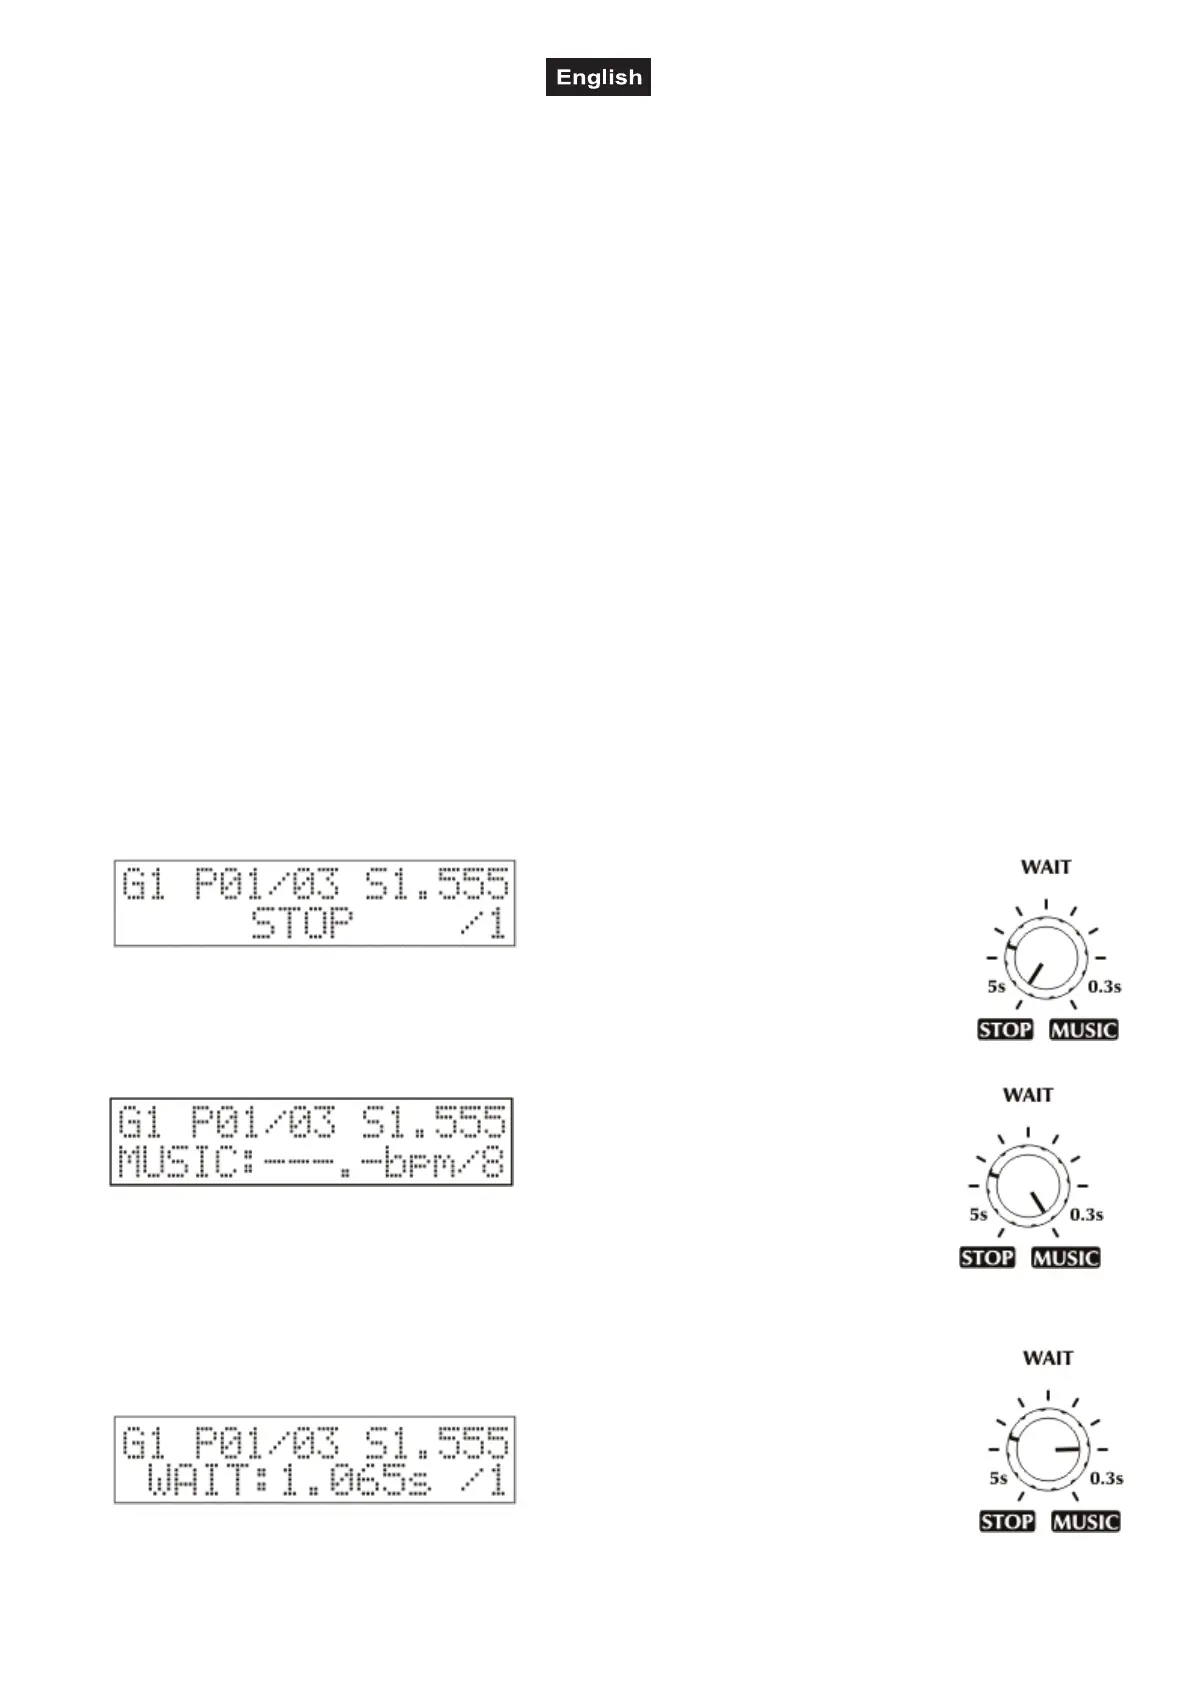
Program scene shifting time modification:
The time between loading the program scenes after one another can be set in different ways. With the WAIT
potentiometer the scene shifting can be stopped (stop), shift for music can be switched on (music), or the
time clue can be adjusted (wait) with the BMP button (manual bpm) or the jog discs (auto bpm). With the
SCENE button (scene) you can also affect the program scene shifting.
In music mode the programs can be shifted from the built-in microphone unit or from outer source through
the audio port.
1. STOP mode:
Turn the WAIT potentiometer into maximum
position to switch on the stop mode. Only the
current group is affected! In the lower line of the
display the STOP caption appears. In the
current group there is no scene shifting until the
stop mode is not interrupted.
2. MUSIC mode:
Turn the WAIT potentiometer to music and
the music mode becomes active. Only the
current group is affected. In the lower line of
the display the MUSIC caption appears, and
then the perceived pace in bpm. The
controller is able to indicate the received microphone pace in a range of 60.0-200.0 bpm. At
that time in the current group a scene is shifted when a microphone impulse arrives from the
outer audio signal sender. In the controller is an automatic microphone sensitivity setup,
which allows a very good pace perception to be available in case of different volume. If the
pace is outside the given range, the program scene is shifted as well, but is signaled on the display by
horizontal lines.
3. WAIT mode:
In the intermediate positions of the WAIT
potentiometer a time value can be set, this
range is between 0.300s-5.000s. The setup is
made according to a logarithmic scale so that
that perception of changing the scene shifting
time should be as good as possible. The display indicates the current time with an accuracy of
a milli second. Again, only the current group is affected.
 Loading...