10
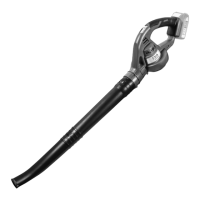
1. Concentrator nozzle
2. Concentrator nozzle lock button
3. Blower tube
4. Lock button
5. Auxiliary handle
6. On/Off switch
7. Power cord
8. Rear handle
9. Mulch/Vacuum gate
10. Mulcher tubes
11. Collection bag
12. Shoulder strap
5) SERVICE
a) Have your power tool serviced by a qualified repair
person using only identical replacement parts. This
will ensure that the safety of the power tool is
maintained.
COMPONENTS & CONTROLS (FIG.1)
UNPACKING
Caution! This packaging contains sharp objects. Take
care when unpacking. Remove the machine, together
with the accessories supplied, from the packaging.
Check carefully to ensure that the machine is in good
condition and account for all the accessories listed in
this manual. Also make sure that all the accessories
are complete. If any parts are found to be missing, the
machine and its accessories should be returned
together in their original packaging to the retailer.
Do not throw the packaging away, keep it safe
throughout the guarantee period, then recycle if
possible, otherwise dispose of it by the proper means.
Do not let children play with empty plastic bags due
to the risk of suffocation.
ASSEMBLY
Note: Before carrying out any assembly or
disassembly of the unit please ensure that the unit is
not connected to the electrical supply.
PACKING LIST
• Electric Blower
• Blower tube
• Concentrator nozzle
• Mulcher tubes x 2
• Collection bag
• Shoulder strap
• Operator’s manual
WARNING! If any parts are damaged or missing do
not operate this product until the parts are replaced.
Failure to heed this warning could result in serious
personal injury.
Do not attempt to modify this product or create
accessories not recommended for use with this
product. Any such alteration or modification is misuse
and could result in a hazardous condition leading to
possible serious personal injury.
A
SSEMBLE AS A BLOWER
Slide the blower tube onto the blower housing until
the lock button clicks into place, Fig.2.
Insert the concentrator nozzle onto the blower tube
until the concentrator nozzle lock button clicks into
place, Fig.3. (Concentrator nozzle is used to increase
air flow in tight areas: flower beds. under decks, etc.).
The fully assemble blower should be as Fig.4.
ASSEMBLE AS A VACUUM/MULCHER
Slide the front and rear mulcher tubes together until
the lock button engages, Fig.5.
Press the lock button (Fig.6) to disengage the
Mulch/Vacuum gate. Hold the gate open, Fig.7.
Insert the “wedged” end clip of the mulcher tube into
the rear clip (Fig.8). Push the “hooked” end clip of the
mulcher tube into the front clip (Fig.9) until the lock
clicks into place.
To remove the mulcher tubes press the lock button
and pull away the tubes.
Insert the bag adaptor into the blower housing until
the lock button clicks into place, Fig.10. To remove
the bag, simply press lock button and remove bag.
Note: It may be necessary to remove the blower tube
or mulcher tubes to clear a blocked tube or impeller.
The fully assemble vac/mulcher should be as Fig.11.
WARNING! To prevent serious personal injury, make
sure the switch is in the OFF position, it is unplugged,
and the impellers have stopped before attaching or
removing tubes.
OPERATION
STARTING AND STOPPING
Once the unit is plugged in, stand in the operating
position, Fig.12.
Depress the On/Off trigger, Fig.13.
To stop the motor, release the trigger.
WARNING! To avoid serious personal injury, wear
goggles or safety glasses at all times when operating
this unit. Wear a face mask or dust mask in dusty
locations.
To prevent serious personal injury or damage to the
unit, make sure the blower tube or the mulcher tubes
and the bag are in place before operating the unit.
OPERATING TIPS
Be sure the bag is zipped closed before operating the
unit.
 Loading...