17
English –
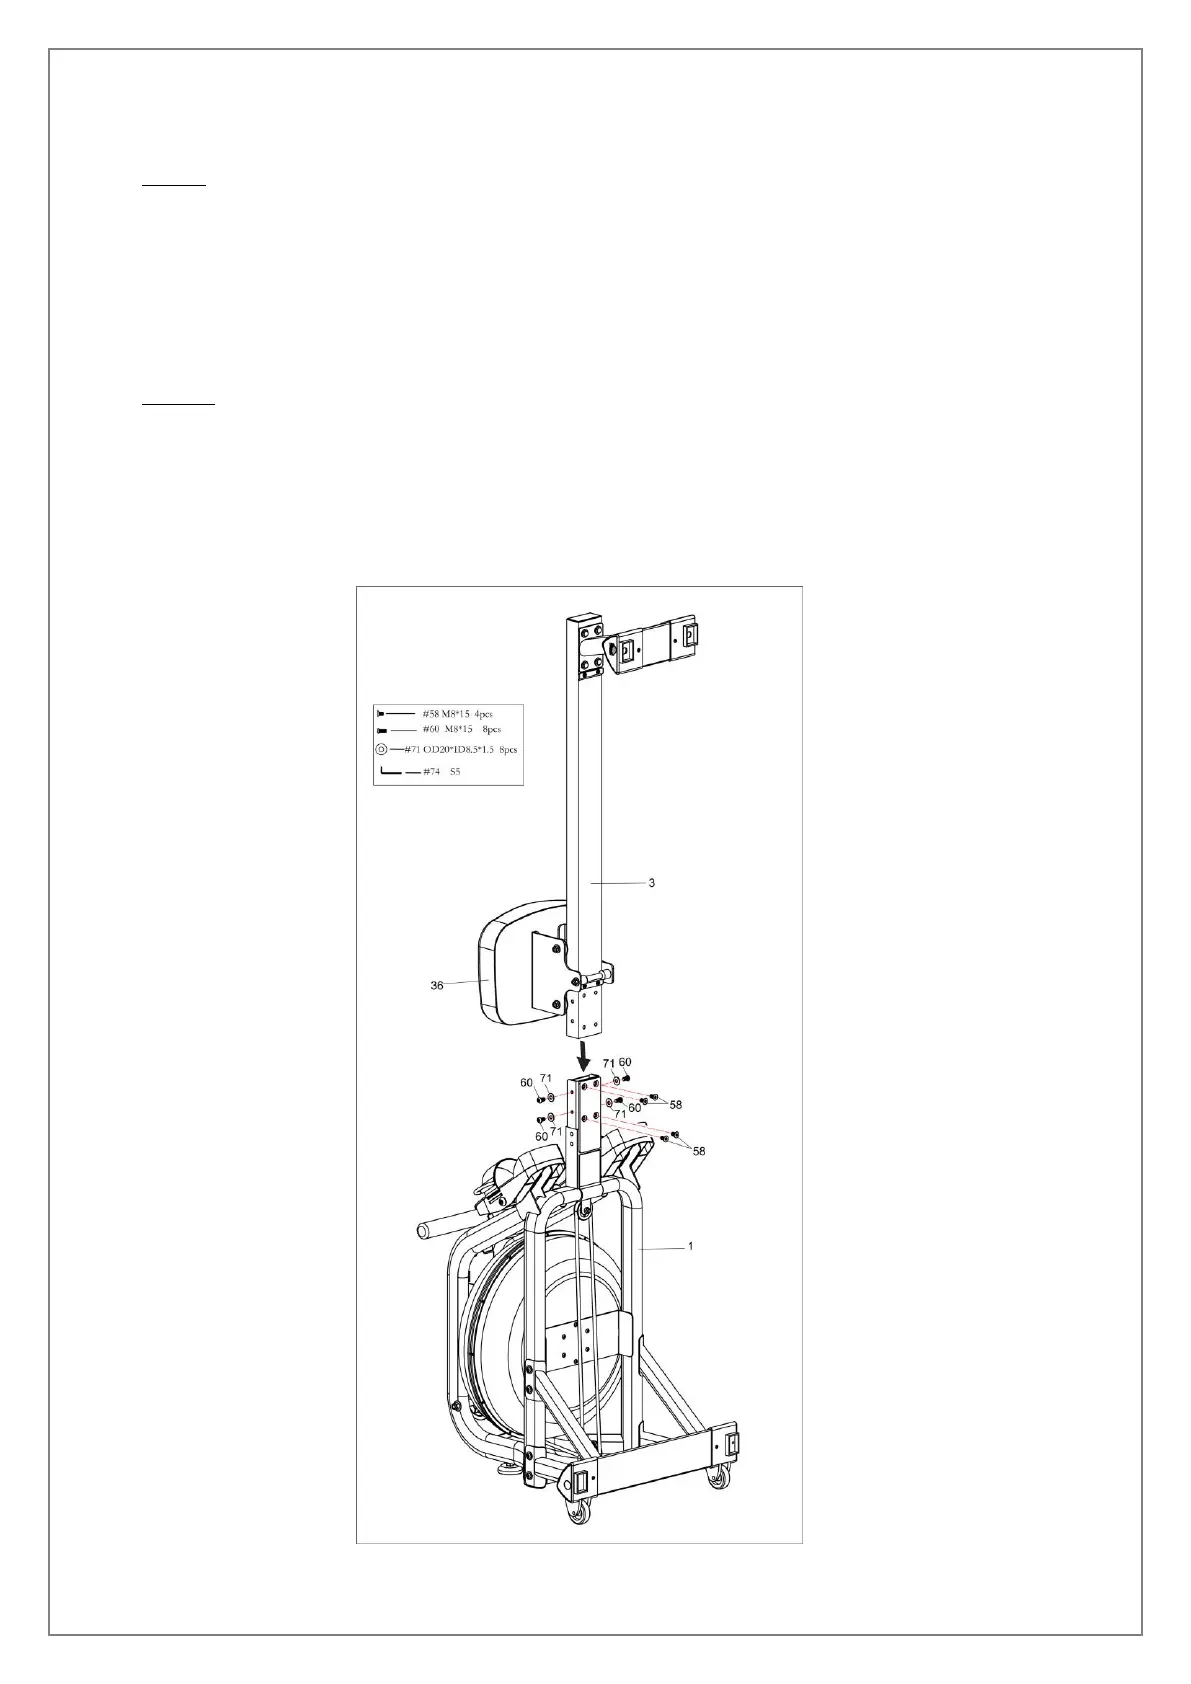
STEP 4
Note: Move the Seat (No.36) to the front of the Slide Rail (No.3) before assembly to prevent it from gliding down
during assembly.
Attach the Slide Rail (No. 3) to the Main Frame (No. 1) using 4 Washers (No. 71), 4 Screws (No. 60) and 4 Flat
Screws (No. 58). Insert all 8 screws partially into the holes first, and then tighten with Allen Wrench (No.74).
Spanish –
PASO 4
Nota: Mueva el Asiento (No.36) a la parte delantera del Riel Deslizante (No.3) antes del ensamblaje para evitar que
se deslice hacia abajo durante el ensamblaje.
Fije el riel deslizante (No. 3) al marco principal (No. 1) usando 4 arandelas (No. 71), 4 tornillos (No. 60) y 4 tornillos
planos (No. 58). Inserte primero los 8 tornillos parcialmente en los orificios y luego apriételos con una llave Allen
(No.74).
 Loading...