P
P
G
G
-
-
6
6
0
0
0
0
0
0
T
T
h
h
r
r
e
e
a
a
d
d
D
D
i
i
a
a
m
m
e
e
t
t
e
e
r
r
G
G
a
a
g
g
e
e
O
O
p
p
e
e
r
r
a
a
t
t
i
i
o
o
n
n
M
M
a
a
n
n
u
u
a
a
l
l
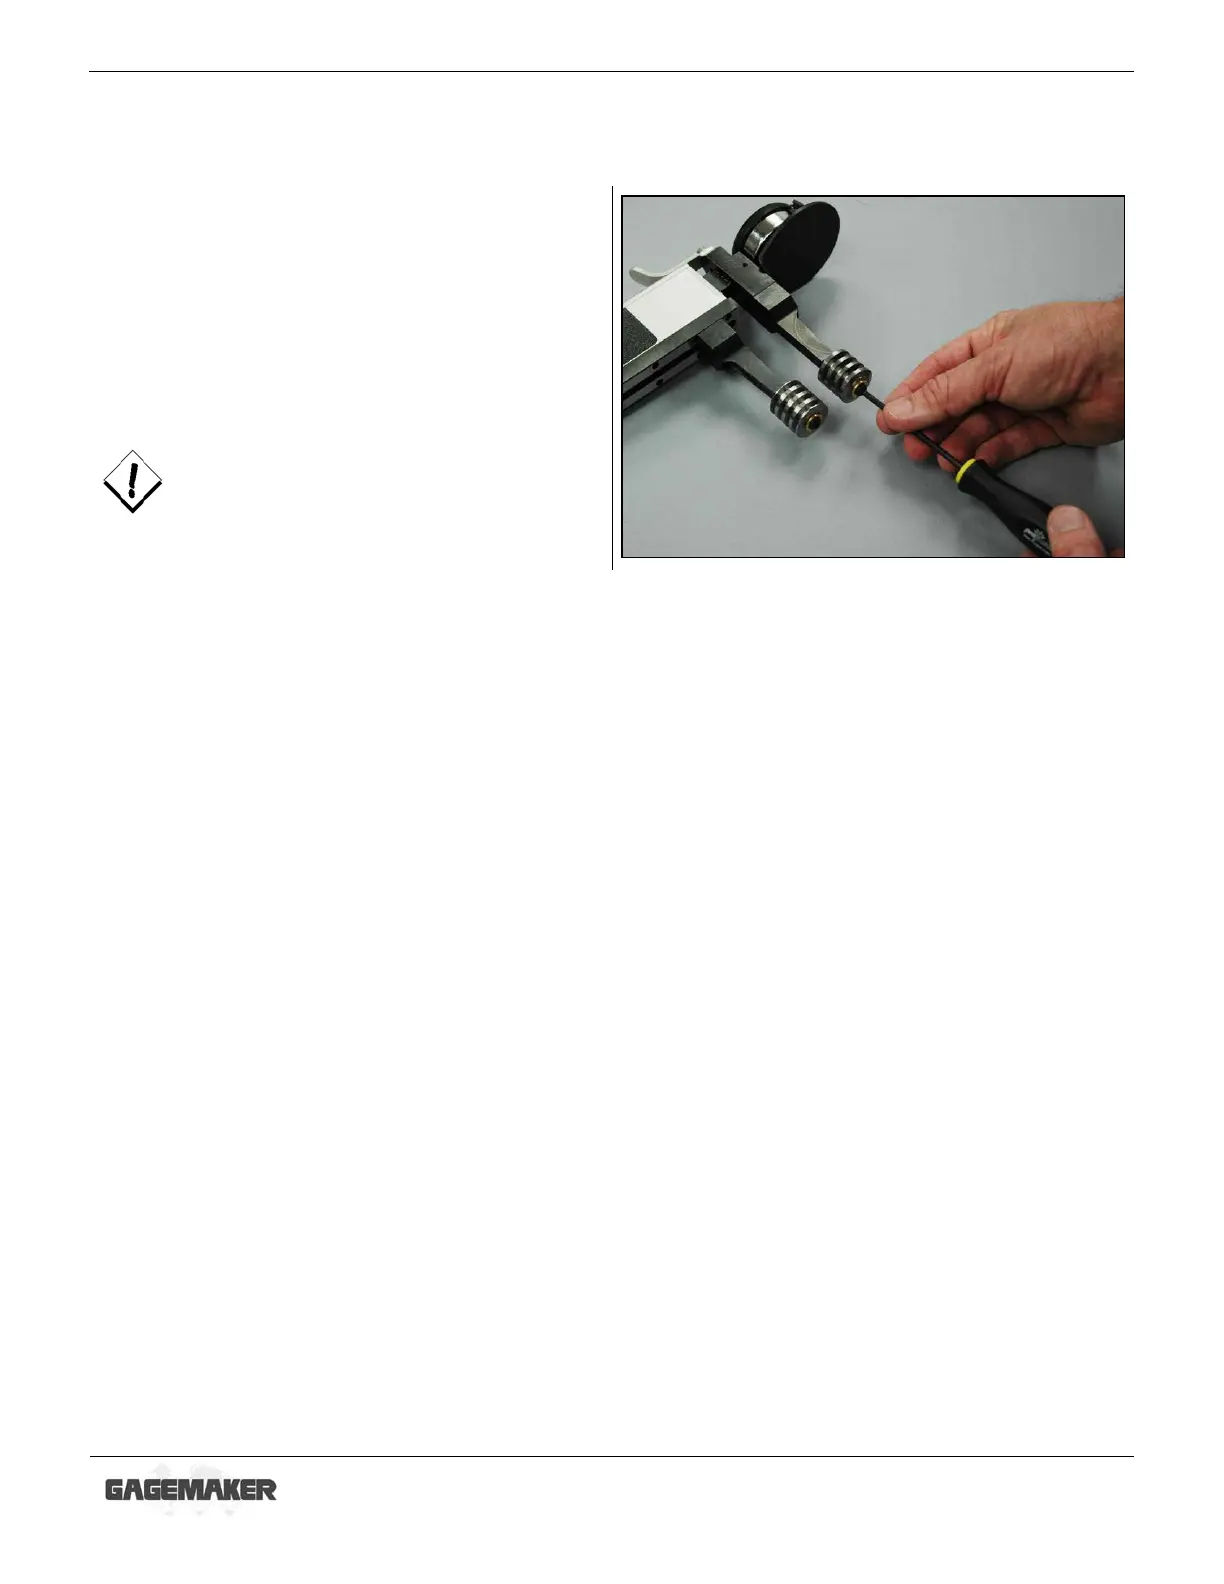
Setting Up the PG-6000 Gage (continued)
12. Place the washer and lock screw on each roll
pin.
13. Using the 1/8” hex wrench, tighten the lock
screw. Eliminate any side to side movement of
the thread roll, but make sure that the thread
roll still rotates.
DO NOT over tighten the lock screw. This
will prevent the gage from operating
properly.