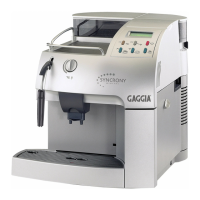
ENGLISHENGLISH
• 33 •• 32 •
8 DISPENSING HOT WATER
Caution: splashing may occur at the
start – scalding hazard! The hot water
nozzle and pipe can reach high temperatures:
avoid touching directly with your hands.
• Before attempting to dispense hot water, make
sure that the display shows.
SELECT PRODUCT
READY FOR USE
When the machine is ready to dispense coffee,
carry out the following steps.
• Press the button (26); the following messages
will be displayed in turn:
SELECT PRODUCT
READY FOR USE
HOT WATER
READY FOR USE
• Place a cup and/or receptacle beneath the
hot water/steam pipe (Fig.15).
• Turn the knob anticlockwise as shown in
Fig.15.
• Dispense the desired quantity of hot water; to
stop the flow of hot water turn the knob
clockwise.
• Press the button (26) again; the machine will
switch back to the normal operating mode
and the display will show:
SELECT PRODUCT
READY FOR USE
9 DISPENSING STEAM /
PREPARING CAPPUCCINO
Steam can be used to froth the milk
for cappuccinos and also to heat
beverages.
Scalding hazard!
Splashing may occur at the start –
scalding hazard! The hot water nozzle and
pipe can reach high temperatures: avoid
touching it directly with your hands.
• When the machine is ready to dispense coffee,
direct the steam pipe (14) above the drip tray,
open the “hot water/steam” knob (16) for a
few instants to discharge any residual water
from the steam pipe; soon only steam will issue
from the nozzle. The display will show:
STEAM
• Turn the knob (16) to OFF.
• Fill 1/3 of the receptacle you wish to use to
make cappuccino with cold milk.
For best results when making
cappuccinos, the milk and the cup
used should be cold.
• Immerse the steam nozzle into the milk to be
frothed and turn the knob (16); turn the container
slowly with up-down movements to achieve
uniform frothing (Fig.16).
• After using the steam for the desired time, shut off
the steam (16).
• The same method can be used to heat other
beverages.
• Clean the steam nozzle with a damp cloth (Fig.17)
10 CLEANING AND MAINTENANCE
General Cleaning
• Maintenance and cleaning should only be
carried out when the appliance is cold and
disconnected from the power supply.
• Do not immerse the appliance in water and do
not wash the parts in the dishwasher.
• Do not use abrasives or aggressive chemicals
(solvents) for cleaning.
• Do not dry the machine and/or any of its
parts using a microwave and/or
conventional oven.
• We recommend that you clean the water tank
and change the water daily.
• Clean the ground coffee doser daily.
- Use the brush provided to clean the doser
(Fig.18).
• To clean the appliance, use a soft cloth
dampened with water (Fig.19).
• Clean the service area and the coffee dispenser.
• We recommend that you empty and clean the
drip tray (12) and the coffee grounds drawer
(10) daily; to carry out this operation you must
open the front cover (Fig.20) and remove the
drip tray (Fig.21); then you can empty and clean
all the components.
• You can remove the coffee dispenser in order to
clean it (Fig.24):
- lower the dispensing unit nozzles
- take the dispensing unit as shown in Fig. 24,
and remove it from its housing
- wash the whole unit with warm water.
10.1 The coffee dispenser
The coffee dispenser (17) must be
cleaned each time you fill the coffee
bean container or at least once a week.
• Switch off the appliance by pressing the ON/OFF
switch (7) to the “O” position and remove the
plug from the wall outlet.
• Open the service cover (15). Remove the drip
tray (12) and the coffee grounds drawer.
• Remove the coffee dispenser, holding it by its
handle and pressing the “PUSH” button (Fig.22)
• Make sure that the two steel filters are free from
any coffee residues. The top filter can be removed
by unscrewing the plastic pin anticlockwise using
the key provided (Fig.23.).
• Wash the coffee dispenser only with hot water:
do not use detergents. Then thoroughly wash and
dry all its components.
• Refit the filter and carefully screw the plastic pin
back on using the key provided.
• Clean the compartment inside the appliance.
• Holding it by its handle, insert the coffee dispenser
into its housing until it snaps into place.
• Insert the coffee grounds drawer, the drip tray plate
and the drip tray.
• Close the cover (15).
11 DESCALING
Scale forms during normal use of the appliance;
a descaling treatment should be carried out every
3-4 months, either when you notice a reduced
water flow or the following message is displayed:
DESCALING
READY FOR USE
If you wish to carry this out at home,
you can use a commercially available
descaling product for coffee makers that is
non-toxic and/or not harmful.
Caution! Never use vinegar.
To descale the appliance proceed as follows:
1. Mix the descaling agent with water as directed
on the package and fill the tank with the solution.
2. Switch on the machine by pressing the on/
off switch (7).
3. Press the button (27) for at least 5 seconds to
select the function; the following message will
appear on the display:
DESCALING
OPEN KNOB
Note: if you immediately want to
cancel the descaling cycle press the
button (27) again.
4. Direct the steam pipe (14) over the drip tray.
5. Place a receptacle of adequate capacity
beneath the steam pipe and turn the hot
wa ter k nob ( 16) a nticlock wise. The
machine will start an automatic descaling
cycle including pauses preset by the
manufacturer and automatically controlled
by the machine. The display will show:
MACHINE IS DESCALING
6. At the end of the cycle, the flow of
descaling solution will be stopped and the
display will show:
DESCALING FINISHED
CLOSE KNOB
7. Turn the hot water knob (16) clockwise to
shut off flow. The display will show:
RINSE MACHINE
FILL WATERTANK
8. Thoroughly rinse out the water tank and
fill it with fresh drinking water.
RINSE MACHINE
PRESS KEY
9. Place a receptacle of adequate capacity
beneath the steam pipe and press the
button (27)
RINSE MACHINE
OPEN KNOB
 Loading...