Flexbar
21-1-2009
edda
Algemene installatie instructie
modifications
destination
Gamko Holding BV
Mon Plaisir 75
4879 AL Etten-Leur
Tel.(0)76-5087500
The Netherlands
name
drawing nr.
draftsman date
196169
1 02/09 DMX + CELS 5611
1 02/09 DMX + CELS 5611
Blad 11 van 13
42
47
44
Service
43
E
DETAIL E
2
1
3
4
1
2
2
4
3
5
7
6
45
355mm
knock-out
8
Ø85mm
46
9
10
A
DETAIL A
I
II
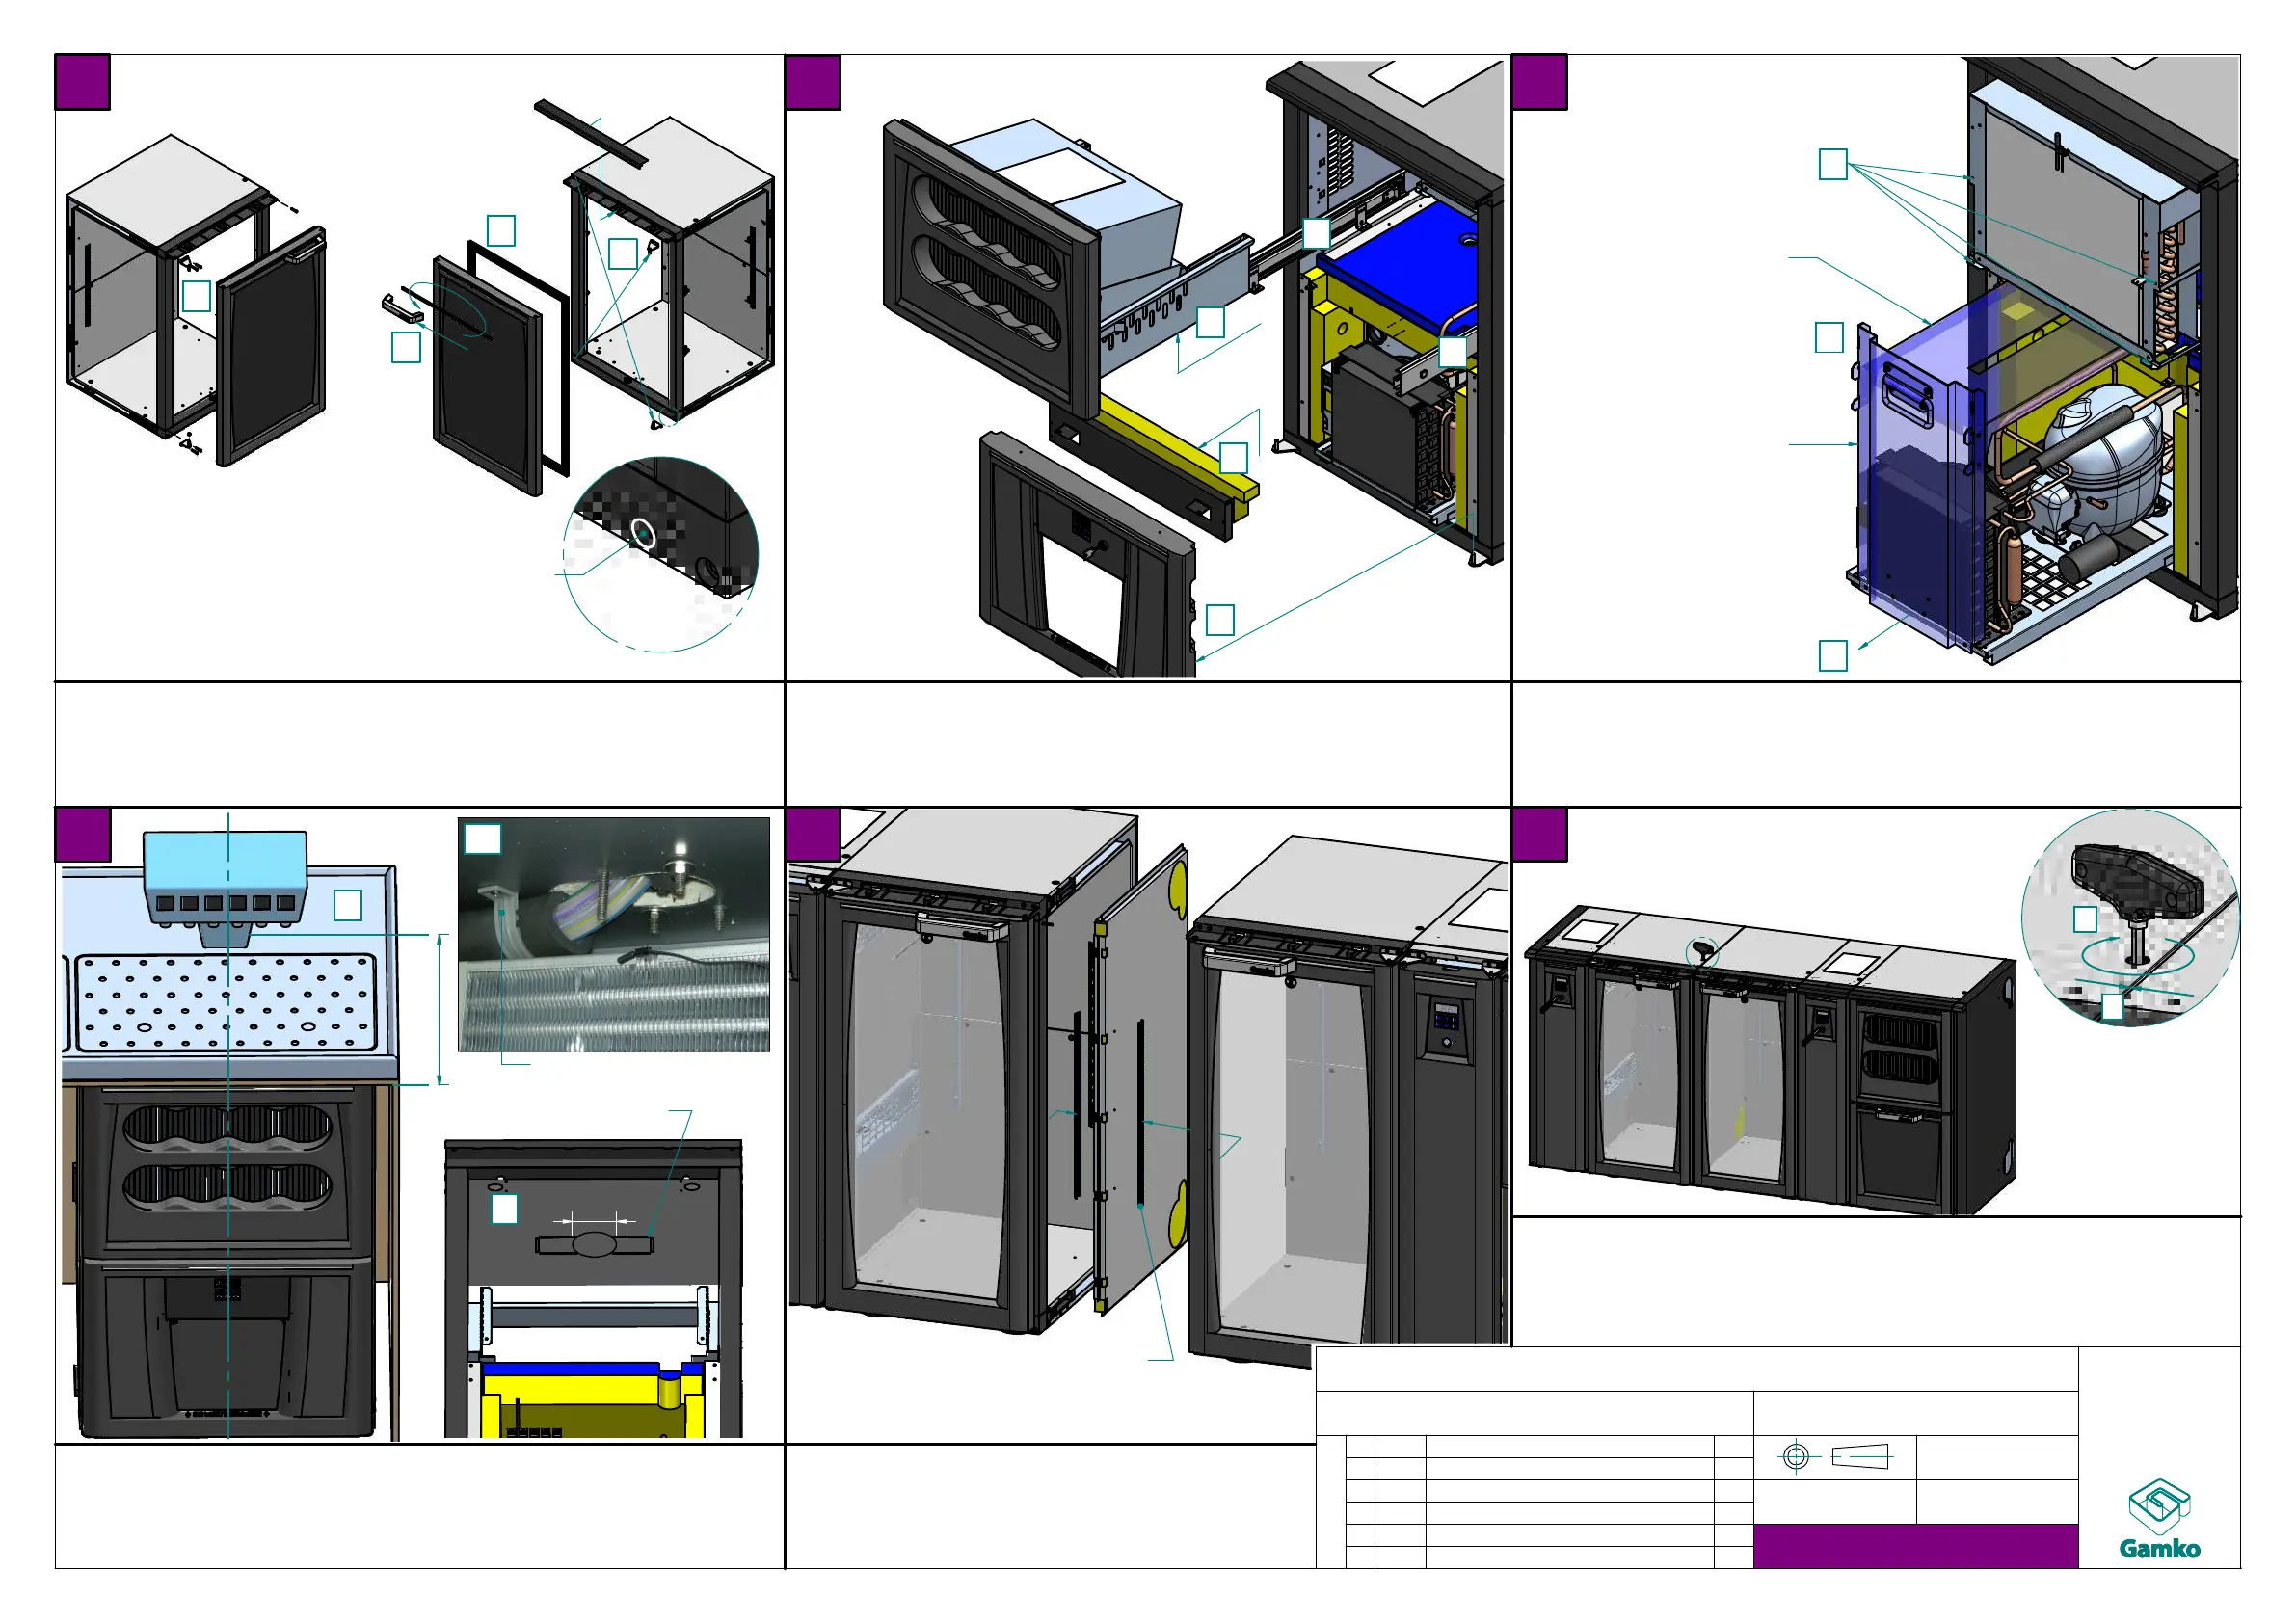
1 remove cable duct cover, hinges and door
2 remove magnetic gasket to reveal screws, remove screws
3 turn ornamental strip 180°, move handgrip
4 switch hinges crosswise and re-install door and cover
To mount a postmix column on a X/1HB
Remove (1) horizontal bottle drawer, (2) drawer-slides,
(3) machinefront (Switch off main power)
and (4) cross beam
5 Remove screws from evaporator cover
6 Place unit bracket to remove unit
7 Disconnect main powersupply connector and pull out unit
8 Drill a hole Ø85mm in center of X/1HB at 355mm from front
9 Break out knock-out pattern left or right and cut away
insulation to make space for post-mix tube
10 clamp up tube and reassemble X/1HB
On installation place X/TP00 or X/TP02
between segments using double sided tape
before coupling
Changing
direction door
push through to reveal
hidden screw hole
Reposition shelf support rails
to X/TP02 when used next
to doorsegment
Unit bracket
X/1HB-X/MU
230459A
Unit bracket
X/1HB-X/MU
230458A
Placing X/TP
clamp up tube
Couple segments
Turn hexagon key (6mm) on all 4 hooks, clockwise on
outside, conter-clockwise from inside of segment
2-way action: I hook (make sure they "hook" properly)
II pull (max. 4 "clicks")
Postmix column
on X/1HB
Postmix column
on X/1HB
Placing X/TP
Postmix kolom
on X/1HB
GB
 Loading...