Flexbar
21-1-2009
edda
Algemene installatie instructie
modifications
destination
Gamko Holding BV
Mon Plaisir 75
4879 AL Etten-Leur
Tel.(0)76-5087500
The Netherlands
name
drawing nr.
draftsman date
196169
1 02/09 DMX + CELS 5611
1 02/09 DMX + CELS 5611
Blad 12 van 13
Service
49
48
F
DETAIL F
50
006130053
*
*
Reed switch
008110167
*
51
52
Reed switches
1
2
3
Jumper
4
53
012100509
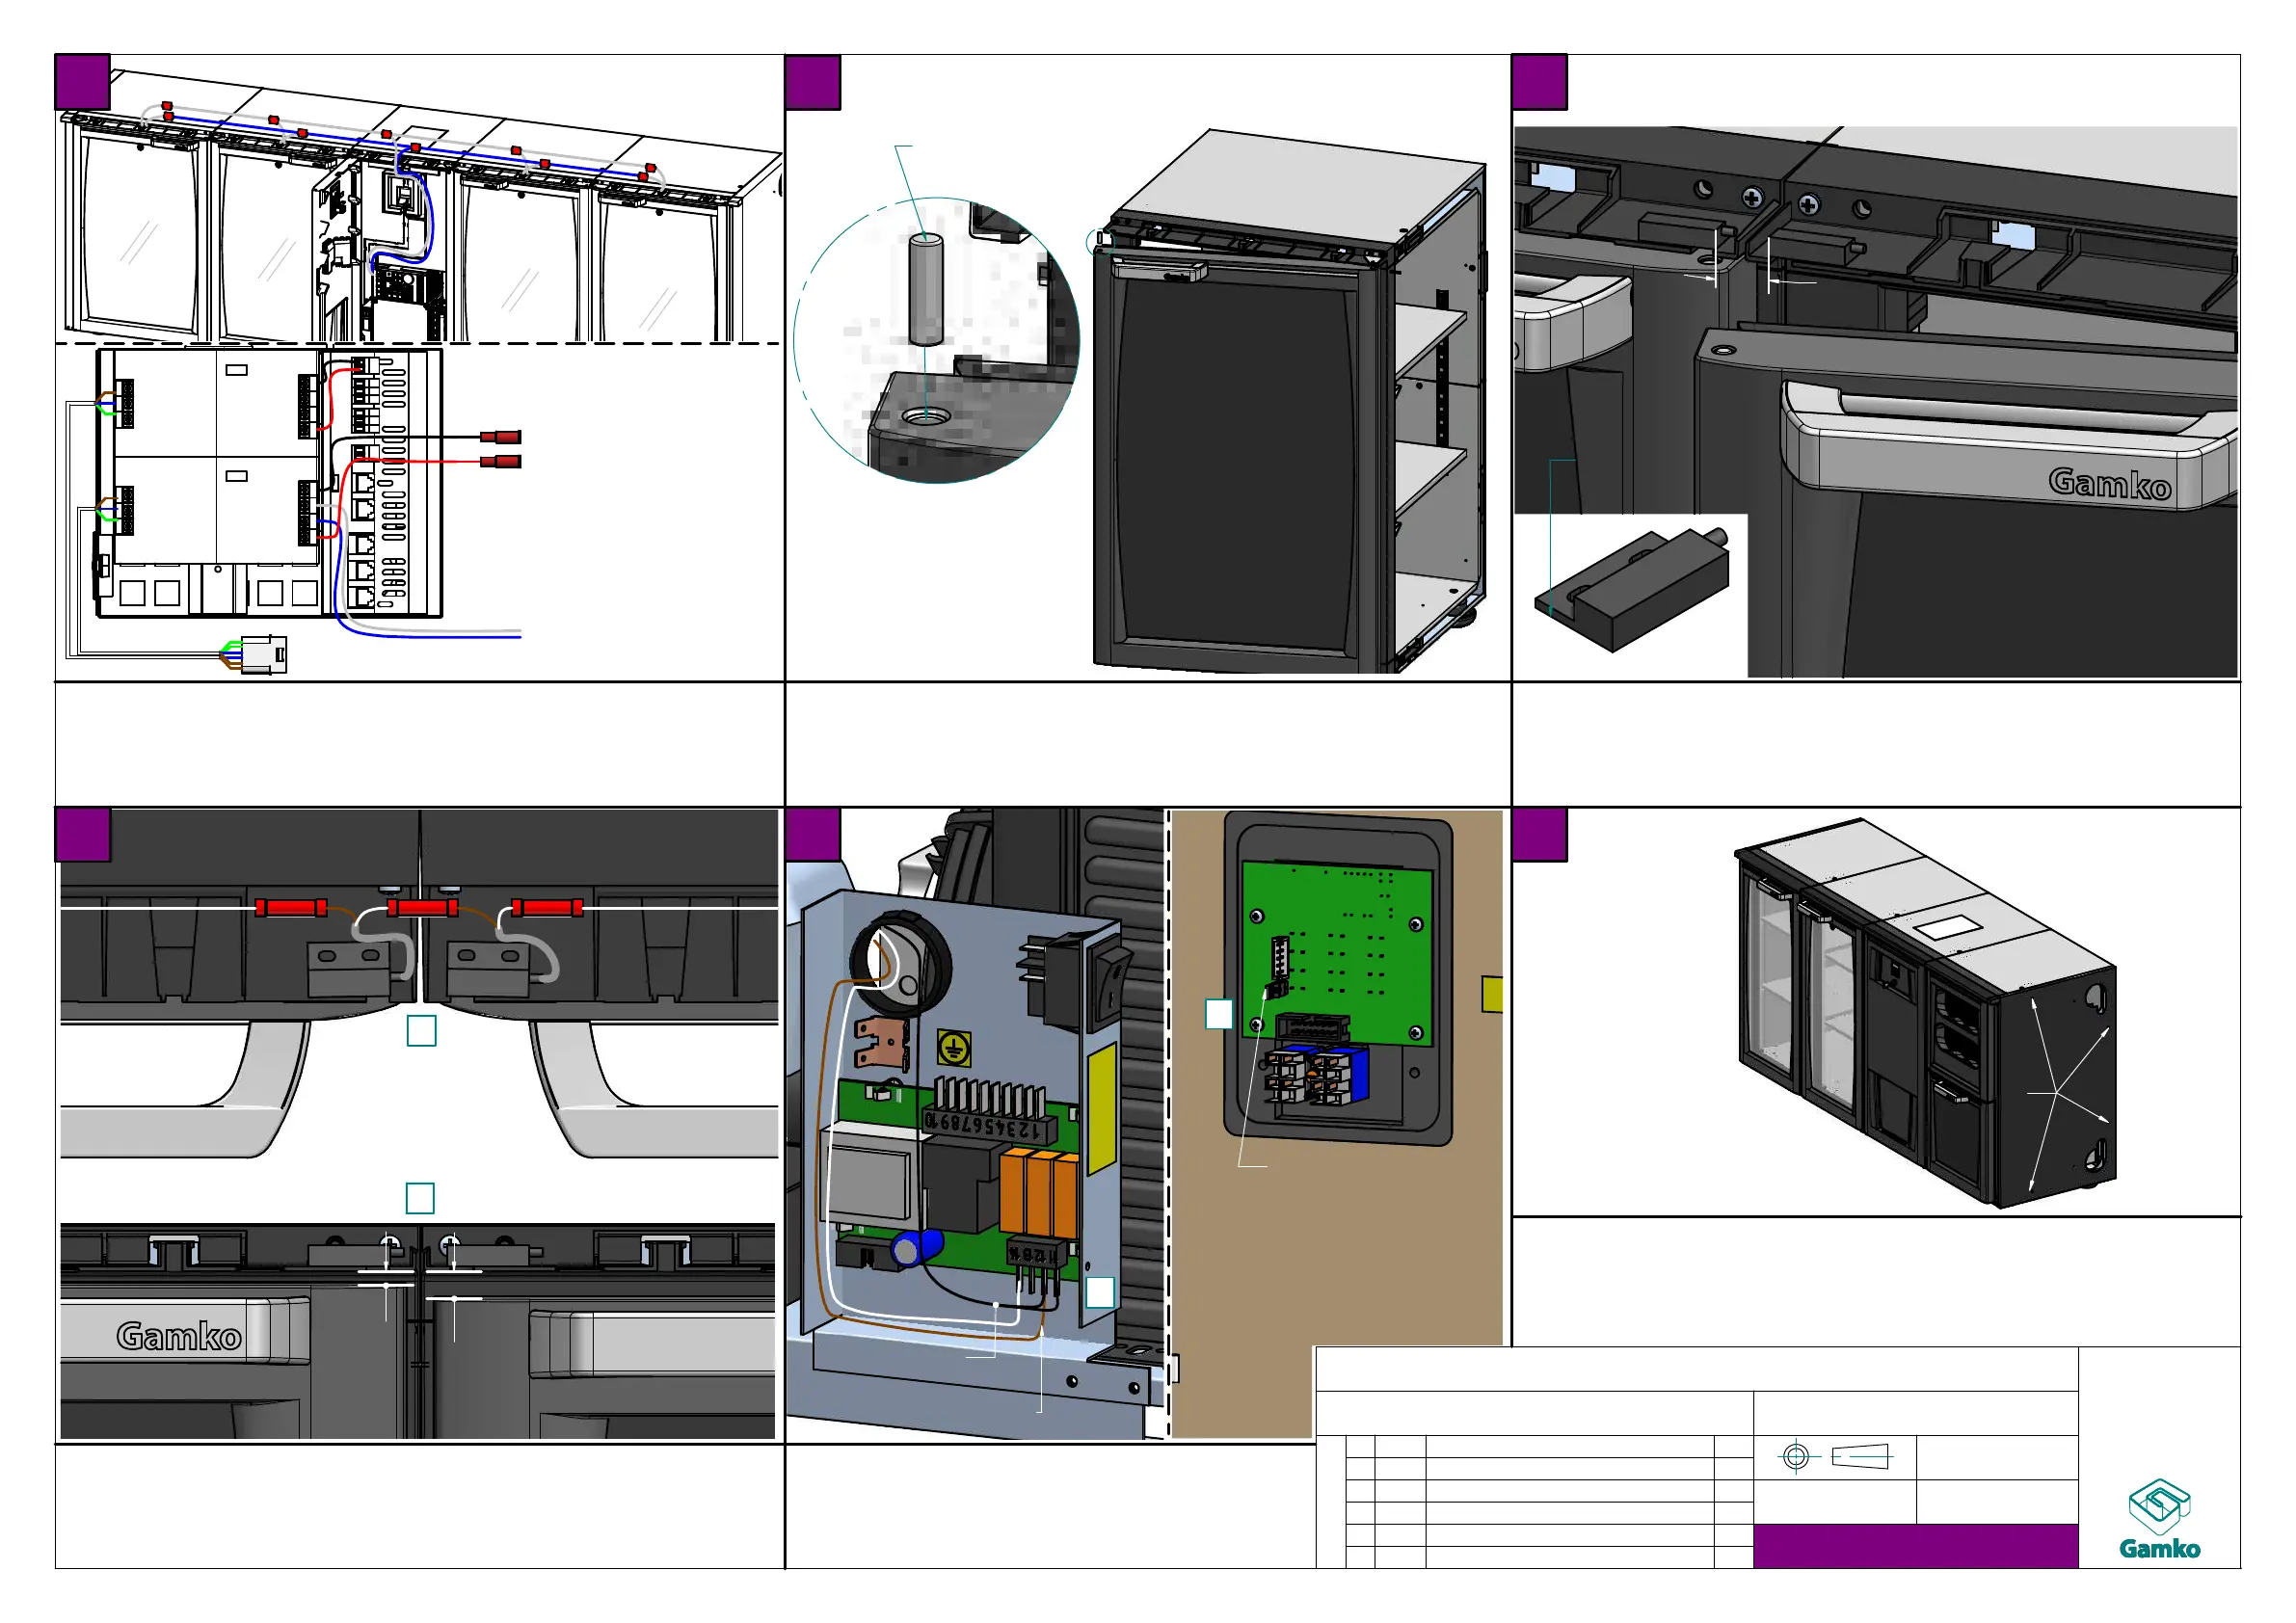
24V LED
24V CELS+
heating wire
24VDC CELS
24VDC heating wire
24VDC RGB LED
230VAC
Connect heatingwire parallel to 24V powersupply
- Flexbar without CELS: use new powersupply
- Flexbar with CELS: use CELS powersupply
- Do NOT use RGB LED powersupply!
1 Place magnet in hole opposite of hinge
top of magnet must be flush with door
2 oppervlak ontvetten
3 plak read switch mbv VHB tape in oversteek
4 reed switch uitlijnen met scharniergat (zie illustratie)
(zorg ervoor dat de magneet uitlijnt met de )
1 Connect reed switches in series
2 Make sure the gap between the reed switches and the
magnet is not too big
if necessary place extra washers between hinge and door
3 Connect reed switches in the electrobox
on pin14 (digital output) and together with
the temperature sensor on pin12
4 Remove jumper on back of display
Ergonomic light - production
(white light behind solid doors with doorswitch)
Place X/EP02 to segment, align top and front and fix using
4x40mm (012100509) screws in the 4 pre-punched holes
Make sure the screw heads end up flush with side
Connecting heating wire (to
prevent condensation)
Ergonomic light - production
(white light behind solid doors with doorswitch)
align with hinge hole
align
Ergonomic light - installation
(white light behind solid doors with doorswitch)
Temperature
sensor
Placing X/EP02
good
too big
Ergonomic light - installation
(white light behind solid doors with doorswitch)
GB
 Loading...