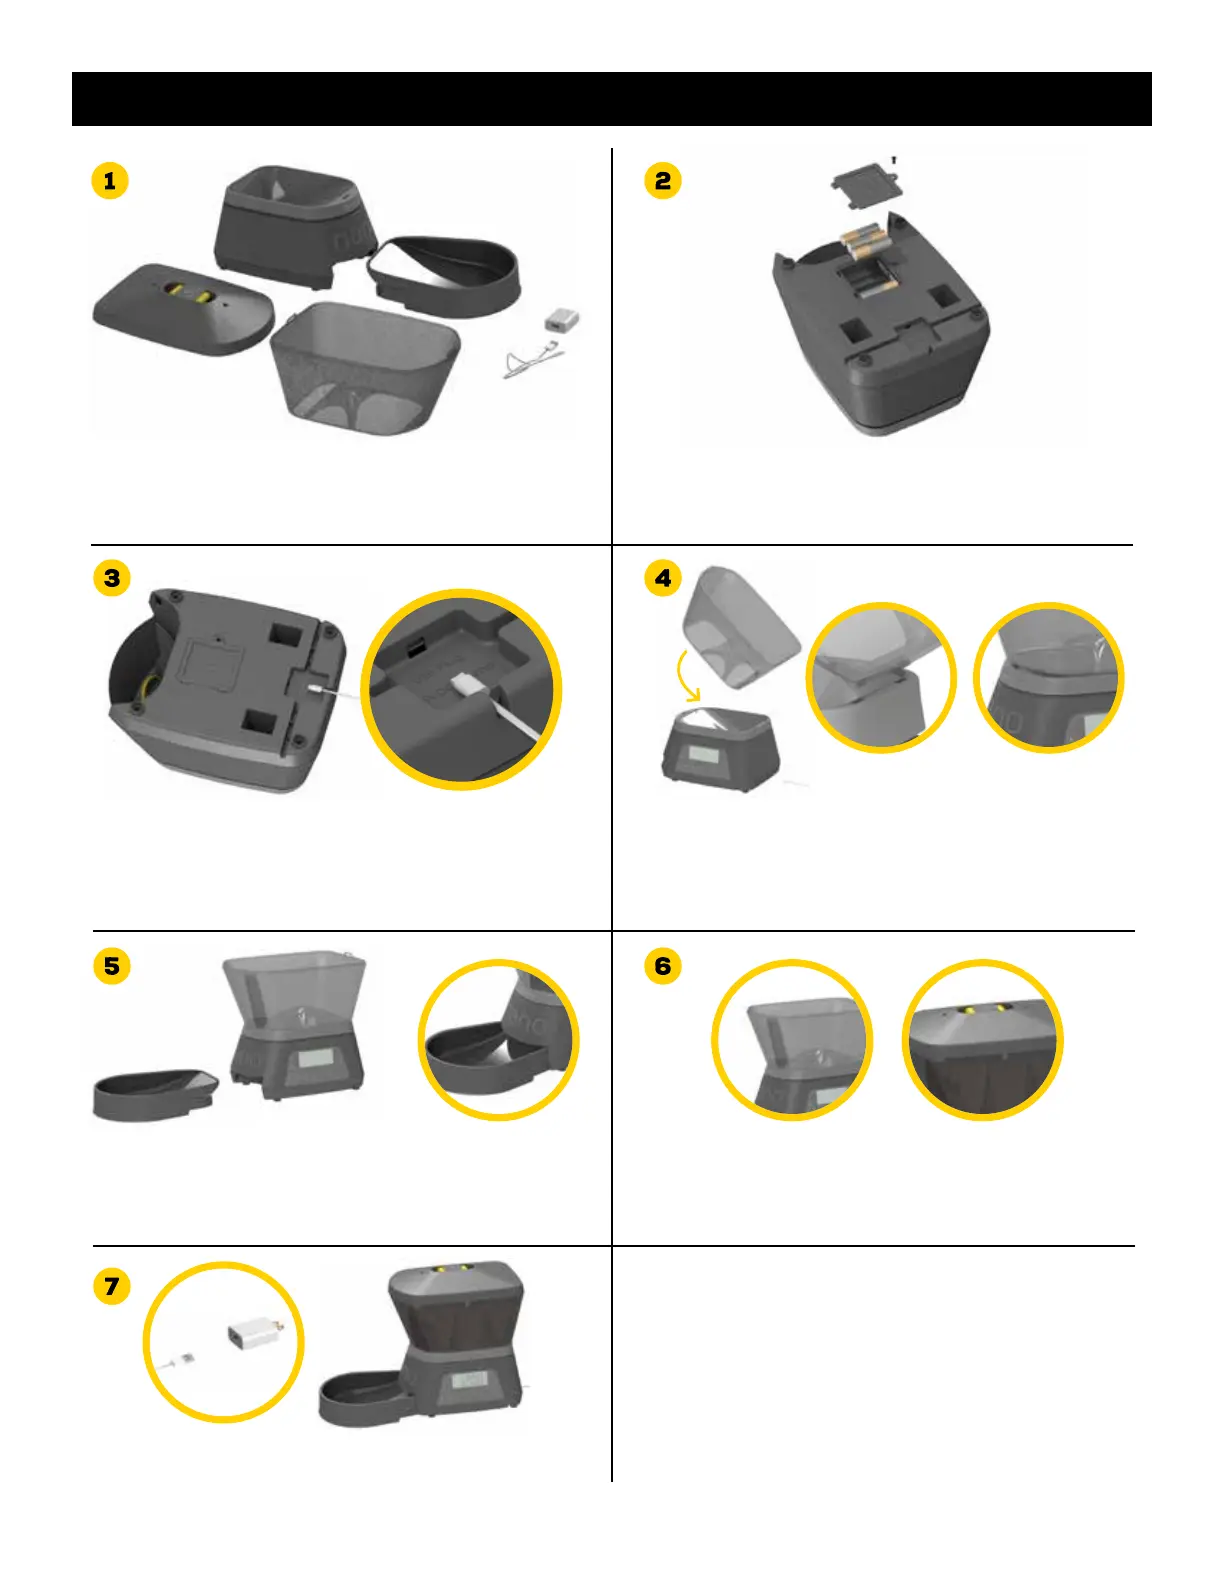
2
Unpack items. Remove Battery Door on bottom of BASE UNIT and install (4) new AA batteries.
Once complete, reinstall Battery Door.
Note: Phillips Head Screwdriver required to remove screw to install Battery Door.
Install MICRO USB PLUG.
Note: There is a channel to route the plug LEFT, RIGHT or to the BACK of the unit.
Slide BOWL into Base Unit. It will snap when engaged. To remove bowl, press
circular lock button on either side of the bowl and pull forward.
Fill Food Hopper with dry pet food. Squeeze yellow latches on LID to unlock,
once aligned and engaged to Food Hopper, release latches to lock Lid in
place. Note: Lid only assembles one way, the front has a circular shape.
Attach FOOD HOPPER starting on back side. Once back two hooks are
engaged, tilt forward to lock in place. It will snap when engaged. Connection
should be firm. Once installed, DO NOT remove. Note: The FOOD HOPPER will
flex down, or wiggle when pushed down on the BASE UNIT. This is normal.
section 1: product assembly
Insert Micro USB plug into the UNIVERSAL USB POWER SUPPLY and plug
into a standard wall outlet.