This document outlines the installation and basic operation of the DIGIMASTER 960H Series Digital Video Recorder (DVR), specifically models DR-8FX5 and DR-16FX5. It provides essential information for setting up the device, connecting various peripherals, and ensuring proper functionality.
Function Description
The DIGIMASTER 960H Series DVR is a robust surveillance solution capable of receiving and recording video and audio inputs from up to 16 channels of 960H cameras. It records footage onto an internal hard disk drive in real-time, offering high-quality 960H resolution for monitoring, playback, and backup. Beyond local storage, the DVR facilitates the transfer of video and audio data to networked external devices, enabling remote monitoring via computers and mobile devices such as iPhones, iPads, and Android phones.
Key functionalities include:
- Real-time Display and Recording: It can display up to 16 channels of 960H camera videos at 480 (NTSC) / 400 (PAL) frames per second (fps) in real-time. It also supports saving up to 16 channels of 960H camera videos at a maximum of 480/400 fps.
- Simultaneous Operations: The DVR allows for simultaneous recording and playback of a maximum of 16 channels.
- Video Compression: It supports H.264 HP CODEC for efficient video compression, optimizing storage space and network bandwidth.
- Alarm Features: The system includes an auto alarm feature with self-diagnostics, monitoring critical aspects like HDD S.M.A.R.T status and network errors.
- Dual Streaming: Supports dual streaming for remote access services, providing flexibility for different network conditions and viewing requirements.
- Search Methods: Offers various search methods, including time, event, bookmark, and thumbnail, to quickly locate specific footage.
- Backup Capabilities: Provides mass storage backup via USB port, allowing users to easily transfer recorded data.
- Remote Access: Supports remote access and search functions through a web server, enabling monitoring from any internet-connected device.
- Mobile Applications: Dedicated smartphone applications are available for iPhone, iPad, and Android OS, facilitating convenient mobile surveillance.
- User Interface: Features a 1080p Full HD Graphical User Interface (GUI) for a clear and intuitive user experience.
Usage Features
The DVR is designed for ease of use, from installation to daily operation.
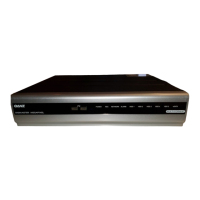
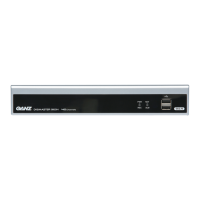
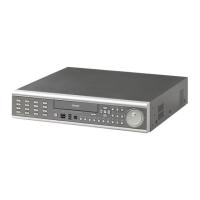
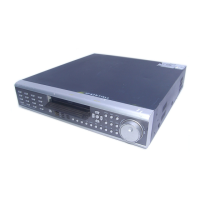
- Front Panel: The front panel includes an IR Remote Control Receiver for remote operation, USB ports for connecting USB storage or a mouse, and Status LEDs to indicate power, recording, network connection, and alarm status. HDD 1-5 / eSATA LEDs show the connection status of internal/external storage devices.
- Rear Panel: The rear panel offers a comprehensive array of ports for various connections:
- Video Inputs/Outputs: VIDEO IN (camera input), LOOP OUT (to external video device), SPOT (exclusive output for TV monitor), AUX (additional SPOT output), VGA (VGA monitor output), and HD MONITOR (HD monitor output).
- Audio Inputs/Outputs: AUDIO OUT (for speakers) and AUDIO IN.
- Power: Power Switch and 100-240V (50/60Hz) power input.
- Storage: eSATA (for external eSATA storage) and USB (for USB storage or mouse).
- Network: WAN (UPLINK) for connecting to the Internet, router, or hub.
- Control/Alarm: ALARM IN (alarm input signal), ALARM OUT (alarm output signal), RELAY (relay terminal output), RS-485 (for PTZ camera and system keyboard), and RS-232C (for PTZ camera, POS, and ATM devices).
- Remote Control: The remote control provides comprehensive command over the DVR, including power on/off, search, archive, channel selection, display split mode, sequence mode, snapshot, playback speed/direction adjustment, menu navigation, and PTZ/zoom control. The remote control ID can be changed to prevent interference when multiple DVRs are in proximity.
- HDD Installation: The manual provides clear steps for installing or replacing hard disk drives, emphasizing correct direction and secure fastening.
- Monitor Connection: Supports HDMI and VGA monitors. Users must ensure the DVR's NTSC/PAL output setting matches the camera's video standard for proper operation. The display operates at 50Hz for PAL and 60Hz for NTSC, provided the monitor supports both.
- Power Connection: Connect the supplied power cable to the main unit's rear. Users are advised to connect power only after all other connections are made, arrange cables neatly, and avoid placing the power cord under carpets or rugs. Multiple devices should not be inserted into a single power socket to prevent overload.
- Alarm I/O Connection: Detailed instructions are provided for connecting alarm input devices (sensors) and alarm output devices (relays), including proper wiring to terminal blocks and selecting relay types (Normal Open or Normal Close).
- Communication Ports: Instructions for connecting PTZ cameras and keyboard controllers via RS-485, and PTZ cameras, POS, or ATM devices via RS-232C.
- Audio Device Connection: Guidance on connecting microphones to the Audio In port and speaker amplifiers to the Audio Out port.
- Storage Expansion: The eSATA port allows for expanding storage capacity by adding external eSATA storage devices.
- USB Device Usage: USB ports are used for backup of recorded video, saving snapshots, firmware updates, and importing/exporting user configurations. A USB mouse can also be connected for DVR manipulation. For USB HDDs with high power consumption, a separate power source is recommended.
- Network Connection (Local): Connect the DVR to a local network via the WAN (UPLINK) port to a router or hub, allowing control and monitoring from a PC on the same network using a web browser. Default access ID is ADMIN, password is 1234, which should be changed for security.
- Network Connection (Remote): Connect the DVR to a remote network via the WAN (UPLINK) port to a router or ADSL modem. For remote access, port forwarding and DDNS address settings are required, enabling monitoring from remote PCs or mobile devices.
Maintenance Features
The manual emphasizes several maintenance and safety guidelines to ensure the longevity and proper functioning of the DVR.
- Safety Precautions: Before installation, users must remove the power supply module and check the input voltage (AC100V-AC240V). The product should be kept away from humidity and all connected devices must be properly earth-grounded to prevent fire, explosion, system failure, or electric shock.
- Operation Safety: During operation, avoid opening the cover without consulting a service person. Do not connect multiple devices to a single power socket. Keep the product away from dust and combustible substances. Do not touch with wet hands or insert conductors into ventilation vents. Avoid applying excessive force when unplugging the power cord.
- Cleaning: For cleaning the surface, use a dry cloth. Do not use water, paint thinner, or organic solvents.
- Self-Repair Prohibition: Users are strictly advised not to dismantle, repair, or modify the product on their own.
- Installation Environment: Ensure at least 18 cm of distance between the cooling fan and the wall for proper ventilation. Install the product on a flat surface and keep it away from direct sunlight or excessive temperatures.
- Handling: Do not apply force, shake, move, throw, or put excessive force on the DVR while in use.
- HDD Compatibility: Only compatible HDDs should be used, as unrecommended HDDs may cause system failure. The manual explicitly states that a system failure or data loss caused by an incompatible HDD will void the warranty.
- Cable Quality: For optimal video quality, especially over long distances between cameras and the DVR, it is recommended to consult an authorized installer regarding cable quality.
- Security: For network connections, the default access ID and password should be changed immediately after purchase to enhance security.