3. INITIAL OPERATION
Select correct location for Large-Area Pop-Up
Irrigation [ Fig. I1 / I2 ]:
Correct location:
A Circle water distribution:
• With circle water distribution the large-area pop-up
irrigation should be positioned as centrally as possible
in the watering area to ensure that the irrigation width is
not greatly affected by external influences such as wind.
B Sector water distribution:
• With sector water distribution the large-area pop-up
irrigation should be positioned right at the edge of
the watering area (e. g. at the corner of the house).
• The large-area pop-up irrigation must be positioned at
a point in the watering sector from which it is possible
to water the entire garden area required. The maximum
range is 9 m (with 2 bar flow pressure at the irrigation
unit).
• The large-area pop-up irrigation must be installed in
a position which is sunny all year round to ensure the
solar cell receives sufficient light.
Incorrect location:
1: No obstacles (e. g. walls, trees, etc.) should be
locatedin the watering sector. It must be possible
to access every contour point of the areas to be
watered in a straight line. With the maximum range
the spray height can reach approx. 5 m.
2: The minimum range is 2.5 m (at 2 bar). With circle water
distribution the large-area pop-up irrigation must there-
fore be located 2.5 m from the edge in all directions (A).
If this is not possible the large-area pop-up irrigation
should be positioned at the edge and the watering area
will be a circle sector (B).
3: Erratic spray-range changes must be avoided.
The smaller the angle α, the greater the deviation
from the programmed contour is.
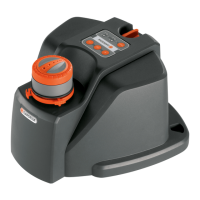
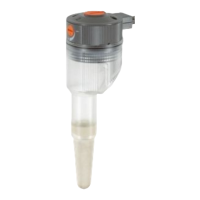
Install Large-Area Pop-Up Irrigation [ Fig. I3 ]:
Before installing the large-area pop-up irrigation,
you must set up an above-ground test to check
whether the largearea pop-up irrigation can actu-
ally water the required area at this location.
The large-area pop-up irrigation has a 3/4" female thread
and is connected to the 25 mm Connecting Pipe
8
Art. 2700 / 2701 / 2718 using the GARDENA L-piece
7
Art. 2781.
1. Install the above-ground test set-up and check whether
the large-area pop-up irrigation can water the required
area (see 4. OPERATION).
2. If the large-area pop-up irrigation has watered the
required area in the test, install a pack of coarse
gravel
9
approx. 20 cm x 20 cm x 20 cm in size
underneath the unit.
This ensures proper functioning of the drain valve.
3. Install the upper edge of the large-area pop-up irrigation
level with the turf.
This prevents any damage when mowing the lawn.
Remove protective plastic film of solar cell:
v Take off transportation protective plastic film from the
protective panel of of the solar cell.
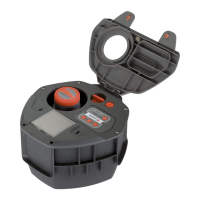
Control panel [ Fig. F1 ]:
The GARDENA Large-Area Pop-up Irrigation AquaCon-
tour automatic can be used to water individual garden
areas. A jet of water slowly turns in a circle to the end of
the programmed sector, stops, and turns back again,
altering the spray range depending on the ranges pro-
grammed. The control panel is used to programme the
irrigation contour points.
1
Menu button: Choose between programming mode
(Set) and operating mode (Auto).
2
“+” button: Increases irrigation range.
3
“–” button: Decreases irrigation range.
4
OK button: Stores the irrigation range selected.
5
Set LED: Indicates programming mode.
6
Auto LED: Indicates automatic operating mode.
The LED flashes every 10 seconds.
2. FUNCTION
4. OPERATION
Select watering sector [ Fig. O1 ]:
A watering sector from 25° to 360° can be selected.
To prevent areas being watered unintentionally
(e. g. house), the sector should first be selected
roughly (slightly too small).
Roughly select sector:
1. Close water supply.
2. Turn the nozzle head
0
by hand to the middle of the
watering sector (e. g. P4).
3. Roughly select watering sector: turn right sector stop
ß
R
to right-hand side (e. g. P9) and left sector stop
-
to
left-hand side (e. g. P2).
Note: When the water supply is open, the sector-stop is
shifted during switching of the turn direction to its end
position.
Re-adjust sector:
1. Open water supply.
2. Watch watering sector and re-adjust the sector-stops
-
and
ß
R
according to the sector limits (P1 and P10) until
11
EN

 Loading...