This document provides operating instructions for the GARDENA PowerMax 36 E (Art. 4037) and PowerMax 42 E (Art. 4043) electric lawnmowers.
Function Description
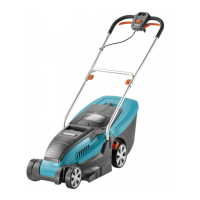
The GARDENA PowerMax electric lawnmower is designed for cutting lawns in and around the garden. It is intended for domestic use and is not suitable for trimming bushes, hedges, shrubs, cutting and pruning climbers or grass on roofs or in balcony boxes. Additionally, it should not be used for chopping branches, twigs, or leveling irregular soil. The mower offers three primary methods for grass management:
- Grassbox Fitted: This method efficiently collects and compacts grass cuttings into the grassbox.
- Mulch Plug Fitted: When the mulching plug is inserted, grass cuttings are finely chopped and returned to the lawn, providing nutrients.
- Rear Discharge: This option allows for effective cutting of long grass without the need to empty the grassbox, as the cut grass is discharged downward behind the machine.
The lawnmower is equipped with a motor that drives the cutting blade. It features a start/stop lever for operation and a lock-off button to prevent accidental starting. The cutting height can be adjusted to five different positions, ranging from 20 to 60 mm, to suit various lawn conditions and desired grass lengths.
Usage Features
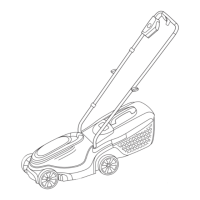
Assembly
The lawnmower requires some assembly before first use. This includes:
- Roller Assembly: The roller, which helps in creating stripes on the lawn, is assembled by placing its two halves over location pegs on the product's underside and clipping them together.
- Lower Handles Assembly: The lower handles are attached to the lawnmower deck using bolts, springs, pivot blocks, barrel nuts, cam locks, and washers. The cam locks are tightened by turning them clockwise.
- Upper Handles Assembly: The upper handles are connected to the lower handles using barrel nuts, cam locks, round-headed bolts, and washers. Similar to the lower handles, the cam locks are tightened by turning them clockwise.
- Grassbox Assembly: The grassbox handle is first located into slots on the grassbox upper and pushed until it clicks into position. The two halves of the grassbox are then aligned and clipped together, ensuring all clips are correctly located. Finally, the grassbox lid is aligned and clipped onto the assembled grassbox.
- Fitting Grassbox to Lawnmower: To attach the grassbox, the safety flap is lifted, the discharge chute is cleared of debris, and the assembled grassbox is located onto two points at the rear of the deck. The safety flap is then lowered onto the grassbox, ensuring it is securely located and that no gap remains between the flap and the grassbox.
Starting and Stopping
To start the lawnmower:
- Connect the female extension cable connector to the back of the switchbox.
- Form a loop in the mains cable and push it through the slot.
- Position the loop over the hook and pull the cable back through the slot to secure it.
- Connect the plug to the mains and switch on.
- Press and hold the lock-off button on the switchbox.
- Squeeze one of the two start/stop levers towards the upper handle.
- Continue to squeeze the start/stop lever and release the lock-off button.
To stop the lawnmower, simply release the pressure on the start/stop lever. It is important not to use the start/stop levers intermittently.
Mowing
- Mowing Strategy: Begin by mowing the edge of the lawn nearest to the power point to lay out the cable on the cut grass.
- Mowing Frequency: Mow twice a week during the growing season. Avoid cutting more than a third of the grass length at one time to prevent damage to the lawn.
- Avoiding Overload: Mowing long, thick grass can cause the motor speed to drop, indicated by a change in sound. If this occurs, the mower may be overloaded, potentially causing damage. For long, thick grass, a first cut with a higher cutting height can reduce the load.
- Grassbox Full Window: The grassbox features a window that allows the operator to see when the grassbox is filling up. When grass is visible through the window, or when the window/grassbox is full, it is time to empty the grassbox.
- Mulching: To use the mower as a mulcher, stop the lawnmower, lift the safety flap, and insert the mulching plug into the rear discharge chute, ensuring it is securely fitted. The mulching plug blocks the collection chute, preventing grass from being collected and instead finely chopping it for nutrient return to the lawn.
Cutting Height Adjustment
The cutting height is adjusted by raising or lowering the wheels using the height adjustment lever. There are five heights of cut available. A medium height of cut is recommended for most lawns. Cutting too low can negatively impact lawn quality and collection performance.
Maintenance Features
Cleaning
Regular cleaning is crucial for the lawnmower's performance and safety.
- Safety Precaution: Always wear gloves during cleaning.
- Importance of Cleanliness: Keeping the lawnmower clean is very important. Grass clippings left in air intakes or under the deck can become a potential fire hazard.
- Cleaning Steps:
- Remove grass from under the deck using a brush.
- Use a soft brush to remove grass clippings from all air intakes, the discharge chute, and the grass box.
- Clean grass clippings from the vision window with a soft brush.
- Wipe the surface of the lawnmower with a dry cloth.
- Important Cleaning Restrictions: Never use water, chemicals, petrol, or solvents for cleaning the lawnmower, as these can destroy critical plastic parts.
Storage
- Folding Handles: To store the lawnmower, loosen the cam locks to fold the handles over the product, making it more compact.
- Storage Location: Store the lawnmower in a cool, dry place, protected from damage. Do not store it outdoors.
End of Mowing Season Maintenance
At the end of the mowing season, it is recommended to:
- Replace any necessary bolts, nuts, or screws.
- Thoroughly clean the lawnmower.
- Ensure the electric cable is stored correctly to prevent damage.
General Maintenance and Safety Checks
- Pre-use and Post-impact Checks: Before using the product and after any impact, check for signs of wear or damage and repair as necessary.
- Blade Maintenance: Replace worn or damaged blades together with their fixings in sets to preserve balance.
- Fastener Tightness: Keep all nuts, bolts, and screws tight to ensure the lawnmower is in safe working condition.
- Grassbox Inspection: Frequently check the grassbox for wear or deterioration.
- Part Replacement: Replace worn or damaged parts for safety. Only use replacement parts specified for this product.
- Adjustment Caution: Be careful during product adjustment to prevent fingers from being entrapped between moving blades and fixed parts.
Electrical Safety
- Cable Inspection: Before each use, examine the electric cable for damage or signs of aging. Do not use the product if the cables are damaged or worn.
- Immediate Disconnection: Immediately disconnect from the mains electricity supply if the cable is cut or insulation is damaged. Do not touch the cable until the supply has been disconnected. Do not repair cut or damaged cables; replace them with new ones.
- Cable Management: Keep cables away from the blade to prevent damage and contact with live parts. Always work away from the power point, mowing up and down, not in circles. Do not pull the cable around sharp objects.
- Disconnecting Power: Always switch off at the mains before disconnecting any plug, cable connector, or extension cable.
- Storage: Before winding the cable for storage, switch off, remove the plug from the mains, and examine the cable for damage or aging. Wind the cable carefully, avoiding kinking. Never carry the product by the cable or pull on the cable to disconnect plugs.
- Voltage: Use only on AC mains supply voltage shown on the product rating label.
- Double Insulation: The products are double insulated, and an earth should never be connected to any part of the product.
- Extension Cables: Use only 1.00mm² size cable up to 40 meters length maximum. Only use extension cables specifically designed for outdoor use.
Service Recommendations
It is strongly recommended that the product be serviced at least every twelve months. Always use genuine spare parts. If a problem arises, contact an approved Service Centre with full details of the product as described on the rating label. If work needs to be carried out by a Service Centre, take the complete machine, including the cable and any extension cables used.