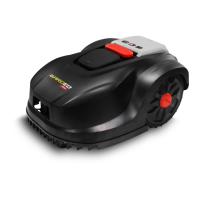
The Gardeo Pro GRO20V20WIFI-2A is a robotic lawnmower designed for efficient and autonomous lawn care. It is recommended to install the charging station in a dry place, protected from rain, hail, or flood.
Function Description:
The robotic lawnmower is designed to cut grass within a defined boundary. It operates in two main modes: Manual Mode and Schedule Mode. In Manual Mode, the mower cuts all areas based on the operation time until manually stopped. If no specific settings are applied, it will continue to cut until stopped. In Schedule Mode, the mower cuts all areas (or defined zones) based on a pre-set time period. This mode allows users to define specific start and end times for operation, as well as designate up to three different zones within the garden, each with its own working hours. The mower automatically returns to the charging station when its battery is low and resumes mowing after recharging. It also features an "Edge Cut" function, which allows it to cut along the lawn edges every eight charging cycles. The mower is equipped with a "Rain" function, enabling it to return to the charging station in case of rain, which is activated by default for optimal cutting results. For safety, the mower will not operate if the slope angle exceeds 20 degrees. The device also includes a "Key sound" function, which can be turned on or off, and a "WIFI Config" function for network setup. Users can view the remaining battery power, current working mode, and status (mowing, charging, or standby) via the associated smartphone application. The machine time is automatically calibrated when connected to Wi-Fi, displaying the local time zone. The application also allows for sharing the robot mower with family or friends.
Important Technical Specifications:
- Model: GRO20V20WIFI-2A
- Size: 521 x 380 x 243 mm
- Working voltage: 20 V
- Motor speed: 3500 min⁻¹
- Loading time: +/- 50 min
- Average operating time: +/- 60 min
- Cutting width: 200 mm
- Cutting height: 25-55 mm
- Blade model: S1
- Recommended dimensions for the lawn: Max 800 m²
- Protection class: IP X4
- Insulation class: III
- Noise: LWA 70 dB (individual hearing protection must be worn if exceeding 85 dB(A))
- Weight: 8 kg
- Charging station model: S16-2
- Input: 21.0V DC, 2.5A
- Output: 21.0V DC, 2.5A
- Charger model: FY2102500
- Input: AC 100-240 V~ 50/60Hz 1.5A
- Output: DC 21.0V 2.5A, 52.5W
- Battery model: BP27-20020 (DC 20V 2Ah Lithium battery)
- Wireless connection: From your smartphone (2.4 GHz Wi-Fi network)
- CE Directives Compliance: 2006/42/EU (MD), 2014/35/EU (LVD), 2014/30/EU (EMC), 2005/88/EU (NOISE), 2015/863/EU (ROHS), 2014/53/EU (RADIO/RED)
Usage Features:
- Installation: The charging station should be placed on the outer edge of the mowing area, on the boundary wire, on a flat, solid surface, free of obstacles within 2 meters in front. The boundary wire starts under the charging station, runs anticlockwise along the lawn edge, and ends at the back of the charging station. It must pass through the center of the charging station for at least 2 meters in a straight line. The minimum distance between parallel boundary wires should be 1.5 meters. Inner angles of the boundary line corners must be at least 125 degrees. Obstacles like flowers or trees can be isolated with a semi-ring or ring-shaped boundary line. The boundary wire should be fixed tightly to the ground with pegs every 1 meter, or closer on uneven terrain. The wire should not be buried more than 2 cm deep to avoid signal interference.
- Operation: To start, place the mower on the demarcation line 0.5 meters in front of the charging station, facing it. Input the initial PIN code (0000) and press "OK" to access the operating interface. Press "START" to begin mowing. The mower will advance, connect with the charging station's paddles (indicator light turns red), then move off the fence line to mow.
- Mowing Height Adjustment: The cutting height can be adjusted between 2.5 cm and 5.5 cm using a knob next to the display panel. Ensure the power is off before making adjustments.
- Charging: The mower automatically seeks the charging station when recharging is needed. The charging station has two indicator lights:
- Light 1 (Red): Mower is charging.
- Light 1 (Green): Charging is complete. The mower will move 2-3 cm back from the charging station if not in working mode.
- Light 1 (Off): No power. Check the connection between the adapter and the charging station.
- Light 2 (Flashing): Loose connection between the charging station and the fence line. Check connections and fence line status.
- Light 2 (Off): Correct assembly of the fence line.
- Zone Function: This feature enhances efficiency in large areas and helps the mower navigate narrow passages. Up to three different zones can be defined, each with specific working hours (max 255 minutes). To set up zones, place the mower on the boundary wire 0.5 meters from the charging station, facing it, enter the password, and press "MENU." Select "AREA" to define starting points and working hours for each zone.
- Schedule Function: In this mode, the mower operates on selected days and times. After setting the schedule, leave the mower in front of the charging station; it will start mowing when the scheduled time is reached.
- History Record: Users can view recent fault data and a work log of the mower's operations.
- Safety: Always wear garden gloves when handling the appliance or working near blades. Never lift or carry the mower while the engine is running. Keep hands and feet away from rotating blades. Do not use the mower if protective covers are damaged or safety devices are missing. Do not operate the mower in bare feet or open sandals; always wear closed-toe shoes and long pants. Do not use a pressure washer or garden hose to clean the machine.
Maintenance Features:
- Cleaning: Thoroughly clean the exterior parts of the garden tool with a soft brush or cloth. Avoid using water, solvents, or abrasive detergents. Regularly clean the blade area by turning the mower over and using a stiff brush or scraper to remove stubborn dirt and grass particles. Ensure all nuts, bolts, and screws are tight.
- Part Replacement: Regularly check the garden tool for worn or damaged parts, especially blades and blade screws. Replace worn or damaged parts with original GARDEO spare parts. If necessary, replace the entire set of blades and screws to prevent vibrations.
- Battery Care: Only charge the battery in the original GARDEO charging station. Do not expose the charger or battery pack to temperatures above 50°C or to moisture. Do not burn the charger or battery pack. If the battery is damaged or leaks, contact GARDEO After-Sales Service. Do not open the garden tool or battery to avoid short circuits and electric shock.
- Storage: Store the mower and accessories in a cool, dry, stable, and secure place, out of reach of children, away from extreme temperatures and direct sunlight. Avoid storing in plastic bags to prevent humidity buildup. For long-term storage, the optimal temperature for Li-ion batteries is 10°C, and they should be charged to 40% capacity. Recharge the mower every 3 months if unused for a long period.
- Troubleshooting: In case of any fault, always check the charging station first to ensure it is in proper working status (fence line not loose, bitten by pets, cut by blades, or AC power shut down). A red flashing light on the charging station indicates a problem. If the mower does not start, check the emergency stop switch, battery charge, and fence line. If the mower does not move forward, check the bumper sensor and grass height. If mowing is incorrect, check blades, slope angle, and for obstructions. If the mower crosses the boundary, check the fence line angle, proximity to slopes, signal strength, and for nearby high-power appliances. If the battery is not charging, check contact poles for dirt or damage.
- Service: For repairs and spare parts, contact GARDEO After-Sales Service at callcenter@gardeo-pro.com or visit www.eco-repa.com.