EasyManua.ls Logo

Gardner Bender 30 Series - User Manual

Gardner Bender 30 Series
4 pages
Print Icon
To Next Page IconTo Next Page
Loading...
Gardner
Bender
Instruction
Sheet
Electric
Pumps
IMPORTANT: RECEIVING INSTRUCTIONS
Visually inspect all components for shipping damage.
If any shipping damage is found, notify carrier at once.
Shipping damage is NOT covered by warranty. The
carrier is responsible for all repair or replacement
costs resulting from damage in shipment.
IMPORTANT--USER SAFETY AND PROTECTION: In setting up systems, take care to select
the proper components and design to ensure appropriate integration with your existing operations
and equipment. Observe all safety measures to avoid the risk of personal injury and damage to
property and equipment through improper usage.
GB ELECTRICAL, INC. CANNOT BE HELD RESPONSIBLE FOR DAMAGE OR INJURY
CAUSED BY UNSAFE USE, MAINTENANCE OR APPLICATION OF ITS PRODUCTS. Please
contact GB's technical service department for assistance if you are in doubt as to the proper
safety precautions essential to designing and setting up your particular application.
CLAMP METER
!
Electric Hydraulic
Voltage
Tester
NEUTRAL
Check hydraulic oil level in reservoir to
prevent pump failure.
Start pump with directional valve in neutral
position to prevent accidental lifting or
moving of load.
Have only qualified personnel check motor
nameplate against power availability to
prevent motor burnout or dangerous
electrical overloading.
Keep extension cord length to
a minimum and sizes to electric code.
Do not use standard electrical equipment
in an explosive atmosphere. Use
grounded receptacle.
Adhere to all applicable local and national
electrical codes.
Do not exceed capacity of equipment
attached to pump. Use a gauge in line
and do not exceed pressure rating of
lowest capacity pressurized component
in the system.
Upon receipt of pump...
1. Remove oil fill plug.
2. Reservoir oil level should be checked
(with all cylinders retracted).
3. If necessary, add ENERPAC hydraulic oil.
CAUTION: The use of other fluids may
cause extensive damage to
the pump. Such damage is
not covered by GB Warranty.
4. Replace oil fill plug.
WARNING: Pump overload protection is factory
set. Adjustment by other than
qualified personnel may cause
malfunction and/or damage to
component parts of the system.
NOTE: Maximum Hydraulic Pressure
generated by this unit is 10,000 PSI.
Question and Answer IconNeed help?

Do you have a question about the Gardner Bender 30 Series and is the answer not in the manual?

Summary

Receiving Instructions

Inspect for Shipping Damage

Visually inspect all components for shipping damage and notify carrier if found.

Safety First

User Safety and Protection

Take care in setup, select proper components, and observe safety measures to avoid injury.

Electrical Hook-up

Hushh-Pumps (PE22 J; PE24 J Series)

Instructions for plugging in the unit and checking motor nameplate for electrical requirements.

Hushh-Pumps (PE34 J; PE34 R Series)

Check motor voltage, connect power, and rewire if necessary for different voltage configurations.

Gauge Installation and Hose Connection

Installing Gauge

Steps to screw the gauge adaptor into the valve port and connect the gauge securely.

Hose Connection

Connect the high-flow coupler halves to the cylinder half and tighten connections.

Pump Operation

PE22 J;PE24 J Pump Operation

Using the 3-position toggle switch for continuous, jogging, or off operation.

Hushh-Pumps (PE34 J;PE34 R) Operation

Steps for starting the pump, venting air, and operating the plunger.

Adjusting Relief Valve

PE22 J;PE24 J Relief Valve Adjustment

Install gauge, purge air, and adjust relief valve using an Allen wrench for desired pressure.

Hushh Pumps (PE34 J;PE34 R) Relief Valve Adjustment

Remove plug, insert wrench, and adjust screw for desired pressure reading.

Periodic Maintenance

Hydraulic Oil Level Check

Check hydraulic oil level every 40 hours; do not overfill or add oil with cylinders advanced.

Hydraulic Oil Change

Completely change hydraulic oil every 300 hours, or more frequently in dusty areas.

Cleaning Oil Filter Screen

Filter Screen Cleaning Procedure

Remove pump unit and cover, unscrew retainer, and flush screen with clean solvent.

Power Unit Servicing (Electric Motor)

Out-of-Service Protection

Wipe unit, cover it, disconnect electrical connections, and prime if needed.

Temperature Protection

Ensure airflow, keep motor clean, and consider additional cooling for high temperatures.

Overview

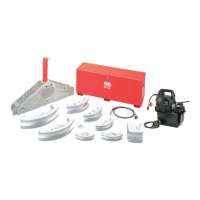
This document describes the operation, maintenance, and safety precautions for GB Electrical's Electric Hydraulic Pumps, specifically the Hushh-Pumps (PE22J/PE24J Series Models and PE34J/PE34R 30, 40, and 50 Series Models).

Function Description:

The GB Electrical Electric Hydraulic Pumps are designed to generate hydraulic pressure, with a maximum output of 10,000 PSI, for various industrial applications, typically involving the advancement and retraction of hydraulic cylinders. These pumps are part of a hydraulic system that requires careful selection and integration of components to ensure safe and efficient operation. The document emphasizes the importance of proper setup, maintenance, and adherence to safety guidelines to prevent personal injury and equipment damage.

Important Technical Specifications:

  • Maximum Hydraulic Pressure: 10,000 PSI.
  • Power Source:
    • PE22J/PE24J Series Models: 115 volt AC grounded power source (wired for 115V at the factory).
    • PE34J/PE34R Series Models: Single phase 110/220 volt, 60 cycle motors (wired for 110V at the factory); Three phase 208/220/440 volt, 60 cycle motors.
  • Motor Rotation:
    • PE22J/PE24J Series Models: Counterclockwise (looking down at shroud).
    • PE34J/PE34R Series Models: Clockwise.
  • Oil Capacity: Varies by model (e.g., 190 cu. in. for some models, 2, 5, or 10 gallons for others).
  • Rated Delivery: Varies by model (e.g., 330/240 cu. in./min for some, 720/500/62 cu. in./min for others).
  • Valves: Available in 2-way, 3-way, and 4-way configurations, with manual or electric options.
  • Overload Protection: Factory set to 10,000 PSI for operation. Adjustment by unauthorized personnel can cause malfunction or damage.
  • Hydraulic Fluid: ENERPAC hydraulic oil is specified. Use of other fluids may cause extensive damage not covered by warranty.

Usage Features:

  • Receiving Instructions: Upon receipt, users must visually inspect all components for shipping damage and notify the carrier immediately if any is found, as shipping damage is not covered by warranty.
  • Safety First: The document stresses the importance of selecting proper components, designing appropriate integration, and observing all safety measures to avoid personal injury and property damage. GB Electrical, Inc. disclaims responsibility for damage or injury caused by unsafe use, maintenance, or application of its products.
  • Electrical Hook-up:
    • PE22J/PE24J: Plugs into a 115V AC grounded power source. Motor rotation is factory-set counterclockwise.
    • PE34J/PE34R: Motor voltage must be checked against the nameplate. Single-phase motors are factory-wired for 110V. Three-phase motors have accessible leads for rewiring to 200V or 440V if needed, which must be done by qualified electrical personnel. Motor rotation is clockwise.
  • Installing Gauge: A gauge adaptor (3/8" NPT) is screwed into the valve port, followed by the gauge. A shut-off valve is recommended. Connections must be tight, using pipe dope or Teflon tape if necessary.
  • Hose Connection: A 3/8" NPT hose end is screwed into the gauge adaptor. The high-flow coupler half of the hose connects to the cylinder half. Connections must be tightened. Couplers should be wiped clean, and dust caps used to prevent dirt ingress.
  • Pump Operation (PE22J/PE24J):
    • Uses a 3-position toggle switch: "Switch up" for continuous operation, "Switch down" for jogging, and "Off" in the center.
    • Remote jog pendant stations are available for remote jogging.
  • Pump Operation (PE34J/PE34R):
    • Requires all hose connections to be tight and the power cord properly connected.
    • Air vent screw is turned counterclockwise 2-3 turns.
    • Motor switch is pushed to "On," and the pump idles for a few minutes.
    • Plunger advancement is achieved by pressing the "advance" button on the push-button station or placing the manual valve in "advance."
    • Plunger retraction is achieved by pressing the "retract" button or placing the manual valve in "retract."
  • Removal of Air: Air in the hydraulic system, common during initial setup, must be removed for safety and proper operation. This is typically done by fully advancing and retracting the hydraulic cylinder several times until smooth action is achieved. Sluggish cylinder action indicates air in the system.
  • Adjusting Relief Valve (PE22J/PE24J):
    • Requires a gauge adaptor, gauge, and shut-off valve installed between the pump and cylinder.
    • The air vent is removed, the motor started, and air purged.
    • The advance button is pressed, or the manual valve is placed in advance.
    • A 7/32" Allen wrench is inserted into the adjusting screw to obtain the desired pressure. Counterclockwise reduces pressure, clockwise increases it.
    • Users must not exceed the pump's operating pressure.
    • The valve setting should be checked by operating the valve several times to ensure the gauge reading remains constant.
  • Adjusting Relief Valve (PE34J/PE34R):
    • The flush pipe plug is removed from the side of the reservoir.
    • A 5/16" Allen wrench is inserted into the adjusting screw to obtain the desired pressure.

Maintenance Features:

  • Periodic Maintenance:
    • Hydraulic Oil Level: Check every 40 hours of operation. Add ENERPAC hydraulic oil as needed, but do not overfill or add oil with hydraulic cylinders advanced.
    • Hydraulic Oil Change: Completely change hydraulic oil every 300 hours of operation, or more frequently in dusty/dirty environments.
  • Cleaning Oil Filter Screen:
    • Remove cap screws, lift the pump unit and cover off the reservoir (being careful not to damage the gasket).
    • Remove the screen retainer screw from the bottom of the pump unit.
    • Flush the screen with clean solvent or similar cleaning agent.
  • Power Unit Servicing (Electric Motor):
    • Out-of-Service Protection (30 days or more): Wipe the unit clean, provide a suitable cover, disconnect electrical connections to prevent accidental starting. If needed, prime by tilting the unit, jogging the motor several times, allowing it to idle, returning it upright, and running it for about 5 minutes.
    • Temperature Protection: Ensure nothing obstructs airflow around the motor and pump. Keep the motor clean (internal and external) for maximum cooling. In high-temperature areas, additional cooling (e.g., an air-cooled heat exchanger) may be necessary.
  • Repair and Service: For repair service and parts, users should contact their nearest GB Electrical Service Center. Only repairs performed by an Authorized Service Center are backed by the factory warranty.
  • Warranty: GB Electrical, Inc. warrants its products against defects in workmanship and materials for 1 year from the date of delivery, excluding ordinary wear and tear, abuse, misuse, overloading, altered products, or use of improper fluid. The chain is not warranted.
  • Warranty Return Procedure: For warranty claims, units should be sent to the nearest GB Authorized Service Center, transportation prepaid, with proof of purchase date. If the claim is valid, the Authorized Service Center will repair or replace affected parts and return the unit prepaid.

Gardner Bender 30 Series Specifications

General IconGeneral
BrandGardner Bender
Model30 Series
CategoryWater Pump
LanguageEnglish