EasyManuals Logo

Garmin STEADYCAST HEADING SENSOR User Manual

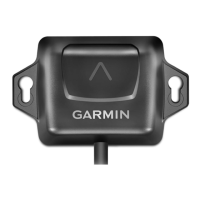
Garmin STEADYCAST HEADING SENSOR
6 pages
To Next Page IconTo Next Page
To Previous Page IconTo Previous Page
Page #3 background imageLoading...
Page #3 background image
interference
is
present.
You
must
choose
another
location
and
test
again
.
Mounting
screws
are
provided
with
the
sensor
. If
you
use
mounting
hardware
other
than
the
provided
screws,
the
hardware
must
be
made
of
quality
stainless
steel
or
brass
material
to
avoid
magnetic
interference
with
the
sensor.
NOTE:
Test
all
mounting
hardware
with
a
handheld
compass
to
make
sure
no
magnetic
fields
are
present
in
the
hardware
.
The
sensor
can
be
mounted
in
any
orientation,
and
is
not
required
to
be
installed
in
the
same
horizontal
plane
as
the
boat.
NOTE:
You
can
set
the
heading
alignment
automatically
if a
GPS
source
is
connected
to
the
NMEA
2000
network.
If
you
are
not
using
a
compatible
Garmin
chartplotter,
the
boat
must
be
able
to
reach
a
cruising
speed
of
at
least
6.4
km/h
(4
mph}
.
You
can
set
or
fine-
tune
the
heading
alignment
using
Fine
Heading
Alignment
with
a
compatible
Gam1in
chartplotter
. If
these
options
are
not
available,
you
must
align
the
heading
by
adjusting
the
sensor
installation
manually
to
point
the
arrow
parallel
to
the
front
of
the
boat.
Mounting
the
Sensor
You
can
mount
the
sensor
with
the
cable
along
the
mounting
surface
or
with
the
cable
routed
through
the
mounting
surface
under
the
sensor.
1
Select
a
mounting
location
(page
2)
.
2 If
you
plan
to
route
the
cable
through
the
mounting
surface,
use
a
25
mm
(1
in
.}
drill
bit
to
drill
the
cable-passthrough
hole
into
the
mounting
surface
at
the
selected
mounting
location.
3 If
necessary,
route
the
cable
through
the
cable
passthrough
hole
.
4
Using
a
bit
appropriate
for
the
mounting
surface
and
mounting
hardware
,
drill
two
pilot
holes
(optional}
.
5
Secure
the
sensor
to
the
mounting
surf
ace,
observing
these
guidelines
for
best
performance
:
If
you
are
using
your
own
mounting
hardware
instead
of
the
included
screws,
test
the
hardware
for
magnetic
interference
(page
2).
Do
not
use
excess
i
ve
force
when
installing
mounting
screws.
Use
on
ly
the
amount
of
force
needed
to
keep
the
sensor
in
place
.
Apply
force
evenly
between
the
mounting
screws
.
Inst
a
ll
the
mounting
screws
perpendicular
to
the
mounting
surface
(not
at
an
angle}
.
The
heads
of
the
In
sta
ll
a
tion
In
s
tru
ctions
screws
should
rest
in
the
center
of
the
grooves.
6
Route
the
cable
to
the
NMEA
2000
network.
7 If
you
routed
the
cab
le
through
the
mounting
surface,
fill
the
cable
hole
in
the
side
of
the
sensor
with
marine
sealant
(optional}.
NMEA
2000
Connection
Considerations
This
sensor
connects
to
an
existing
NMEA
2000
network
on
your
boat.
If
the
integrated
NMEA
2000
drop
cable
is
not
long
enough
to
reach
your
NMEA
2000
network
, a
drop
cable
extension
of
up
to
4 m
(13
ft
.)
can
be
used,
according
to
the
NMEA
2000
guidelines
.
(j)
Heading
sensor
®
NMEA
2000
power
cable
(existing
;
not
included)
@
Ignition
or
in-l
i
ne
switch
(existing
;
not
included)
©
12
Vdc
power
source
@
NMEA
2000
T-connector
(incl
uded)
@
NMEA
2000
terminator
or
backbone
cable
(exi
sting
;
not
i
ncluded)
Calibration
After
installation
is
complete,
you
must
calibrate
the
heading
sensor
for
best
r
esults
.
Depending
on
the
types
of
devices
connected
to
the
NMEA
2000
network
,
you
can
calibrate
the
sensor
using
either
a
menu-
based
method
or
a
basic
method
.
When
you
connect
the
sensor
to
the
same
NMEA
2000
network
as
a
compatible
Garmin
chartplotter,
you
are
prompted
to
begin
menu-based
cal
i
brat
i
on
when
the
chartplotter
detects
the
new
sensor
(page
4)
.
Go
to
www.garmin
.
com
for
a
list
of
compatible
chartplotters
.
NOTE:
A
software
update
available
in
mid
-
2017
enables
you
to
perform
menu
-
based
calibration
using
a
compatible
chartplotter.
If
your
chartplotter
has
software
t
hat
predates
th
is
update
,
you
must
perform
basic
cal
ibra
tion
.
If
you
conn
ec
t
the
sensor
to a
NM
EA
2000
network
without
a
compatible
Garmin
-
3

Questions and Answers:

Question and Answer IconNeed help?

Do you have a question about the Garmin STEADYCAST HEADING SENSOR and is the answer not in the manual?

Garmin STEADYCAST HEADING SENSOR Specifications

General IconGeneral
BrandGarmin
ModelSTEADYCAST HEADING SENSOR
CategoryAccessories
LanguageEnglish

Related product manuals