F
7. Place the bike in the trainer, push down the lever and rotate the knob clockwise until the roller
slightly touches the rear wheel.
NL Plaats de fiets in de trainer, druk de hendel naar beneden en draai de knop met de klok mee tot de roller net
tegen het achterwiel drukt | DE Platzieren Sie das Fahrrad in den Trainer, drücken Sie den Hebel nach unten
und drehen Sie den Drehknopf im Uhrzeigersinn, bis die Rolle das Hinterrad leicht berührt. | FR Placez le vélo
dans le trainer, poussez le levier vers le bas et tournez le bouton dans le sens horaire jusqu’à ce que le rouleau
touche légèrement la roue arrière. | ES Coloque la bicicleta en el rodillo de entrenamiento, empuje la palanca
hacia abajo y gire el mando en el sentido de las agujas del reloj, hasta que toque ligeramente la rueda trasera. |
IT Appoggiare la bici nel trainer, premere la leva e ruotare la manopola in senso orario finché il rullo non tocca
leggermente la ruota posteriore. | DA Placér cyklen i træningsenheden, skub håndtaget ned, og drej knappen
med uret, indtil rullen berører baghjulet en smule. | NO Plasser sykkelen i rullen, skyv hendelen ned og vri
dreieknotten med klokken til rullen så vidt berører bakhjulet. | SV Placera cykeln i tränaren, tryck ner spaken
och rotera handtaget medurs tills rullen nuddar bakhjulet lite. | FI Aseta polkupyörä harjoitusvastukseen, paina
vipu alas ja kierrä nuppia myötäpäivään, kunnes rulla koskettaa kevyesti takapyörää. | PL Ustawić rower na
trenażerze, opuścić dźwignię i przekręcić pokrętło w prawo do zetknięcia rolki z tylnym kołem. | CZ Umístěte
kolo do trenažéru, zatlačte páku dolů a otočte knoflíkem po směru hodinových ručiček, dokud se váleček lehce
nedotkne zadního kola. | EL Τοποθετήστε το ποδήλατο στο προπονητήριο, πιέστε κάτω τον μοχλό και γυρίστε το
κουμπί δεξιόστροφα μέχρι ο κύλινδρος να αγγίζει ελαφρά τον πίσω τροχό. | HR Postavite bicikl u trenažer, gurnite
polugu prema dolje i okrećite gumb u smjeru kazaljke na satu dok valjak blago ne dotakne stražnji kotač. | ET
Paigutage jalgratas treeningpukile, lükake hoob alla ja pöörake nuppu päripäeva, kuni rullik puudutab tagaratast.
| LV Ievietojiet velosipēdu trenažierī, nospiediet uz leju sviru un pagrieziet pogu pulksteņrādītāja kustības virzienā,
līdz veltnis nedaudz pieskaras aizmugurējam ritenim. | LT Įdėkite dviratį į treniruoklį, paspauskite svirtį žemyn ir
sukite rankenėlę pagal laikrodžio rodyklę, kol velenėlis šiek tiek palies galinį ratą. | PT-BR Coloque a bicicleta no
simulador, empurre a alavanca para baixo e rode o botão no sentido dos ponteiros do relógio até o rolo encostar
ligeiramente na roda traseira. | RO Așezați bicicleta în trainer, apăsați pe manetă și rotiți de buton în sens orar,
până când rola tinge ușor roate din spate. | SK Bicykel vložte do trenažéra, stlačte páčku a otáčajte gombík v
smere hodinových ručičiek, až kým sa valec mierne nedotýka zadného kolesa. | SL Namestite kolo v trenažer,
pritisnite vzvod navzdol in obračajte gumb v desno, dokler se valj rahlo ne dotakne zadnjega kolesa. |
HE
8. Pull up the lever to release the rear wheel and rotate the knob 360
o
clockwise for 5 times for an
optimal performance in the Tacx app. Then push down the lever.
NL Haal de hendel omhoog om de druk van het wiel te halen en draai de knop 5 keer 360° voor een optimale
prestatie in de Tacx app. Druk daarna de hendel naar beneden. | DE Ziehen Sie den Hebel hoch, um das Hinterrad
zu lösen, und drehen Sie den Drehknopf um 360 Grad 5 Mal im Uhrzeigersinn für eine optimale Leistung in der
Taxc-App. Drücken Sie dann den Hebel nach unten. | FR Tirez la manette pour débloquer la roue arrière et tournez
5 fois le bouton de 360° dans le sens horaire pour obtenir des performances optimales dans l’application Tacx.
Ensuite, poussez la manette vers le bas. | ES Levante la palanca para liberar la rueda trasera y gire el mando
360º en el sentido de las agujas del reloj cinco veces para obtener un rendimiento óptimo en la aplicación Tacx. A
continuación, empuje la palanca hacia abajo. | IT Sollevare la leva per sbloccare la ruota posteriore e ruotare la
manopola in senso orario di 360° per 5 volte per il funzionamento ottimale dell’app Tacx. Quindi, abbassare la leva.
| DA Træk op i håndtaget for at frigøre baghjulet, og drej knappen 360o med uret 5 gange for at opnå optimal ydelse
i Tacx-appen. Skub derefter håndtaget ned. | NO Trekk i hendelen for å frigjøre bakhjulet, og vri dreieknotten 360
grader med klokken 5 ganger for en optimal ytelse i Tacx-appen. Deretter trykker du hendelen ned. | SV Dra upp
spaken för att släppa bakhjulet och rotera handtaget 360o medurs 5 gånger för bästa prestanda i Tacx-appen.
Tryck sedan ner spaken. | FI Vapauta takapyörä nostamalla vipu ylös ja kierrä nuppia 360° myötäpäivään 5 kertaa,
jotta Tacx-sovellus toimii optimaalisesti. Paina sitten vipu alas. | PL Podnieść dźwignię, aby zwolnić tylne koło i
pięciokrotnie obrócić pokrętło o 360° w prawo, aby uzyskać najlepsze wyniki działania aplikacji Tacx. Następnie
nacisnąć dźwignię. | CZ Zatažením za páku uvolníte zadní kolo a otočením knoflíku o 360° ve směru hodinových
ručiček 5× získáte optimální výkon v aplikaci Tacx. Poté stlačte páku dolů. | EL Τραβήξτε επάνω τον μοχλό για
να ελευθερώσετε τον πίσω τροχό και γυρίστε το κουμπί 5 φορές 360o δεξιόστροφα για βέλτιστες επιδόσεις στην
εφαρμογή Tacx. Κατόπιν πιέστε κάτω τον μοχλό. | HR Polugu povucite prema gore kako biste otpustili stražnji
kotač i gumb okrenite u smjeru kazaljke na satu za 360 stupnjeva 5 puta za optimalnu izvedbu u aplikaciji Tacx.
Zatim polugu gurnite prema dolje. | ET Tõmmake hooba tagaratta vabastamiseks ja pöörake nuppu viis korda
360 päripäeva, et saavutada Tacxi rakenduses optimaalne jõudlus. Seejärel vajutage hoob alla. | LV Pavelciet sviru
uz augšu, lai atbrīvotu aizmugurējo riteni, un pagrieziet pogu 360 pulksteņrādītāja kustības virzienā 5 reizes,
lai nodrošinātu optimālu darbību Tacx lietotnē. Pēc tam nospiediet sviru uz leju. | LT Patraukite svirtį aukštyn,
kad atleistumėte galinį ratą, ir pasukite rankenėlę 360 laipsnių pagal laikrodžio rodyklę 5 kartus, kad „Tacx“
programėlė veiktų optimaliai. Tada paspauskite svirtį žemyn. | PT-BR Puxe a alavanca para cima para soltar a roda
traseira e rode o botão 5 voltas de 360º no sentido dos ponteiros do relógio para conseguir o melhor desempenho
na aplicação Tacx. De seguida, empurre a alavanca para baixo. | RO Trageți de manetă pentru a elibera roata
din spate și rotiți rozeta la 360 de grade în sens orar de 5 ori pentru funcționarea optimă a aplicației Tacx. Apoi,
împingeți maneta în jos. | SK Potiahnutím páčky hore uvoľnite zadné koleso a 5-krát otočte gombík o 360° v smere
hodinových ručičiek, aby ste dosiahli optimálny výkon v aplikácii Tacx. Potom potlačte páčku dolu. | SL Povlecite
vzvod navzgor, da sprostite zadnje kolo in obrnite gumb za 360° v desno 5-krat za optimalno delovanje v aplikaciji
Tacx. Vzvod nato potisnite navzdol. | HE
9. Measure the diameter of your handlebars and place the proper insert in the resistance lever.
NL Meet de stuurdiameter en plaats de juiste inlage in de stuurschakelaar | DE Messen Sie den Durchmesser Ihres
Lenkers, und setzen Sie den passenden Einsatz in den Hebel. | FR Mesurez le diamètre du guidon et placez l’insert
adapté dans la manette de résistance. | ES Mida el diámetro del manillar y coloque la inserción adecuada en la
palanca de resistencia. | IT Misurare il diametro dei manubri e inserire nella leva del cambio l’inserto corretto.
| DA Mål diameteren på dit styr, og anbring den rigtige forsats i modstandshåndtaget. | NO Mål diameteren på
sykkelstyret og plasser den riktige innsatsen i motstandshendelen. | SV Mät diametern på styrstången och placera
rätt inlägg i motståndsspaken. | FI Mittaa ohjaustangon halkaisija ja aseta vastuksen säätövipuun oikeankokoinen
välikappale. | PL Zmierzyć średnicę kierownicy i umieścić odpowiednią wkładkę w dźwigni regulacji oporu. |
CZ Změřte průměr řídítek a vložte správnou vložku do páčky pro nastavení odporu. | EL Μετρήστε τη διάμετρο
του τιμονιού και τοποθετήστε το κατάλληλο ένθετο στον λεβιέ ρύθμισης αντίστασης. | HR Izmjerite promjer
vaših upravljača i umetnite odgovarajući umetak u polugu otpora. | ET Mõõtke oma lenksu läbimõõt ja kinnitage
vastupanuhoovale sobivas mõõdus ühendusdetail. | LV Izmēriet stūres diametru un ievietojiet pareizo ieliktni
pretestības svirā. | LT Išmatuokite rankenų skersmenį ir įstatykite tinkamą įdėklą į pasipriešinimo svirtį. | PT-BR
Meça o diâmetro dos seus guiadores e coloque a peça de encaixe apropriada no regulador de resistência. | RO
Măsurați diametrul ghidoanelor și așezați piesa de racord corespunzătoare în maneta unității de rezistență. | SK
Odmerajte priemer riadidiel a do odporovej páčky vložte správnu vložku. | SL Izmerite premer ročk vašega krmila
in v uporovni vzvod namestite ustrezni vstavek. | HE
10. Place the resistance lever on your handlebars and tighten it by turning the knob.
NL Bevestig de stuurschakelaar op het stuur en klem hem vast met de draaiknop | DE Bringen Sie den
Widerstandshebel auf Ihrem Lenker an und ziehen Sie ihn fest, indem Sie den Drehknopf drehen. | FR Placez
la manette de résistance sur le guidon et serrez-la à l’aide du bouton. | ES Coloque la palanca de resistencia
en el manillar y gire el mando para apretarla. | IT Inserire la leva del cambio nei manubri e serrarla ruotando
la manopola.| DA Anbring modstandshåndtaget på styret, og spænd det ved at dreje på knappen. | NO Plasser
motstandshendelen på sykkelstyret og stram til ved å vri dreieknotten. | SV Placera motståndsspaken
på styrstången och spänn den genom att vrida på handtaget. | FI Sovita vastuksen säätövipu paikoilleen
ohjaustankoon ja kiristä se nuppia kiertämällä. | PL Umieścić dźwignię regulacji oporu na kierownicy i zamocować
poprzez obrót pokrętła. | CZ Umístěte páčku pro nastavení odporu na řídítka a utáhněte ji otáčením knoflíku. |
EL Τοποθετήστε τον λεβιέ ρύθμισης αντίστασης στο τιμόνι και σφίξτε τον γυρίζοντας το κουμπί. | HR Postavite
polugu otpora na vaše upravljače i pritegnite je okretanjem gumba. | ET Paigaldage vastupanuhoob lenksule ja
keerake nuppu, et see kohale fikseerida. | LV Novietojiet pretestības sviru uz stūres un pievelciet to, pagriežot
pogu. | LT Uždėkite pasipriešinimo svirtį ant vairo ir priveržkite sukdami rankenėlę. | PT-BR Coloque o regulador
de resistência nos guiadores e aperte-o rodando o botão. | RO Amplasați maneta rezistenței pe ghidoane și
strângeți-o prin rotirea rozetei. | SK Odporovú páčku umiestnite na riadidlá a utiahnite ju otáčaním gombíka. | SL
Uporovni vzvod namestite na ročke vašega krmila in ga z obračanjem gumba zategnite. | HE
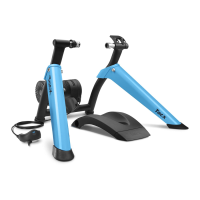
Boost Bundle
PUSH YOUR LIMITS
Owner’s manual
EN | NL | DE | FR | ES | IT | DA | NO | SV | FI | PL | CZ
EL | HR | ET | LV | LT | PT-BR | RO | SK | SL | HE
1
2
3
4
2
1
5x, 360
o
3
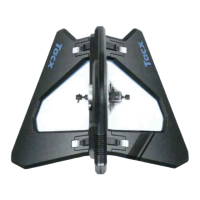
1x T1467.08
31.8 mm 26 mm
1x T1467.091x T1467.17
What are my training options?
Virtual power allows you to:
- Ride Tacx Films in the Tacx Training app.
- Ride a GPS track in the Tacx Training app.
- Ride with the Zwift app.
- Ride with the TrainerRoad app.
- Keep track of your speed and estimated power. Cadence
data requires an optional cadence sensor.
When using the Tacx or Zwift app, it’s best to keep the
resistance lever on position 2 so the resistance will not
change.
Instructions
1. Mount the speed sensor on the rear wheel hub
according to the sensor’s manual.
2. Open the app you wish to use.
3. Pair the speed sensor in the app.
4. Select your wheel diameter.
5. Select the Tacx Boost as trainer.
6. The sensor is connected.
7. When using the Tacx app or Zwift app, set the
resistance lever on your handlebar to position 2.
What is virtual power?
The app estimates your power based on the speed
readings it gets from the sensor and the resistance
position of the resistance lever on your handlebars. This
estimation is based on the trainers power curve. The
power curve chart (below) shows you the power (watts)
required to achieve a given speed at each resistance
setting and is unique for each basic trainer model.
So, virtual power is an estimation of your actual power
based on your speed and not a precise measurement.
GETTING STARTED
010-02419-02 | 2021-02
Printed in the Netherlands
190-02717-03_0B
.ירוחאה לגלגב טעמ עגיי רלורהש דע ןועשה ןוויכ םע תלגלגה תא בבוסו תידיה תא הטמ ףחד ,רניירטה לע םיינפואה תא םקמ
םימעפ 5 ןועשה ןוויכ םע 360o תלגלגה תא בבוסו ירוחאה לגלגה תא ררחשל ידכ תידיה תא הלעמ ךושמ
.תידיה תא הטמ ףחד ןכמ רחאל .Tacx םושייב םיילמיטפוא םיעוציבל
.תודגנתהה תידי ךותב םיאתמה קלחה תא םקמו ךלש ןודיכה רטוק תא דודמ .תלגלגה בוביס ידי לע התוא קדהו ךלש ןודיכה לע תודגנתהה תידי תא םקמ
Manual_Boost_Bundle_A5_B.indd 1-6Manual_Boost_Bundle_A5_B.indd 1-6 2/18/2021 12:09:45 PM2/18/2021 12:09:45 PM