This document provides a comprehensive guide for the GARUDAN GOV-2004-24 and GOV-2005-34 industrial sewing machines, covering their function, technical specifications, usage, and maintenance.
Function Description
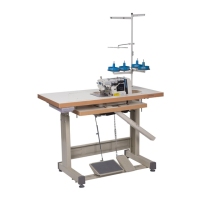
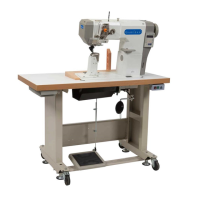
The GARUDAN GOV-2004-24 and GOV-2005-34 are basic four-thread/five-thread overlock sewing machines equipped with a servomotor and a lower differential feed. This differential feed mechanism allows for either stretching or gathering the sewn material, making them versatile for various fabric types. The machines feature integrated LED lighting, ensuring good visibility of the work area, and are designed for low vibration and noise levels. They are intended for light to medium-duty operation, suitable for daily 8-hour work in tailoring shops and similar environments.
Important Technical Specifications
The two models, GOV-2004-24 and GOV-2005-34, share many specifications but differ primarily in their thread count and stitch width.
- Application: Both models are designed for light to medium-heavy materials.
- Stitch Type: The GOV-2004-24 is a 4-thread machine (class #514), while the GOV-2005-34 is a 5-thread machine (class #516).
- Stitch Length: Both models offer a stitch length range of 0.8 - 3.8 mm.
- Stitch Width: The GOV-2004-24 has a stitch width of 6 mm, and the GOV-2005-34 has a stitch width of 7 mm.
- Needle Gauge: The GOV-2004-24 has a needle gauge of 2 mm, and the GOV-2005-34 has a needle gauge of 3 mm.
- Presser Foot Lift: Both models feature a presser foot lift of 5.5 mm.
- Number of Needles: Both machines use 2 needles.
- Needle System: The needle system for both is B27.
- Needle Size: Recommended needle sizes are Nm. 75-90.
- Lubrication: Both models feature automatic lubrication.
- Lubricating Oil: The recommended lubricating oil is M22.
- Drive: An integrated 1x230V servomotor powers both machines.
- Head Weight: The head weight is 33 kg.
- Base Weight: The base weight is 25 kg.
- Power Consumption: The power consumption is 550 W.
- Footprint (including stand): 1070 x 550 mm.
- Working Table Height: 655-810 mm.
- Machine Height (including thread stand): 1540 mm.
- Equivalent Acoustic Pressure Level: 73 dB/A (at 50% machine utilization and standard sewing conditions).
- Maximum Sewing Speed: 6,500 stitches/min. It is important to note that this maximum speed should not be exceeded to ensure the longevity of the machine's mechanism. The actual achievable speed may vary depending on the thread, needle, material, stitch length, and presser foot step.
Usage Features
The manual provides detailed instructions for operating the sewing machine, including:
- Access for Threading: Instructions are given on how to open the machine covers and lift the presser foot to access the threading points. This involves pulling a cover in the direction of an arrow, opening another cover by pressing a lever, and then pressing a third lever to lift the presser foot.
- Threading: A step-by-step guide with diagrams illustrates how to thread the machine. For easier threading, it is recommended to cut the thread at specific points and to release the tension discs by pulling them towards each other. The manual differentiates between threading for needle threads and looper threads, providing detailed diagrams for each.
- Thread Tension Adjustment: Thread tension is adjusted using numbered tensioners for the needle thread, upper looper thread, and lower looper thread. Turning the knob clockwise increases tension, while turning it counter-clockwise decreases tension. A tip suggests using different colored threads to better understand stitch formation.
- Presser Foot Pressure Adjustment: The presser foot pressure is adjusted by loosening a nut and turning a screw. Clockwise rotation increases pressure, and counter-clockwise rotation decreases it. The manual emphasizes setting the pressure to the minimum necessary for proper stitch formation and to prevent material slippage during acceleration, which can cause stitch shortening or thickening.
- Differential Feed Adjustment: The differential feed is adjusted by loosening a nut and moving a lever up or down. Moving the lever up (in the direction of the '+' sign) will gather the material, while moving it down (in the direction of the '-' sign) will stretch it. Fine-tuning is done with an adjustment screw.
- Stitch Length Adjustment: Stitch length is adjusted by pressing a knob (indicated by an arrow) and rotating a handwheel until a desired position is found. The knob is then released. The manual notes that stitch length may need to be re-adjusted after changing the differential feed.
- Needle Replacement: Instructions for replacing the needle emphasize inserting it all the way in and ensuring correct orientation, with the groove facing backward towards the looper.
- Lower Knife Replacement: This involves loosening a screw, pushing the lower knife holder to the left, and then replacing the lower knife. The manual also details how to adjust the new knife, ensuring its cutting edge is level with or slightly below (up to 0.5 mm) the upper edge of the stitch plate. Correct sharpening angles for the knife are also illustrated.
- Control Unit Operation: The manual details the functions of the control unit buttons: 'P' for entering/exiting parameter settings, 'S' for checking/saving parameters, up/down arrows for navigation and value adjustment, a light button for LED brightness, a needle position button, and a 'RESET' button for system restart. Instructions are provided for restarting the system, entering user parameters, and entering service parameters.
- Parameters: A table lists user and service parameters, including maximum/minimum sewing speed, needle stop position, slow start activation, acceleration time, LED brightness, motor rotation direction, automatic operation speed/time, and error codes.
Maintenance Features
The manual outlines essential maintenance procedures to ensure the machine's longevity and optimal performance:
- Lubrication:
- Mechanism Lubrication: The machine uses M22 viscosity sewing machine oil, preferably from Garudan. Oil is added to a designated spot, and the indicator should show the oil level between the 'H' (High) and 'L' (Low) marks. If the level drops below 'L', oil should be added.
- Manual Lubrication: 2-3 drops of M22 oil should be manually applied to specific points (needle bar and upper looper holder/shaft) for new machines or those unused for extended periods.
- Oil Circulation Check: During sewing, the oil circulation should be checked through a designated window.
- Oil Filter Check and Replacement: The oil filter should be checked and replaced every six months.
- Oil Change: The oil should be changed after the first month of use and then every six months. Used oil is drained via a screw.
- Thread Lubrication: If needed, silicone oil should be applied to designated reservoirs after removing the covers. This helps prevent thread breakage and damage to the fabric from high needle temperatures.
- Cleaning: The machine should be cleaned daily, focusing on the stitch plate and feed dog area.
The manual also includes a list of error codes and their corresponding solutions, such as checking power supply, pedal connection, motor blockage, or sensor connections, and advises contacting service if problems persist.