SET-UP INSTRUCTIONS
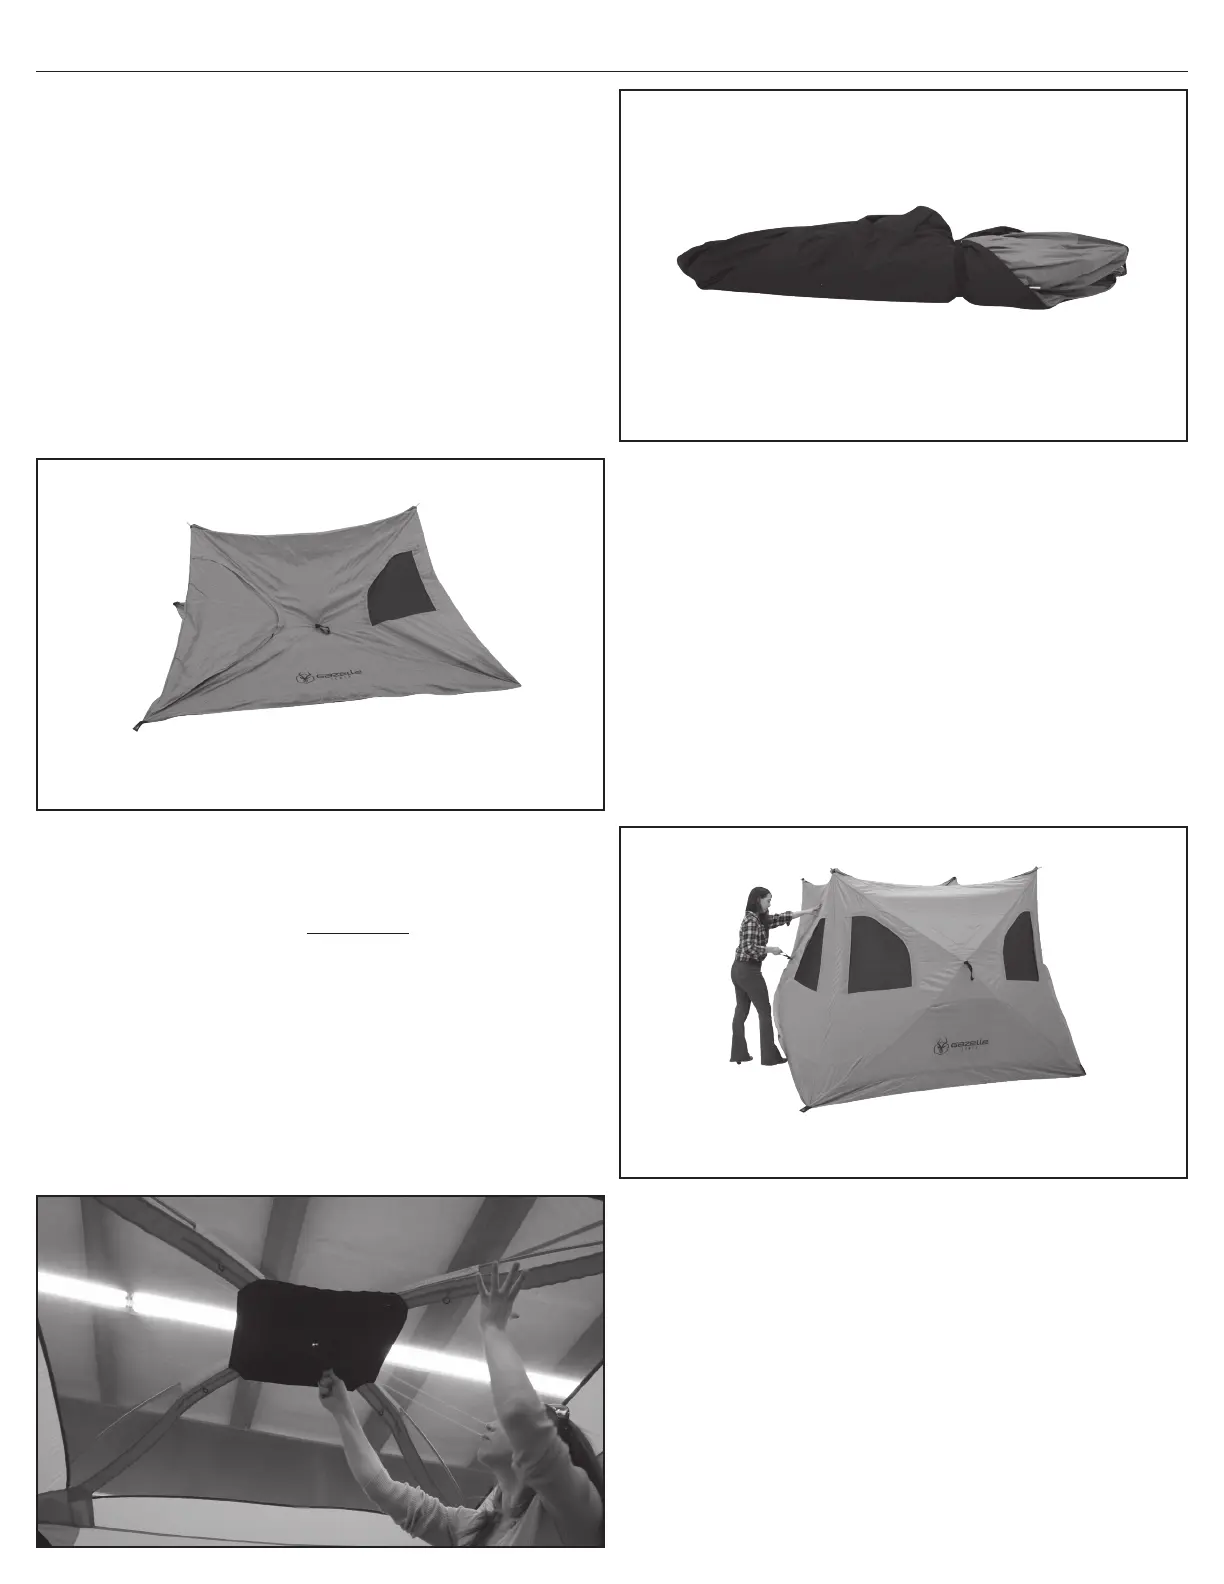
4. Once all walls are popped open, locate the zipper door, unzip
both the outer door and mesh door, and enter the tent. Once
inside, nd the hub for the roof. Proceed to push up on the hub
OR roof poles until it pops over center. [ SEE FIGURE 4 ]
NOTE: This step should be done with caution as there is tension
on the roof hub and pole assemblies.
OPTIONAL: To attach the overhead gear lofts, insert toggles into
the “O” rings on the inside of the roof.
FIGURE 4
1. Remove the tent from the due bag. Remove the tie strap from
around the tent. [ SEE FIGURE 1 ]
FIGURE 1
2. Lay the tent at on the ground and check that there is no
material twisted or overlapping the ends of any poles.
DO NOT force tent when folding or unfolding. Watch for the
entanglement of poles. [ SEE FIGURE 2 ]
NOTE: When unfolding, check that the Gazelle logo and webbing
loops are visible. This is the EXTERIOR of the tent. The poles and
hubs are the INTERIOR of the tent.
NOTE: For easy set-up in windy conditions, make sure to posi-
tion one of the corners of the tent into the wind, and stake that
corner down through the provided grommet.
FIGURE 2
3. Find the webbing loop handle located on the exterior of each
hub, centered on each wall. Proceed to pull outward until the
wall pops open. Do this to all SIDE WALLS rst. [ SEE FIGURE 3 ]
NOTE: For added assistance, grasp the top seam of the panel and
place your foot on the bottom edge when popping open a side
wall panel to help hold the tent in place.
NOTE: At this time, the rain y can be attached. See ATTACHING
THE RAIN FLY for further instruction.
NOTE: The tent is usable with or without the rain y installed but
will not protect from the rain/elements without.
FIGURE 3
 Loading...