Do you have a question about the GBC AP-2 and is the answer not in the manual?
Explains the function of the Safety Alert symbol preceding safety messages.
Details warning symbols for electrical shock hazards, indicating potential severe injury or death.
Warns about crushing fingers/hands from the upward movement of the Output Stacker.
Warns that clothing, hair, or loose articles can get entangled in moving parts.
Explains the meaning of ISO, IEC, and operating symbols used on the AP-2.
Describes symbols displayed on the unit, indicating machine status and functions like Jog Time.
Read manual before operating and receive training. Save manual for future use.
Keep hands, hair, and items away from moving parts. Do not override interlocks.
Avoid inserting objects or spilling liquids to prevent shock or fire.
Connect to specified supply, ensure accessible outlet, do not alter plug.
Turn power off daily. Unplug when not in use for extended periods.
Do not self-service. Contact GBC for damaged cords, spills, water, or drops.
Details FCC compliance for Class A devices and potential radio interference.
Describes the three components: plug, cordage, and appliance inlet, all requiring safety approvals.
Specifies minimum voltage, amperage, and frequency requirements for the cordset.
Details plug specifications including amperage, voltage, frequency, class, and conductor type.
Defines cordage type (H05 V V-F 3G0.75 Harmonized) and approval marks.
Specifies appliance connector type (IEC 320), voltage, frequency, and maximum length.
Lists acceptable paper dimensions from 5½" x 5½" to 12" x 11".
Specifies acceptable paper weight range from 16# bond to 110# index.
Notes that glossy, coated, laminated, and plastic stocks are not recommended.
States maximum sheets per hour and cycles per hour with GBC pattern die.
Indicates the maximum number of sheets the feed hopper and output stacker can hold.
Provides the physical dimensions of the AP-2 in inches and centimeters.
States the weight of the AP-2 in pounds and kilograms.
Lists power requirements, including voltage, frequency, amperage, and wattage.
Specifies the interrupt capacity of the electrical system.
Defines the operating temperature range for the machine.
Specifies acceptable humidity levels (non-condensing).
Indicates the maximum operating altitude in meters and feet.
States the noise level produced by the machine in decibels.
Indicates the year the product was first manufactured.
Located on the rear, turns power ON/OFF. LCD display illuminates when ON.
Located on the right side, must be down for operation; prevents operation when raised.
Collects paper chips; display notifies when to empty. Auto-resets when opened.
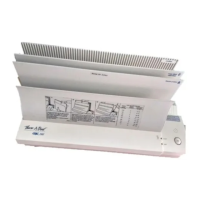
Holds paper stacks; operator can load continuously while machine runs.
Holds paper stack in place and advances it; must be centered on belts.
Collects punched sheets in collated order; lowers automatically as it fills.
Located on output stacker, used to adjust for various paper lengths.
Located on the output stacker, gently tap paper for better justification.
Selects the lift for punching from the paper stack in the input hopper.
Adjusts the Pick Head to accommodate various paper stocks, covers, and curled paper.
Located at the rear of the Feed Hopper; used to align paper edge when loading.
Located on the left side of the Feed Hopper; used to position the paper.
Two knobs on front and rear to adjust paper path positioning.
Guides paper into the die set; must be in place for operation.
Located beneath the die set; must be depressed to release jammed paper.
Lever on the back to lock/unlock the die set.
Latches in the punch area to secure the die set.
Blocks underneath latches to be rotated off/onto the die set drive bar.
Navigates menus, changes settings like Jog Time, Long Paper, and Back Curl.
Used for immediate shutdown in emergencies; located on panel and back.
Used to make selections within the menu system.
Starts/stops the machine and clears errors.
Details how to remove pins from die sets for specific paper sizes.
Step-by-step instructions for correctly installing the die set into the machine.
Step-by-step instructions for safely removing the die set.
Simple adjustments needed to change between paper sizes.
Adjusts edge guides on input hopper, path, and output side for proper alignment.
Steps to adjust paper height for sheets less than 9 inches.
Steps to adjust paper height for sheets greater than 9 inches.
Adjustments for paper printed on high-speed printers or with static/curl.
How to increase jog time for difficult paper stocks or covers.
How to decrease/increase the number of sheets fed for better quality or productivity.
Ensures die set, paper guide, chip tray, and safety shield are correctly set before operation.
Steps for connecting power, loading paper, and starting the punching process.
Procedures for removing jammed paper and resolving other common error conditions.
Lists common errors like MCR/Lid Open, Paper Jam, No Paper, Redirect Jam, Stack full.
Notes that sheets remain collated; documents can be loaded face inward or outward.
Covers and paper stocks of various thickness can be intermixed if bind edge is the same.
Proper methods for fanning and stacking paper to ensure efficient feeding.
Recommended methods for removing paper from the output stacker efficiently and safely.
Explains how paper curl affects feeding and punching, and initial solutions.
Provides solutions for paper curl away from the pick feeder.
Solutions for paper curling towards the pick feeder, including using adjustment knob.
Addresses paper clinging due to static or toner, and suggests solutions.
Discusses suitability of coated, laminated, plastic, and other special paper types.
Guidance on punching paper coated on one or two sides, and when to use slip sheets.
Lists acceptable and not recommended GBC cover stocks.
How to handle sheets with die cuts or windows that may affect feeding.
Notes that color copies have more curl/static and may require cooling before punching.
Addresses causes like curl, unacceptable paper, lift thickness, and loading issues.
Troubleshoots causes like static, toner, misaligned guides, or sheets.
Addresses causes like improperly adjusted edge guides or misaligned sheets.
Troubleshoots issues related to die set pins or edge guide adjustments.
Solution for not being able to punch paper with an unbound edge over 9 inches.
Troubleshoots jams after the redirector, including sensor issues.
Addresses jams in the punch area due to lift thickness, paper type, or paper guide.
Troubleshoots jams in the output area due to stuck paper or incorrect adjustment.
Addresses reasons for the AP-2 stopping, such as full stacker, empty hopper, or open safety shield.
| Brand | GBC |
|---|---|
| Model | AP-2 |
| Category | Binding Machine |
| Language | English |