Do you have a question about the GE Medical Systems LOGIQ ?200 and is the answer not in the manual?
| Brand | GE Medical Systems |
|---|---|
| Model | LOGIQ ?200 |
| Category | Medical Equipment |
| Language | English |
Essential warnings about equipment operation and servicing.
Safety warnings provided in multiple languages for user comprehension.
Overview of the manual's chapters and their respective contents.
Crucial safety warnings and notices for operating and servicing the LOGIQ α200.
Details on equipment protection against electric shock and leakage current.
Information on Electromagnetic Compatibility and installation requirements.
Notices on product modification, cover status, and EMC countermeasures.
Addresses and contact details for GE Medical Systems service centers globally.
Electrical, operational, and environmental considerations before system installation.
Details on physical specs, operating conditions, patient comfort, and EMI.
Requirements and layout guidelines for an optimal ultrasound room setup.
Steps for installing the LOGIQ α200, including time, warnings, and component checks.
Detailed steps for safely unpacking the LOGIQ α200 unit from its packaging.
Instructions for installing the optional MTZ probe holder.
Procedures for connecting transducers, moving the unit, and adjusting the system clock.
Instructions for filling out and submitting the product locator installation card.
Introduction to system configuration and details on unit dimensions.
Details on power supply, facility receptacles, and storage/operation requirements.
Overview of optional peripherals and the rear connector panel layout.
Lists of suggested recording devices and transducers for the LOGIQ α200.
Lists of test points, LEDs, and DIP switch settings for system diagnostics.
Details on system LEDs, DIP switches, and the reset switch functionality.
Procedures for verifying basic functions and controls of the LOGIQ 200 console.
Steps to perform and expected results for the M-Mode function check.
Procedures for accessing the SMPS Assy and performing adjustments.
Detailed steps for adjusting SMPS voltages and measurements.
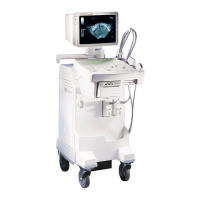
Introduction to the LOGIQ 200 system, its features, and types of applications.
Visual representation of the LOGIQ 200 system's main components and their connections.
Detailed schematic showing electrical connections and wiring of the LOGIQ 200.
Table listing circuit boards and their assignments on the motherboard.
Comprehensive lists of replacement parts for the LOGIQ α200.
Diagram showing major blocks of the operator console with FRU references.
Detailed list of specific renewal parts (FRU 100-106) with part numbers and descriptions.
Detailed list of specific renewal parts (FRU 201-211) with part numbers and descriptions.
Detailed list of specific renewal parts (FRU 301-309) with part numbers and descriptions.
Detailed list of specific renewal parts (FRU 401-412) with part numbers and descriptions.
Detailed list of specific renewal parts (FRU 501-505) with part numbers and descriptions.
Detailed list of specific renewal parts (FRU 601-609) with part numbers and descriptions.
Detailed list of specific renewal parts (FRU 701-715) with part numbers and descriptions.
Instructions for safely disassembling and re-assembling unit components.
Procedure for replacing the monitor assembly unit.
Procedure for replacing the potentiometer knob and set assembly.
Procedure for removing and replacing the CRT filter.
Procedure for removing and replacing the keyboard assembly unit.
Procedure for removing and replacing PC boards, emphasizing ESD precautions.
Procedure for replacing the SMPS Assy unit, including ESD precautions.
Instructions for replacing fuses in the HV Assy and Monitor Assy.
Procedure for replacing fuses F1 and F2 located in the HV Assy.
Procedure for replacing fuse F1 located in the monitor assembly.
Overview of periodic maintenance procedures for reducing downtime and service costs.
Covers cleaning, measurements, battery replacement, and important notes.
Tests for grounding continuity, leakage currents, and wiring arrangement.
Procedure to measure ground wire resistance and ensure proper grounding.
Procedure to test isolation of power line from chassis and measure leakage current.
Measures current flowing from probes to ground through a patient.
Steps to diagnose and resolve issues causing excessive leakage current.
Guidance on managing and placing option installation instructions within the manual.