6
The receiver or monitor must be set to the 1/2
position in order to view both cameras alternately
(see receiver or monitor manuals for specifi c
channel selection requirements).
INSTALLATION
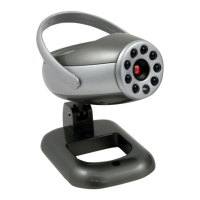
Desktop Mount:
1. Place camera in desired
location on a fl at surface.
2. Set Channel switch on
camera to 1 or 2. Set receiver or
monitor to same channel.
3. Adjust antenna and camera
angle as needed for the clearest
picture.
Wall Mount:
1. To simplify the wall mount process, you will
fi nd a custom mounting plate included with the
mounting hardware.
2. Select the ideal location. Using the supplied wall
mount as a template, drill two 3/16” holes in the
desired mounting location, and install the two wall
anchors (included) into the holes, or screw directly
into a wall stud. Secure the mounting plate to the
wall. Do not run the adapter cable in walls; when
securing the cable, do not cut or puncture.
MIN
SENSITIVITY
MAX
Antenna pivots to
increase/decrease
signal strength