9
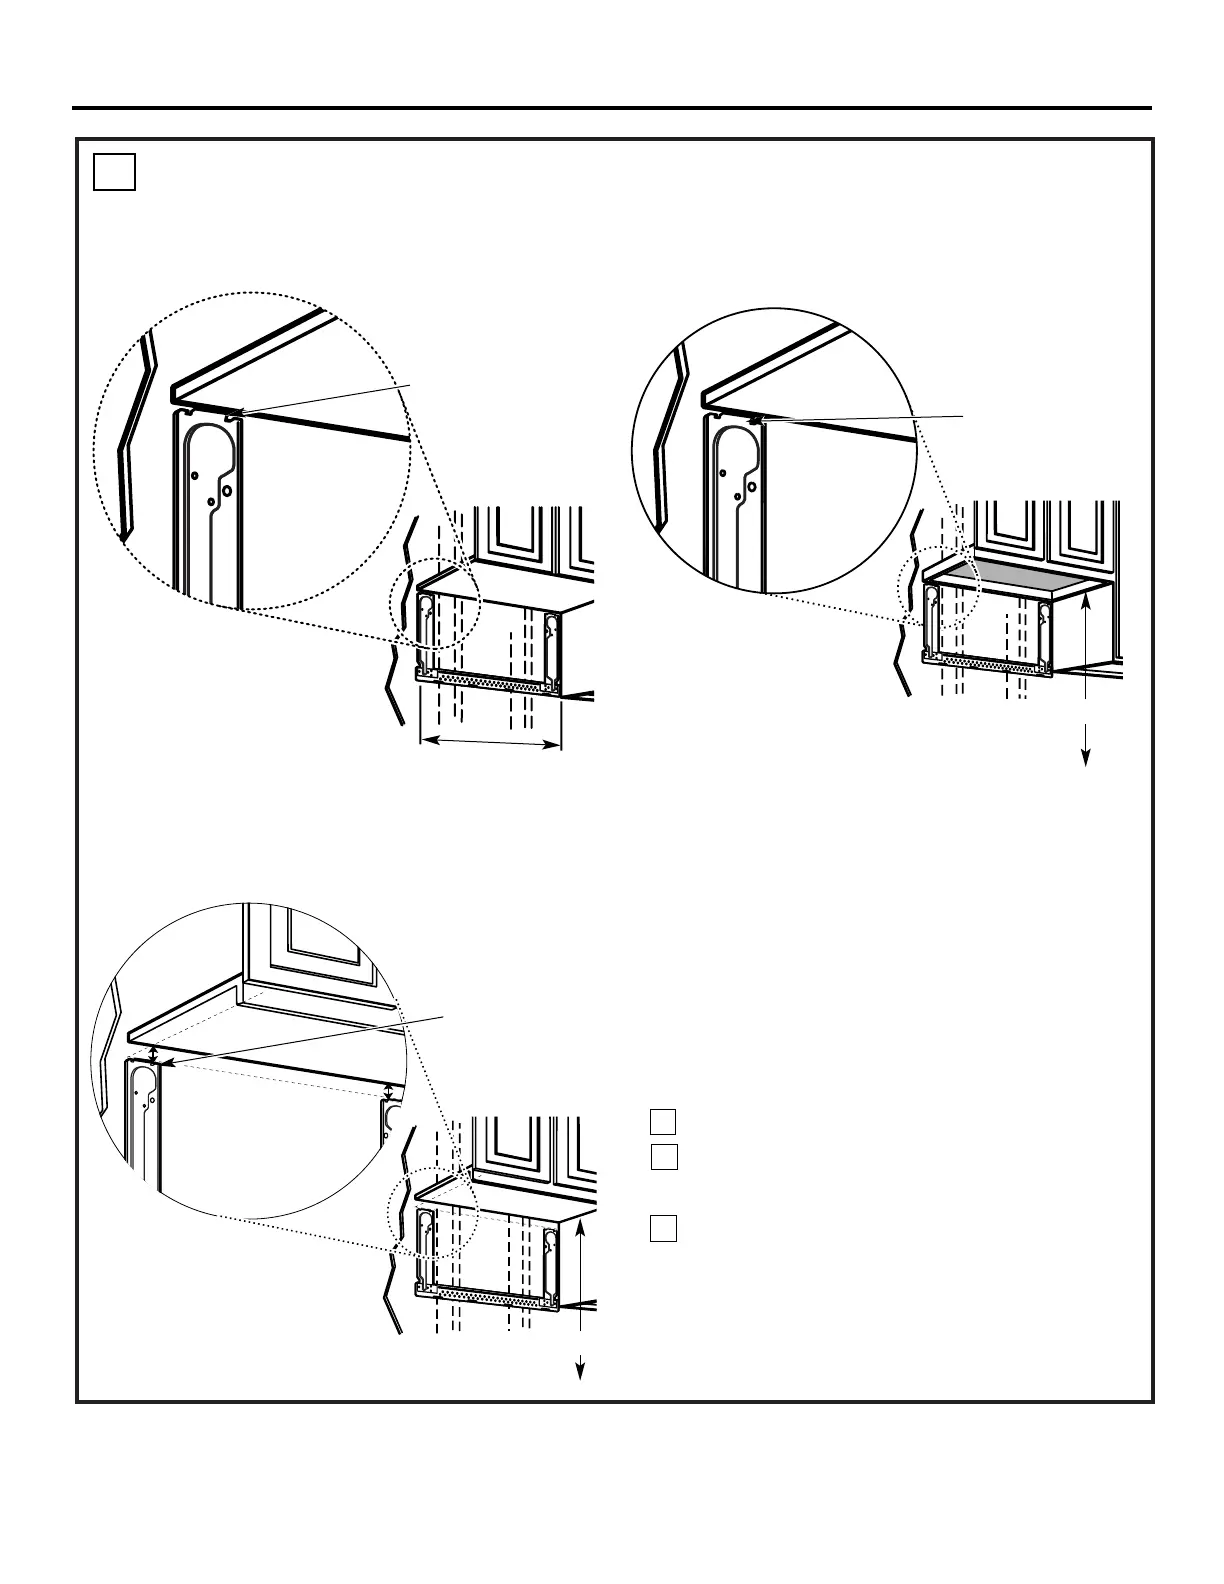
DETERMINING WALL PLATE LOCATION UNDER YOUR CABINET
C.
Your cabinets may have decorative trim that interferes
with the microwave installation. Remove the decorative
trim to install the microwave properly and to make it
level.
THE MICROWAVE MUST BE LEVEL.
Use a level to make sure the cabinet bottom is level.
If the cabinets have a front overhang only, with no
back or side frame, install the mounting plate down
the same distance as the front overhang depth. This
will keep the microwave level.
Measure the inside depth of the front overhang.
Draw a horizontal line on the back wall an equal
distance below the cabinet bottom as the inside
depth of the front overhang.
For this type of installation with front overhang only,
align the mounting tabs with this horizontal line, not
touching the cabinet bottom as described in Step D.
Plate position – beneath flat bottom
cabinet
Plate position – beneath recessed bottom
cabinet with front overhang
Mounting Plate Tabs
Touching the Cabinet Bottom
Mounting Plate with
Tabs Below Cabinet
Bottom the Same
Distance as the Front
Overhang Depth
At least 30″, up to 36″
Plate position – beneath framed recessed
cabinet bottom
Mounting Plate Tabs
Touching the Back
Frame
Installation Instructions
30″ to Cooktop
30″ to Cooktop
1
2
3
 Loading...