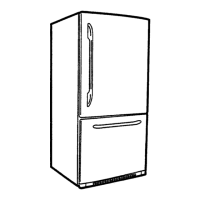
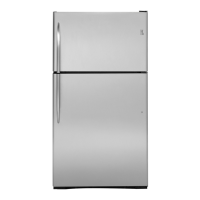
This document is a Technical Service Guide for a GE Consumer Products refrigerator, specifically the 2003 Upgrade, Louisville Built, No Frost Top Freezer, 18-19 Cu. Ft. Refrigerator models, identified by "P" in their model series (ETS19__P, GTH18__P, GTL18__P, GTS18__P, GTS19__P, HTS18__P, STS18__P). It provides comprehensive information for service technicians, covering technical data, components, illustrated parts, schematics, wiring diagrams, and warranty details.
Function Description
This guide details the service and maintenance procedures for GE's 2003 No Frost Top Freezer refrigerators. These models are designed to provide refrigerated and frozen storage for household use, featuring a "Clean Steel™" door and a no-frost system to prevent ice buildup. The refrigerator utilizes a single temperature control for the fresh food compartment and, in GE models, a separate control for the freezer. Hotpoint models have a fixed freezer airflow distribution, requiring manual baffle plate adjustment for temperature changes. The no-frost system ensures that manual defrosting is not required, enhancing user convenience.
Important Technical Specifications
Electrical Specifications:
- Temperature Control (Position 5): 24.5-12.5°F
- Defrost Control: 8 hours @ 30 minutes
- Defrost Thermostat: 58-28°F
- Electrical Rating: 115V AC 60Hz (or 100V AC 50Hz for export models), 6.5 Amp
- Maximum Current Leakage: 0.75 mA
- Maximum Ground Path Resistance: 0.14 Ohms
- Energy Consumption: 18 Cu. Ft. models consume 40 KWH/mo, 19 Cu. Ft. models consume 41 KWH/mo.
No Load Performance (Control Position: Fresh Food 5, Freezer 5):
- Ambient Temperature: 70°F to 90°F
- Fresh Food Temperature: 34-40°F (at 70°F ambient) / 35-39°F (at 90°F ambient)
- Frozen Food Temperature: (-3)-4°F (at 70°F ambient) / (-3)-3°F (at 90°F ambient)
- Run Time: 20-30% (at 70°F ambient) / 41-53% (at 90°F ambient)
- Airflow Distribution: Approximately 90% of airflow is distributed in the freezer, 10% in the fresh food compartment, at Fresh Food 5, Freezer 5 control positions.
Refrigeration System:
- Refrigerant Charge: R134a (refer to rating plate for exact charge)
- Compressor Capacity: 685 BTU/hr
- Minimum Compressor Capacity: 19 inches
- Minimum Equalized Pressure: 52 PSIG (at 70°F), 66 PSIG (at 90°F)
Installation Clearances:
- At Top: 1-inch
- At Sides: 1/8-inch
- At Rear: 1-inch
Replacement Parts (Key Components):
- Condenser Fan Motor: WR60X10044
- Evaporator Fan Motor: WR60X10057
- Defrost Heater: WR51X10031
- Relay: WR07X0194
- Overload: WR08X10046
- Temperature Control: WR09X10044
- Defrost Thermostat: WR50X10025
- Capacitor: WR62X0080
Usage Features
Temperature Control:
- Refrigerator Control: Adjustable from 0 (OFF) to 9 (HIGHEST) to set the fresh food compartment temperature.
- Freezer Control (GE Models): Adjustable from 0 (OFF) to 9 (HIGHEST), with 5 being NORMAL.
- Freezer Air Distribution (Hotpoint Models): Fixed by the baffle plate position. Manual adjustment of the baffle plate is required to change freezer airflow and temperature.
"Clean Steel™" Door:
- A vinyl-laminated steel door designed to mimic stainless steel but offers easier cleaning and better scratch resistance. It is less prone to showing fingerprints and has a galvanized steel substrate to prevent red rust from scratches. Doors are shipped with a protective polyethylene coating.
Maintenance Features
Fresh Food Control Panel Removal and Replacement:
- Involves unplugging the refrigerator, removing screws from the control panel housing, disconnecting electrical connectors, and then removing the baffle.
- The guide provides detailed steps for removing the control rod shaft, knob, and thermostat retaining block.
Baffle Plate Adjustment (Hotpoint Models):
- For Hotpoint models, where freezer air distribution is fixed, the baffle plate can be manually trimmed and repositioned into WARM or COLD slots to adjust freezer temperature.
- Inserting the baffle plate into the WARM slot increases freezer temperature by 3-4°F and lowers fresh food temperature by 3-4°F.
- Inserting the baffle plate into the COLD slot lowers freezer temperature by 3-4°F and raises fresh food temperature by 3-4°F.
Evaporator Fan Motor Removal and Replacement:
- Requires disconnecting power, removing shelves, the ice maker (if installed), light shield, and light bulb.
- Detailed steps are provided for removing the tower housing, evaporator cover, and then disconnecting and removing the fan motor, blade, and associated grommets.
- Emphasizes ensuring the rear blue isolation grommet is properly seated when installing a new motor.
Kick Panel Removal and Replacement:
- Applicable to models without a freezer light (replaceable).
- Requires two people due to the need to lay the refrigerator on its back.
- Involves removing shelving, the fresh food door, hinges, and various screws to access and remove the kick panel.
- Notes that an electric screwdriver can aid in installing kick panel screws.
"Clean Steel™" Cleaning:
- Cleaned similarly to painted surfaces using a clean cloth lightly dampened with appliance polish or mild household detergent, then dried and polished with another clean cloth.
- Caution against using kitchen towels previously used for kitchen cleaning without washing, as bacteria can deteriorate the finish.
Warranty Information:
- One-Year Full Warranty: Covers any part failing due to defects in materials or workmanship, including labor and in-home service.
- Five-Year Sealed Refrigerating System Warranty: Covers the compressor, condenser, evaporator, and all connecting tubing for defects, including labor and in-home service.
- Exclusions: Service trips for instruction, replacement of fuses/resetting breakers, incidental/consequential damage, light bulb replacement, damage from accidents/natural disasters, product abuse/misuse, improper installation/delivery/maintenance, loss of food due to spoilage, and damage after delivery.
- The warranty is extended to the original purchaser and subsequent owners for ordinary home use within the USA. In Alaska, shipping and service call costs are excluded.