27
26
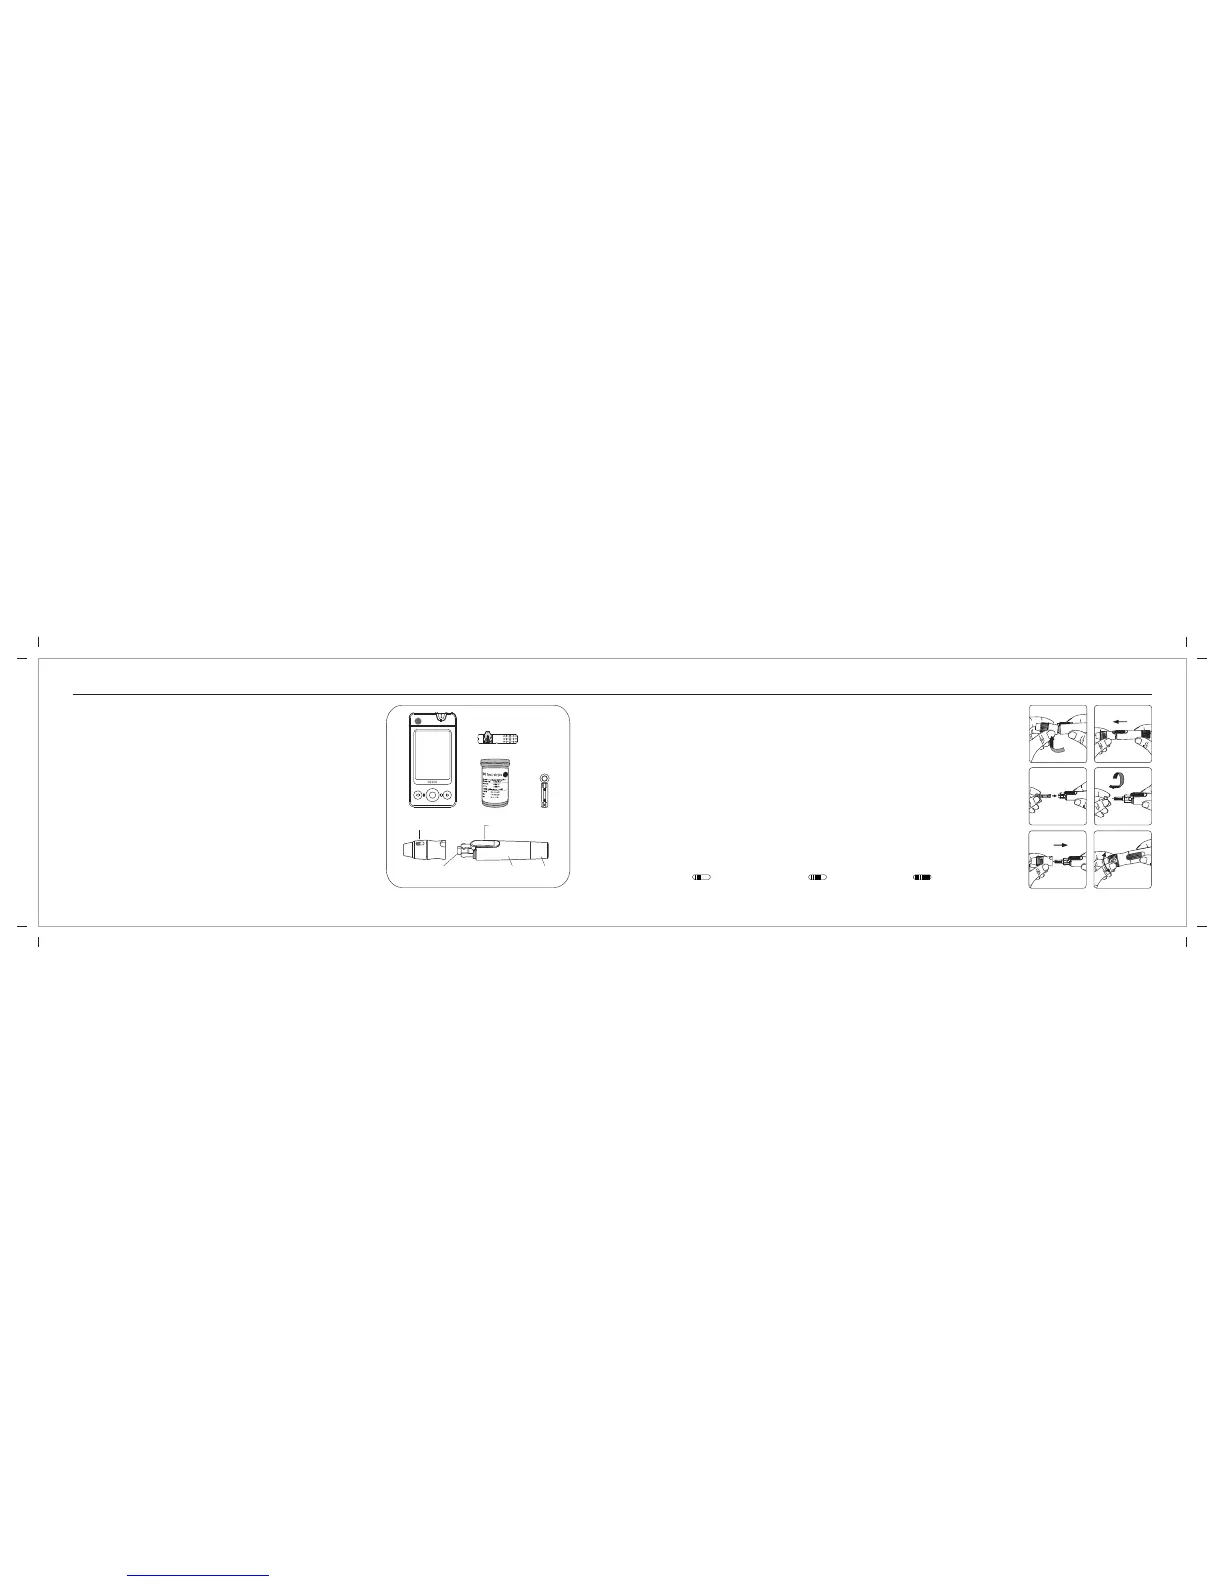
Getting Ready for Testing
Performing a Blood Glucose Test
PlungerBase
Lancet carrier
Release button
Depth adjustable cap
2
1
3
4
5
6
Before performing a blood glucose test, prepare the items below :
- GE200 Blood Glucose Meter
- GE200 Blood Glucose Test Strips
(Please check the expiration date on the test strip vial. Do not use
expired test strips)
- GE Lancing device
- Sterile lancet
- Alcohol swab (optional)
1. Hold the depth adjustable cap in one hand and hold the base with the other hand.
Bend the cap down. When a gap appears between the cap and base, pull the cap
and base in opposite directions.
2. Pull off the depth adjustable cap.
3. Insert a new disposable lancet firmly into lancet carrier.
4. Twist off and set aside the protective cover of the disposable lancet.
5. Replace the depth adjustable cap.
6. Choose a depth of penetration by rotating the top portion of the depth adjustable
cap until your desired setting is visible in the window. Settings are based on skin
type " " for soft or thin skin; " " for average skin; " " for thick or
calloused skin.