49-60769 Rev. 4
Accessory Installation Instructions
ACCESSORY INSTALLATION INSTRUCTIONS
BEFORE YOU BEGIN
Read these instructions completely and carefully.
• IMPORTANT – Save these instructions for
local inspector’s use.
• IMPORTANT – Observe all governing codes
and ordinances.
• Note to Installer – Be sure to leave these
instructions with the Consumer.
• Note to Consumer – .HHSWKHVHLQVWUXFWLRQV
for future reference.
• Skill level±,QVWDOODWLRQRIWKLVDSSOLDQFHUHTXLUHV
basic mechanical skills.
• Completion time – 20–60 minutes
• Proper installation is the responsibility of the
installer.
• Product failure due to improper installation is not
covered under the Warranty.
,I\RXKDYHTXHVWLRQVFDOO*($SSOLDQFHVDW1.800.GE.CARES or visit our Website at:
GEAppliances.com.,Q&DQDGDFDOO1.800.561.3344 or visit our Website at: geappliances.ca
Damage – Shipment/Installation
Ɣ,IWKHXQLWLVGDPDJHGLQVKLSPHQWUHWXUQWKHXQLW
to the store in which it was bought for repair or
replacement.
Ɣ,IWKHXQLWLVGDPDJHGE\WKHFXVWRPHUUHSDLURU
replacement is the responsibility of the customer.
Ɣ,IWKHXQLWLVGDPDJHGE\WKHLQVWDOOHULIRWKHUWKDQ
the customer), repair or replacement must be made
by arrangement between customer and installer.
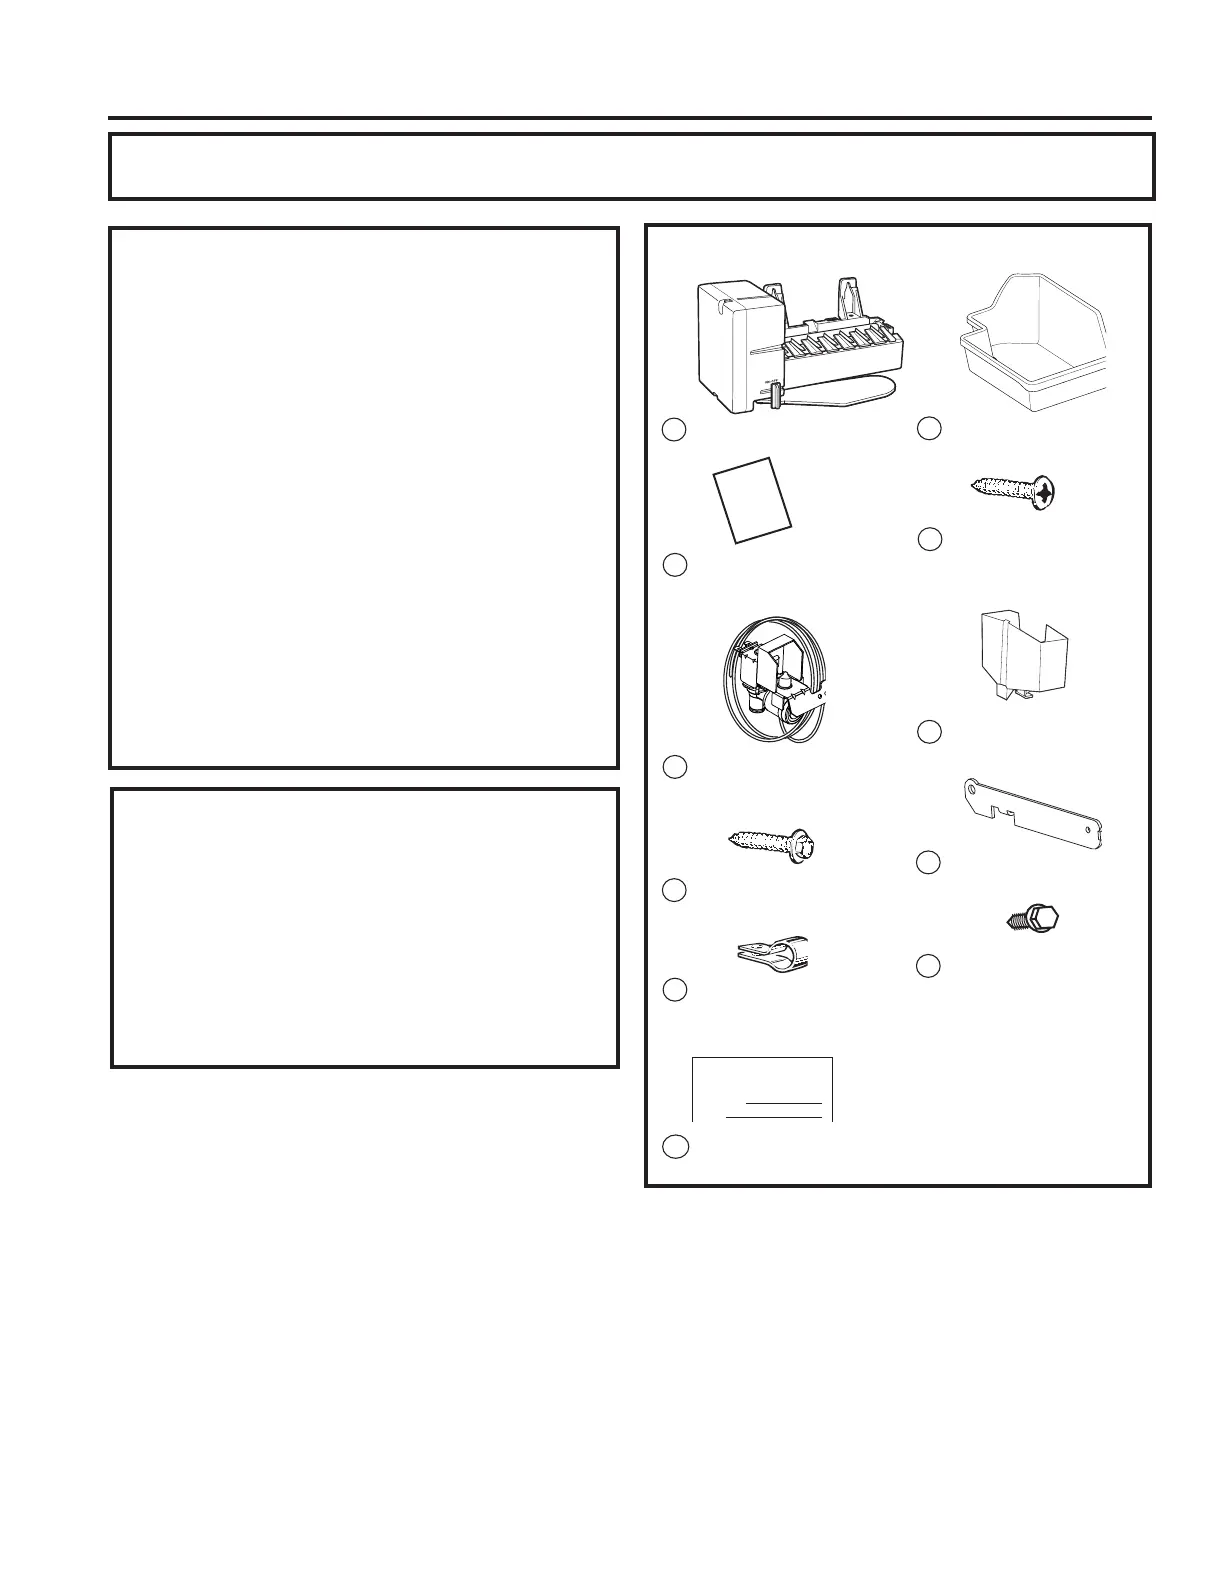
ITEMS NEEDED FROM IM4D KIT
,QVWDOODWLRQ,QVWUXFWLRQV
2
Hex-Head Screw
IRU:DWHU/LQH&ODPS´
5
Water Valve and
Tube Assembly
3
,FHPDNHU
1
,QVWDOODWLRQ
,QVWUXFWLRQV
,FH%XFNHW
8
Water Line Clamp
(strain relief), for
house water line
6
10
Phillips Head Screws,
for mounting icemaker (2)
´
Warranty Label
7
ICEMAKER
WARRANTY VERIFICATION
Date Installed
Dealer
13
17
16
,FHPDNHU)LOO&XS
(side-mounted)
Hex-Head Screws, for
bracket extension (1)
´
Bracket Extension
 Loading...