20 49-60769 Rev. 4
Accessory Installation Instructions
INSTALLING ICEMAKER IM4D (CONT.)
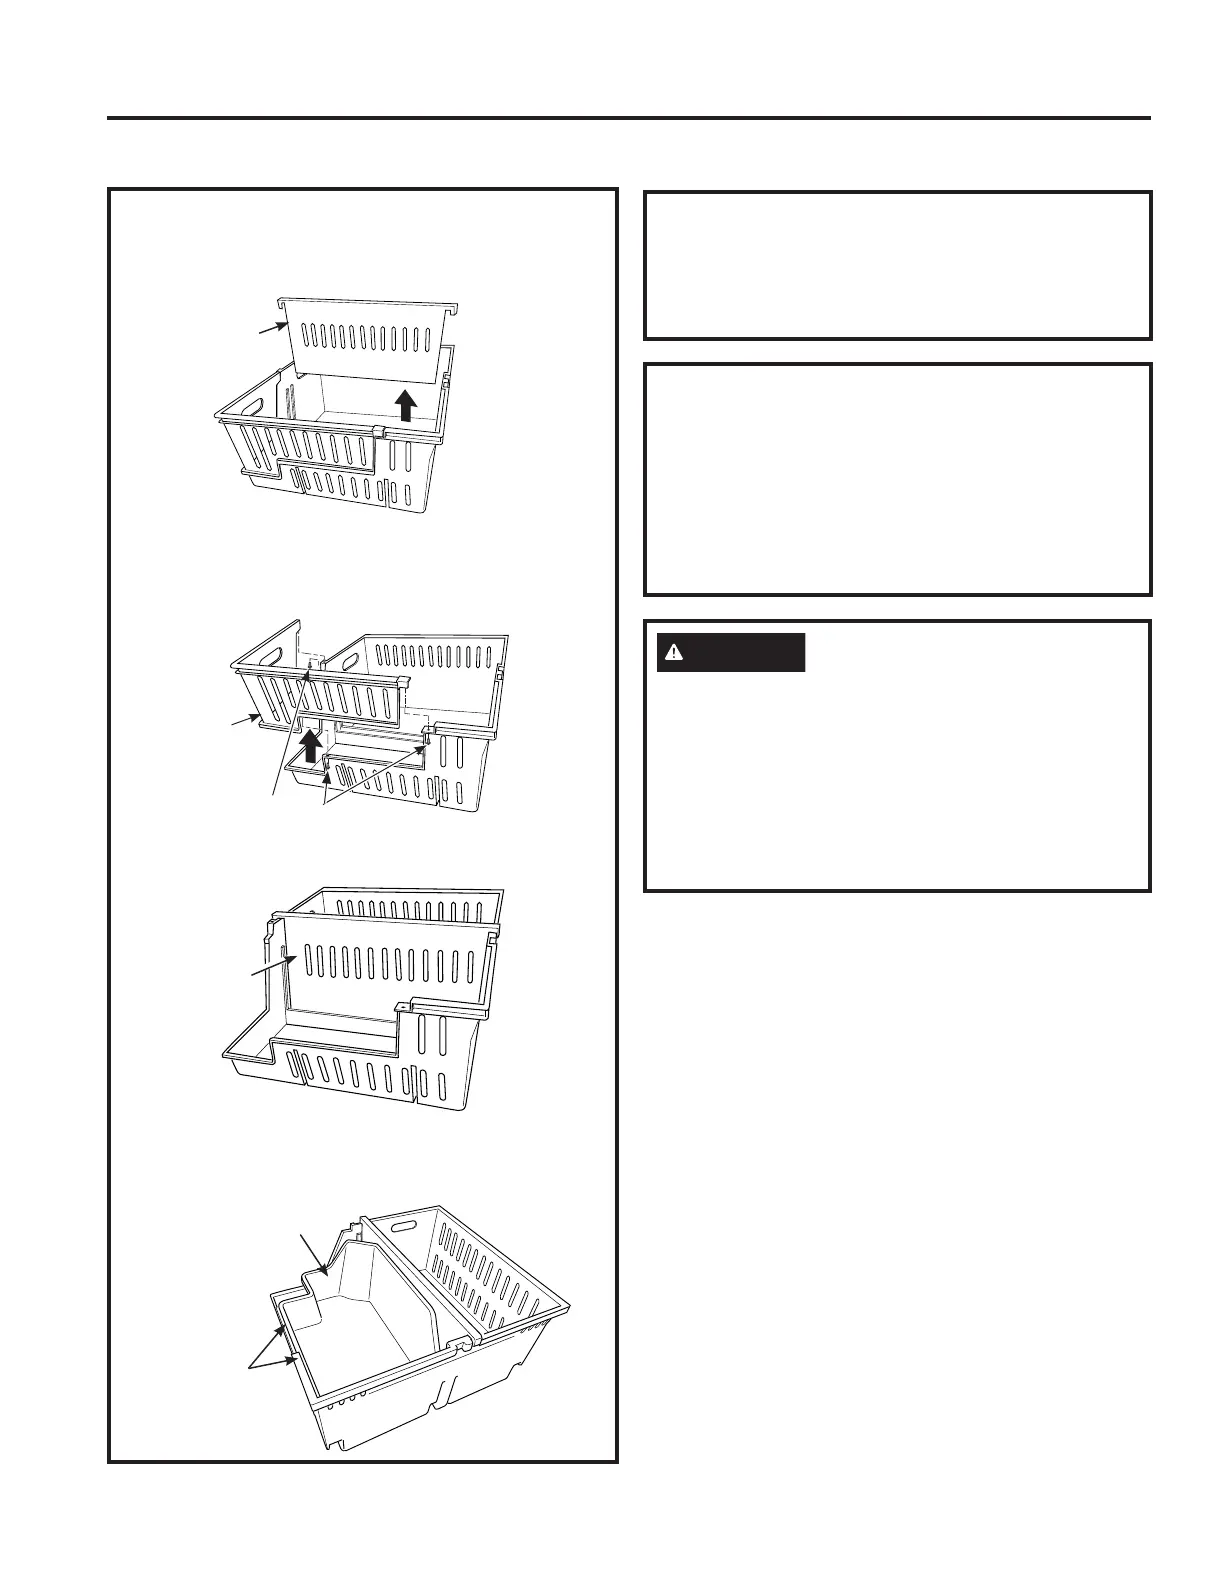
INSTALL THE ICE BUCKET
Ɣ5HPRYHWKHPLGGOHGLYLGHUIURPWKHWRSIUHH]HU
drawer.
Ɣ5HPRYHWKH/VKDSHGLQVHUWE\XQVFUHZLQJWKH
VFUHZVRQHDFKHQG,QVHUWWKHEXWWRQVSURYLGHG
into the holes in the ice bucket.
Ɣ,QVWDOOWKHPLGGOHGLYLGHULQWRWKHULJKWVORW
Ɣ3ODFHWKHLFHEXFNHWRQWKHERWWRPULEVLQWKHOHIW
side of the drawer.
ATTACH WARRANTY LABEL
A label is provided with this kit to record the date of
installation for warranty purposes. Apply it to the back
of the refrigerator.
KEEP THE MANUAL
The warranty for the icemaker is printed in the
manual that came with your icemaker kit. Keep
this manual with your Refrigerator Owner’s
Manual.
7KHLFHPDNHULQVWDOODWLRQLQVLGHWKHIUHH]HULVQRZ
complete. Continue to the Water Valve Assembly
section.
CAUTION
'RQRWSODFHILQJHUVRUKDQGVLQWKHDXWRPDWLF
icemaking mechanism while the refrigerator is
plugged in. This will help protect you from possible
injury.
,WZLOODOVRSUHYHQWLQWHUIHUHQFHZLWKPRYLQJSDUWVRI
the ejector mechanism and the heating element that
releases the cubes, located on the bottom of the
icemaker.
ACCESSORY INSTALLATION INSTRUCTIONS
5LEVIRU,FH
Bucket (under
ice bucket)
,FH
Bucket
Middle
'LYLGHU
Middle
'LYLGHU
,QVHUW
Screws
 Loading...