Installation
Instructions
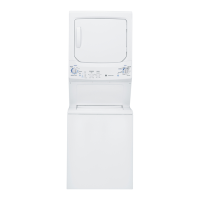
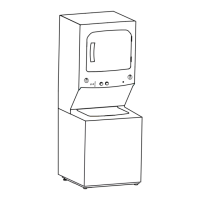
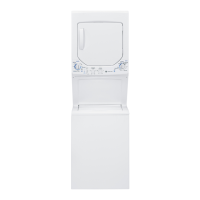
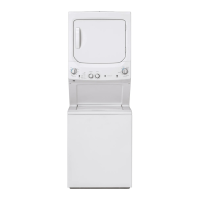
Unitized Electric
Wosher/Drger
Questions on Installation? Call: 1-800-GECARES (US)or Visit our Web site at: www.GEApplionces.com (US).
In Canada, call 800.561.3344 or visit www.GEApplionces.co
BEFOREYOU BEGIN
Readthese instructions completely and
carefully.
•IN PORTANT- savethese instructionsfor
localinspector's use.
• IMPORTANT- Observeoil governing codes
and ordinances.
• Note to Installer - Besureto leavethese
instructionswith the customer.
• Note to Customer- Keepthese instructions
with your Owner's Honuol for future reference.
• Beforethe applianceis removedfrom service or
discorded,remove the washer and dryer doors.
• Inspectthe dryerexhaust outlet and straighten
the outlet walls if they ore bent.
• Serviceinformation and the wiring diagram ore
located at the accesspanel.
• Donot allow children on or in the appliance.
Closesupervisionof children isnecessarywhen
the appliance isusednear children.
• Installthe appliance wherethe temperature
isabove50°Ffor satisfactory operation ofthe
control system.
• Productfailuredue to improperinstallation is
not coveredunder the Warranty.
A, ,,^,,=,,=,,-
J:IkW_Kl_lll_llJ" RISK OF FIRE
• To reduce the risk of severe injury or death, follow all installation
instructions.
• Appliance installation must be performed by a qualified installer.
• Install the appliance according to these instructions and in accordance
with local codes.
• This appliance must be exhausted to the outdoors.
• Use only 4" rigid metal ducting for exhausting the clothes dryer to the
outdoors.
• DO NOT install a clothes dryer with flexible plastic ducting materials.
If flexible metal (semi-rigid or foil-type) duct is installed, it must be
ULlisted and installed in accordance with the instructions found in
"Connecting The Dryer To House Vent" on page 8 of this manual.
Flexible venting materials are known to collapse, be easily crushed,
and trap lint. These conditions will obstruct dryer airflow and increase
the risk of fire.
• Do not install or store this appliance in any location where it could be
exposed to water and or weather.
• Savethese instructions. (Installers: Be sure to leave these instructions
with the customer).
NOTE: Installation end service of this appliance requires basic
mechanical end electrical skills. It is gour responsibilitg to
contact a qualified installer to make the electrical connections.
I
TOOLS YOU WILL NEED
Slip Pliers
Phillips Screwdriver
Flat-blade Screwdriver
1/4" Nutdriver
Level
)
# DAMETALDUCT
(RECOMMENDED}
MATERIALSYOUWILL NEED
4' DUCT
# DIA.FLEXIBLEMETAL(SEMI-RIGID} CLAMPS(2}
ULLISTEDTRANSITIONDUCT
(IFNEEDED} OR
KITWXO8X10077(INCLUDES2 ELBOWS} 4' SPRING
CLAMPS(2}
# DA FLEXIBLEMETAL(FOILTYPE}
ULLISTEDTRANSITIONDUCT
,,,j
(iFNEEDED.}
4' COVERPLATE(IFNEEDED}
(KiTWE1M454}
%
4'DIA,METAL
ELBOW
,d<5
EXHAUST SAFETY
HOOD GLASSES
_ 3/#STRAIN
DUCTTAPE GLOVES RELIEF
ULRECOGNIZED
APPLIANCEPOWER
CORDKIT
(NOTPROVIDED}
ULRATED
120/240V,30A
WITH5OR4 PRONGS,
IDENTIFYTHEPLUG
TYPEASPERTHE
HOUSERECEPTACLE
BEFOREPURCHASING
LINECORD,
PARTS SUPPLIED
1 Cable Tie
% oo
2 Rubber Washers 2 Stainer Screens/
Rubber Washers
(washers may be in water hoses)
2 Washer Hoses
Printedin Mexico 189D7219PO02 31-16652-4 04-12 GE