EasyManua.ls Logo

GE GTUP270EM1WW User Manual

GE GTUP270EM1WW
36 pages
To Next Page IconTo Next Page
Page #1 background imageLoading...
Page #1 background image
I
Installation
Instructions
Unitized Electric
Washer/Dryer
Questions on Installation? Call: 1-800-GECARES (US)or Visit our Web site at: www.GEAppliunces.com (US).
In Canada, call 888-561-3344 or visit www.GEAppliances.ca
BEFORE YOU BEGIN
Readtheseinstructionscompletelyandcarefully.
IN PORTANT- savetheseinstructionsfor
localinspector'suse
1MPORTANT-Observeall governingcodes
and ordinances.
Noteto Installer - Besureto leavethese
instructionswith thecustomer.
Noteto Customer - Keeptheseinstructions
with your Useand CareBookfor future
reference.
Beforethe applianceisremovedfrom service
or discarded,removethe washerand dryer
doors.
Inspectthe dryerexhaustoutlet and straighten
the outletwalls ifthey are bent.
Serviceinformationand the wiring diagram
are locatedat theaccesspanel.
Donot allowchildrenon or in the appliance.
Closesupervisionof childrenisnecessary
whenthe applianceisusednearchildren.
Installthe appliancewherethe temperatureis
above50°Ffor satisfactoryoperationof the
control system.
,WARNING RISKOFFIRE
Toreduce the risk of severe injury or death, follow all installation
instructions.
Appliance installation must be performed by a qualified installer.
Install the appliance according to these instructions and in accordance
with local codes.
This appliance must be exhausted to the outdoors.
Use only 4" rigid metal ducting for exhausting the clothes dryer to the
outdoors.
DO NOT install a clothes dryer with flexible plastic ducting materials.
If flexible metal (semi-rigid or foil-type) duct is installed, it must be
ULlisted and installed in accordance with the instructions found in
"Connecting The Dryer To House Vent" on page 8 of this manual.
Flexible venting materials are known to collapse, be easily crushed,
and trap lint. These conditions will obstruct dryer airflow and increase
the risk of fire.
Do not install or store this appliance in any location where it could be
exposed to water and or weather.
Savethese instructions. (Installers: Be sure to leave these instructions
with the customer).
NOTE: Installation and service of this appliance requires basic
mechanical and electrical skills. It is your responsibility to
contact a qualified installer to make the electrical connections.
TOOLS YOU WILL NEED
Slip Pliers
Phillips Screwdriver
Flat-blade Screwdriver
1/4" Nutdriver
Level
4"DIA.METALDUCT
(RECOMMENDED}
") MATERIALSYOUWILLNEED
4"DUCT
4"DIA.FLEXIBLEMETAL(SEMI-RIGID} CLAMPS(2}
ULLISTEDTRANSITIONDUCT
(IFNEEDED) OR
KFWX08X10077(INCLUDES2ELBOWS} 4"SPRING
CLAMPS(2}
4"DIA.FLEXIBLEMETAL(F01LTYPE}
ULLISTEDTRANSITIONDUCT
,,,j
(iFNEEDED,}
4"COVERPLATE(IFNEEDED}
(KITWEZM454)
%
4"DIA.METAL
ELBOW
EXHAUST SAFETY
HOOD GLASSES
_ 3/#'STRAIN
DUCTTAPE GLOVES RELIEF
ULRECOGNIZED
APPLIANCEPOWER
CORDKIT
(NOTPROVIDED}
ULRATED
120/240V,30A
WITH3OR4PRONGS
IDENTIFYTHEPLUG
TYPEASPERTHE
HOUSERECEPTACLE
BEFOREPURCHASING
LINECORD.
1 Cable Tie
PARTSSUPPLIED
oo
2 Stainer Screens/
2 Rubber Washers RuuberWashers
(washers may be in water hoses)
2 Washer Hoses
189D7219PO02 31-16652-1 02-11 GE
Question and Answer IconNeed help?

Do you have a question about the GE GTUP270EM1WW and is the answer not in the manual?

GE GTUP270EM1WW Specifications

General IconGeneral
BrandGE
ModelGTUP270EM1WW
CategoryWasher/Dryer
ColorWhite
Energy Star CertifiedYes
Number of Wash Cycles11
Number of Temperature Settings5
Voltage120 V
Frequency60 Hz
Control TypeElectronic
Dryer TypeElectric
Fuel TypeElectric
Capacity2.3 cu. ft.
Width27 inches
Weight150 lbs
Drying MethodVentless
Wash CyclesDelicates, Heavy Duty, Normal, Quick Wash, Sanitize, Towels, Whites
Dry CyclesDelicates, Jeans, Normal, Quick Dry, Sanitize, Towels
Washer FeaturesDelay Start
Dryer FeaturesDelay Start, End of Cycle Signal

Summary

Before You Begin Installation

Risk of Fire Warning

Tools and Materials Required

Parts Supplied with Appliance

Installation Requirements

Installation Location Requirements

Specifies requirements for appliance placement, including flooring and environmental conditions.

Plumbing Requirements

Details water pressure, temperature, shutoff valves, and drain specifications.

Electrical Requirements

Outlines voltage, frequency, circuit protection, and grounding for safe electrical connection.

Preparing for Installation

Removing Lint from Wall Exhaust Opening

Instructions for clearing the existing exhaust duct and replacing with UL listed transition duct.

New Home or Remodeling Faucets/Drain Standpipe/Electrical Location

Guidance on locating plumbing and electrical hookups in new constructions or remodels.

Electrical Connection Information

Electrical Requirements for Connection

Details the specific circuit, protection, and wiring for appliance connection.

Grounding Instructions

Explains grounding procedures for cord-connected and permanently connected appliances.

Connecting Dryer Using 3-Wire or 4-Wire Connection

Grounding Instructions (Cont.)

Further guidance on grounding, including requirements for mobile homes.

Connecting Appliance Using 4-Wire Connection

Specific instructions for 4-wire electrical connections, particularly for mobile homes.

Connecting Dryer Using 3-Wire Connection

Detailed steps for connecting the dryer using a 3-wire electrical cord.

Exhaust Information

Exhaust System Checklist

Key checks for the exhaust hood or wall cap and termination points.

Separation of Turns

Guidelines for spacing turns in ductwork to ensure optimal airflow.

Sealing of Joints

Instructions on how to properly seal ductwork joints to prevent leaks and lint buildup.

Insulation Recommendations

Advice on insulating ductwork to reduce condensation and lint buildup.

Exhaust Connection Details

Exhaust Connection Warnings

Critical warnings regarding exhaust installation to prevent fire hazards and injury.

Standard Rear Exhaust Installation

Instructions for connecting the dryer exhaust directly to the rear external exhaust hood.

Leveling and Stabilizing the Appliance

Connecting the Dryer to House Vent

Rigid Metal Transition Duct

Recommendation for using rigid metal ducts for best performance and to avoid crushing.

UL-Listed Flexible Metal (Semi-Rigid) Transition Duct

Guidelines for using semi-rigid flexible metal ducts, including length and placement restrictions.

UL-Listed Flexible Metal (Foil-Type) Transition Duct

Information on using foil-type flexible ducts, including compliance and restrictions.

Dryer Exhaust to Right, Left or Bottom Cabinet

Adding Elbow and Duct for Exhaust to Left or Right Side

Instructions for rerouting exhaust to the sides of the cabinet using elbows and ducting.

Plumbing Information

Water Supply Requirements

Details on faucet location, water pressure, temperature, and shutoff valves.

Drain Requirements

Specifications for drain rate, height, standpipe diameter, and siphon break kits.
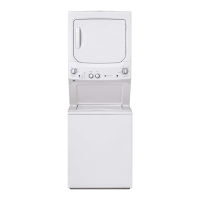
Connecting to Plumbing Facilities

Mobile or Manufactured Home Installation

Alcove or Closet Installation

Bathroom or Bedroom Installation

Servicing

Related product manuals