11
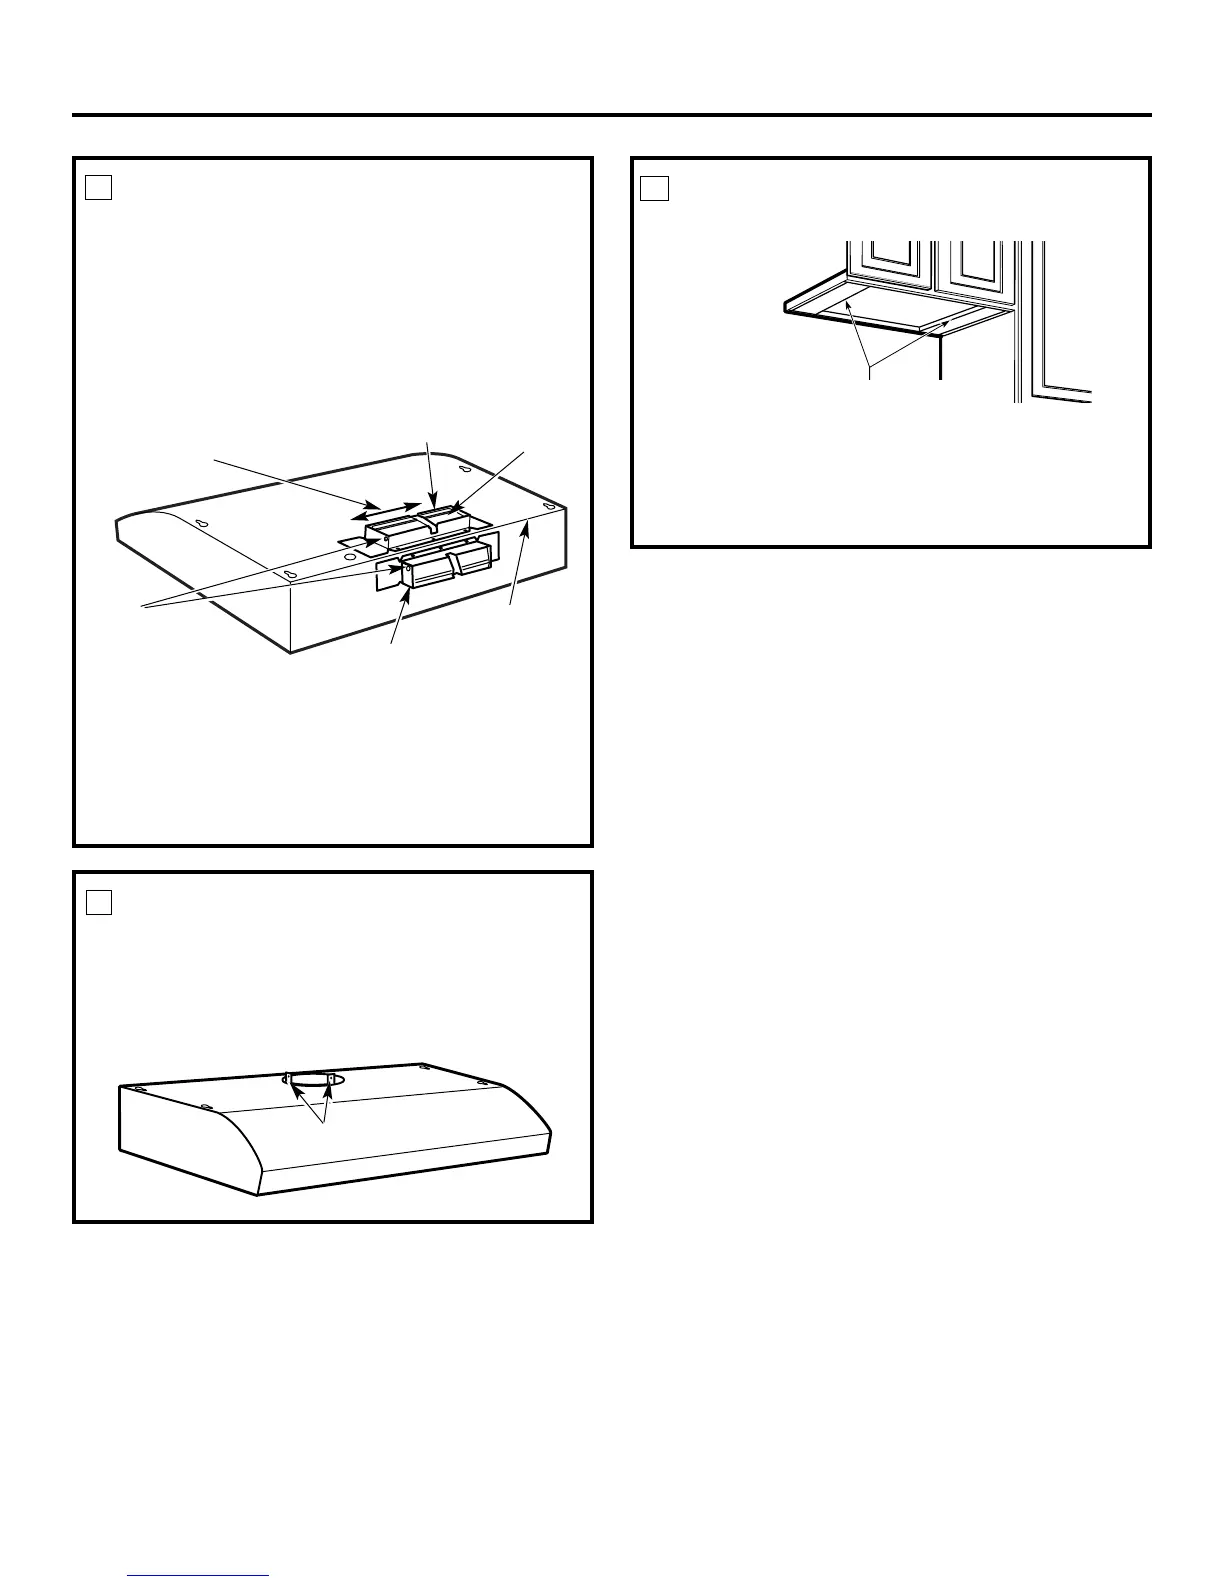
FOR 3
1
⁄4″ X 10″ RECTANGULAR
DUCTED DISCHARGE
INSTALLATIONS ONLY:
Attach exhaust adaptor/damper over the appropriate
knockout opening (for vertical or horizontal,
depending on installation) with two exhaust adaptor
screws. Make sure damper pivot is nearest to top/back
edge of hood. Remove tape from damper flap.
Up to 1″ side-to-
side adjustment
Tape
Top/back edge
Exhaust adaptor/damper
(vertical discharge position)
Pivot
(depending on
installation)
FOR 7″ ROUND VERTICAL
DUCTED DISCHARGE
INSTALLATIONS ONLY:
Bend up the duct alignment ears in preparation for
later attachment of the 7″ duct.
8
9
Installation Instructions
NOTE: The exhaust adaptor/damper can be installed
up to 1 inch on either side of the hood center to
accommodate off-center ductwork. In extreme off-
center installations, one end of the duct connector may
need to be trimmed to clear the electrical cable clamp.
Exhaust adaptor/damper
(horizontal discharge position)
Attachment ear tabs
FOR RECESSED-BOTTOM
CABINETS ONLY
10
Wood shims
(minimum thickness 3/8″)
• If the cabinets have front, side or back trim, make
2 wood shims a minimum of 3/8″ thick and cut to
fit the width of the inner recessed cabinet bottom.
Attach them to the cabinet bottom recess on both
sides. See Step 11 for marking locations.


 To Next Page