11
Installation Instructions
Installing The Range cont.
E
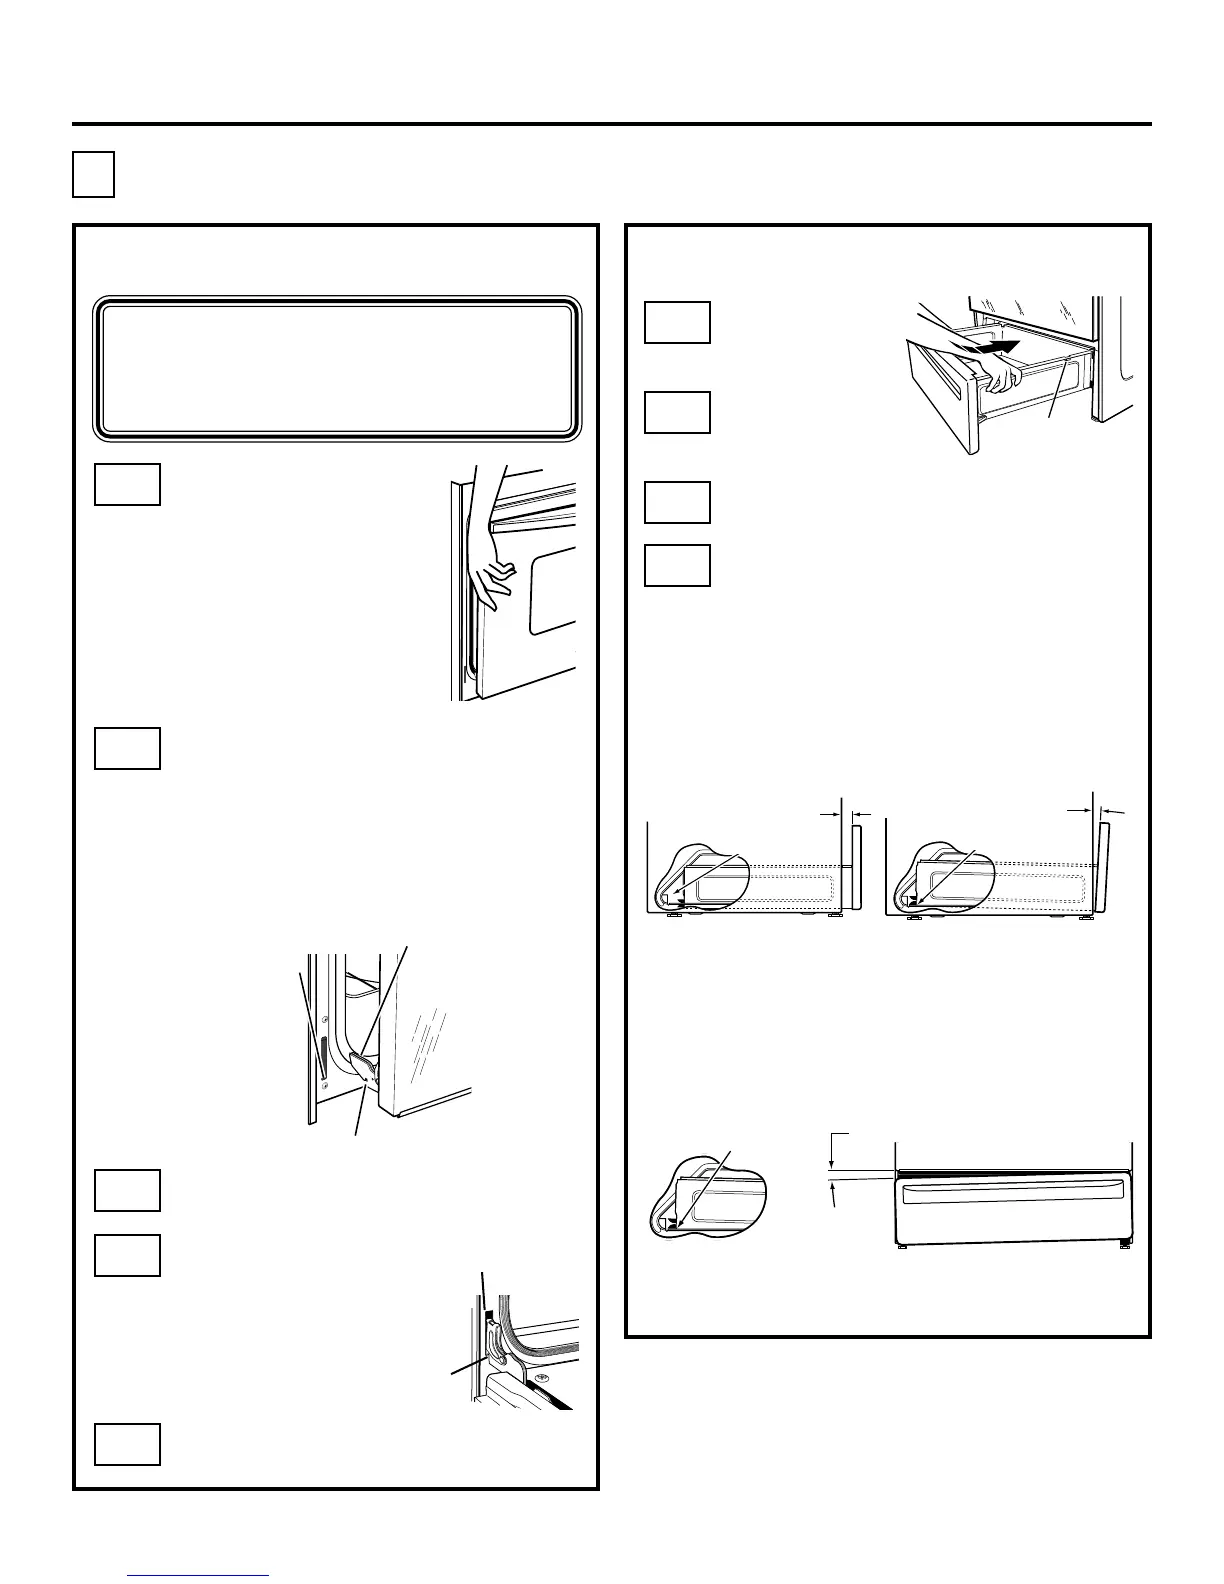
Replacing the Oven Door
Lift the oven door by
placing one hand on
each side. The door
is heavy, so you may
need help. Do not lift
the door by the handle.
With the door at the same angle as
the removal position (halfway between
the closed and broil stop position,
seat the notch of the hinge arm into
the bottom edge of the hinge slot.
The notch of the hinge arm must be
fully seated into the bottom of the slot.
Open the oven door as far as it
will open.
Push the hinge locks
up against the front
frame of the oven
cavity, to the
locked
position.
Close the oven door.
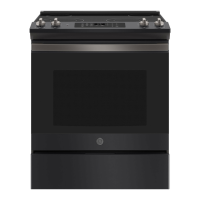
Replacing the Storage Drawer
NOTE:
The oven door is heavy. You
may need help lifting the door high
enough to slide it into the hinge slots.
Do not lift the door by the handle.
E10
Bottom Edge
of Slot
Hinge Arm
Hinge Notch
E11
E12
Notch of Hinge
Securely Fitted
into Bottom of
Hinge Slot
Hinge in
Locked Position
E13
E14
Place the
drawer rail
on the guides.
Push the
drawer in
until it stops.
Lift the front of the drawer and push in
until the stops clear the guides.
Lower the front of the drawer and
push in until it closes.
E15
Stop
E16
E17
E18
SPECIAL INSTRUCTIONS IF YOU ARE
HAVING PROBLEMS WHILE REPLACING
THE STORAGE DRAWER
If Drawer Won’t Close:
Remove and replace, making sure the power
cord is not obstructing the drawer and/or the
rail is in the guide.
Drawer does
not close
completely
Drawer front
panel tipped
away from
body side
Power cord
may be obstructing
drawer in this area
Rear drawer
support is resting
on top of guide rail
If Drawer Is Crooked:
Remove and replace, making sure the rail is
in the guide.
Rear drawer
support is on
top of guide rail
on the high side
Drawer front panel
tipped to one side