EasyManua.ls Logo

GearLight S1 - User Manual

GearLight S1
2 pages
Print Icon
To Next Page IconTo Next Page
Loading...
S1 LED SAFETY LIGHTS
User Manual
TROUBLESHOOTING
If the safety light flickers, works intermittently, changes modes automatically,
appears dim or faded, or does not turn on, check and verify that:
• The back plate is securely attached and the screws are on tightly.
• The batteries are inserted correctly according to the instructions.
Firmly press the power button on and o several times:
• If the safety light still does not turn on, replace the batteries.
• If the problem persists, contact GearLight for a replacement.
Irvine, California | USA | www.GearLight.com
WARRANTY AND LIMITATION OF LIABILITY
MAINTENANCE
Inspect the safety light monthly and carefully remove any damaged battery and clean
any corrosion. If the safety light is used less than once a month, remove the batteries
between uses.
Limited One-Year Warranty
GearLight warrants this product for one year from the date of purchase
against any defects in material or workmanship. This warranty does not cover
normal wear and tear, nor damage resulting from misuse or neglect. We will,
at our discretion, repair, replace, or refund the purchase price of this product
should we determine it to be defective.
Limitation Of Liability
Liability limited to the purchase price of this product. GearLight shall not be
liable for any incidental or consequential damages or any implied warranty on
this product. Some states do not allow the exclusion or limitation of
incidental or consequential damages, so the above limitation or exclusion
may not apply to you.
2x Red GearLight S1 LED Safety Lights
2x Green GearLight S1 LED Safety Lights
4x Straps
4x Extra CR2032 Batteries
1x Mini Philips Screwdriver
1x User Manual
1x Warranty Card
Package Contents:
FOR YOUR SAFETY, READ BEFORE OPERATING
v2
Question and Answer IconNeed help?

Do you have a question about the GearLight S1 and is the answer not in the manual?

Summary

Troubleshooting

Maintenance

Warranty and Limitation of Liability

Limited One-Year Warranty

Product warranted for one year against defects; excludes normal wear/tear, misuse, neglect.

Limitation of Liability

Liability limited to purchase price; excludes incidental/consequential damages.

Operation

On;Off

Turn the safety light on or off by pressing the gray power button.

Switching Modes

Cycle through 3 lighting modes (Steady, Flash, Strobe) using the power button.

Straps

Battery Replacement

Overview

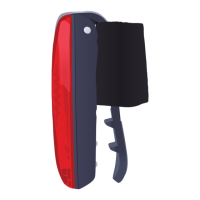
The GearLight S1 LED Safety Light is a compact and versatile illumination device designed to enhance visibility for users, particularly during low-light conditions or at night. It is intended to be used as an additional safety measure and not as a replacement for necessary reflective gear.

Function Description

The primary function of the GearLight S1 LED Safety Light is to provide illumination through its LED lights, offering various lighting modes to suit different situations. It is designed to be easily attached to clothing, gear, or even pet collars using a built-in clip and included straps. This enhances the user's visibility to motorists and the general public, contributing to overall safety.

Important Technical Specifications

The GearLight S1 LED Safety Light operates on CR2032 batteries. Each light comes preinstalled with two CR2032 batteries, and the package includes four extra CR2032 batteries for replacement. The device features a circuit board, a protective shell, and a power button for operation. The package includes a mini Philips screwdriver for battery replacement.

Usage Features

Operation:

  • Turning On/Off: To turn the safety light on, the user presses the gray power button located on the front of the light. To turn it off, the user cycles through all lighting modes by pressing the power button until the light turns off.
  • Switching Modes: The device offers three distinct lighting modes: Steady, Flash, and Strobe. Users can switch between these modes by pressing the gray power button to alternate through them.

Attachment:

  • Clip: The safety light features a clip on its back, allowing for easy attachment to various items.
  • Straps: The package includes four straps. To use a strap, the user gently lifts the clip, slips the strap between the clip and the safety light, ensuring it is securely in place to prevent sliding off. The straps can be cut to a desired length and then securely attached at both ends. A tip provided suggests using the straps to attach the safety light to a dog's collar for secure fastening.

Safety Warnings:

  • Choking Hazard: The product contains small parts and is not suitable for children under 3 years old. Adult supervision is required.
  • Battery Safety: A critical warning emphasizes keeping batteries out of reach of children due to the risk of serious injury or death from chemical burns and esophageal perforation if swallowed. Immediate medical attention is required if a battery is swallowed. Used batteries must be disposed of immediately. Users are warned against disassembling, charging, crushing, or exposing batteries to fire or high temperatures due to the risk of injury, fire, explosion, or leakage.
  • Visibility: Users are advised to always wear reflective outer garments at night or during periods of reduced visibility. The product is not intended to replace necessary reflective gear but rather to improve visibility.

Maintenance Features

Battery Replacement:

  1. Removing Screws: The user employs the provided mini Philips screwdriver to carefully remove the four screws located on the back of the safety light.
  2. Lifting Back Plate: The back plate is then gently lifted up and away from the body of the light.
  3. Replacing Batteries: A new set of CR2032 batteries is inserted. The top battery must be placed with its positive pole facing down, while the bottom battery must have its positive pole facing up.
  4. Reassembly: The cover and screws are then put back in the same way they were removed.

General Maintenance:

  • Monthly Inspection: Users should inspect the safety light monthly.
  • Battery Care: Any damaged batteries should be carefully removed, and any corrosion should be cleaned. If the safety light is used less than once a month, the batteries should be removed between uses to prevent potential issues.

Troubleshooting: If the safety light exhibits issues such as flickering, intermittent operation, automatic mode changes, dimness, or failure to turn on, users should:

  1. Check Assembly: Verify that the back plate is securely attached and the screws are tightly fastened.
  2. Check Battery Insertion: Ensure the batteries are inserted correctly according to the instructions.
  3. Power Button Reset: Firmly press the power button on and off several times.
  4. Replace Batteries: If the light still does not turn on after the above steps, replace the batteries.
  5. Contact Support: If the problem persists after battery replacement, users should contact GearLight for a replacement.

Warranty: GearLight offers a limited one-year warranty from the date of purchase, covering defects in material or workmanship. This warranty does not cover normal wear and tear, misuse, or neglect. GearLight reserves the right, at its discretion, to repair, replace, or refund the purchase price if the product is determined to be defective.

Limitation of Liability: Liability is limited to the purchase price of the product. GearLight is not liable for incidental or consequential damages or any implied warranty. The applicability of this limitation may vary depending on state laws.

GearLight S1 Specifications

General IconGeneral
BrandGearLight
ModelS1
CategoryLight Fixture
LanguageEnglish