Do you have a question about the GeekChef FM9011E and is the answer not in the manual?
Guidance on keeping and utilizing the user manual for optimal appliance performance.
Guidelines for using extension cords safely with the appliance.
Information regarding the appliance's polarized plug and outlet compatibility.
Specifies the intended use of the appliance.
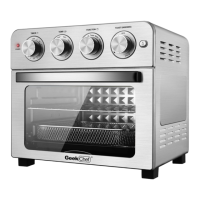
Visual representation of the air fryer's components with labels.
Detailed explanation of each component's function and usage.
Overview of the appliance's control panel and its functions.
Guidance on using various accessories with the air fryer.
Essential steps to prepare the appliance before its initial operation.
Step-by-step instructions for using different cooking functions.
Lists specific conditions and situations not covered by the product's warranty.
The Geek Chef Air Fryer Countertop Oven, model FM9011E (Item No.: GTO23), is a versatile kitchen appliance designed for a variety of cooking functions, including air frying, toasting, baking, broiling, and warming. This countertop oven aims to provide consistent, professional results for household use.
The oven operates with a set of intuitive controls, including a Timer Dial, Temperature Dial, Function Dial, and Toast Darkness Function. The Timer Dial is used to set the desired cooking time for all functions except Toast. Turning this dial powers on the unit and initiates the cooking cycle. Once the timer runs out, the unit automatically powers off. The Temperature Dial allows users to set the desired temperature for cooking. The Function Dial is central to selecting the cooking mode, offering options such as Warm, Broil, Broil (Convection), Toast, Bake, Bake (Convection), and Air Fry. For toasting, a dedicated Toast Darkness Function dial is available to set the desired shade from light to dark, which also powers on the unit and starts the toasting cycle. A Power On Light illuminates when the oven is in use, indicating that it is actively operating. Additionally, a Light Button is provided to turn on the interior oven light, which is useful for monitoring food during cooking, though it will not work if the power is off.
Before first use, all packaging materials, stickers, and labels should be removed. Accessories should be cleaned with hot water, cleaning agent, and a non-abrasive sponge, while the inside and outside of the appliance should be wiped with a damp cloth. It's crucial to note that objects should not be stored on top of the oven, and the exterior housing can become very hot during use, so it should be kept out of reach of children. A safety switch ensures the machine only operates when the door is completely closed.
The oven offers three rack positions: bottom (Position 1), middle (Position 2), and top (Position 3). Generally, the top position is recommended for Broil, the middle for Air Fry and Toast, and the bottom for Warm and Bake, though specific recipes may suggest alternative placements.
For Broil or Broil (Convection), the Function Dial is set to the appropriate broil mode, and the Temperature Dial is set to Toast/Broil (450°F). The Timer Dial is then turned to the desired cooking time. The power light will illuminate, and the timer will ring once the cycle is complete, powering off the oven. To stop broiling prematurely, the Timer Dial can be turned to the OFF position. Users are advised not to use glass oven dishes for broiling and to monitor food closely as it can darken quickly.
For Bake or Bake (Convection), the Function Dial is set to the bake mode, and the Temperature Dial is adjusted to the desired temperature. The Timer Dial is then set for the cooking time. Preheating the oven for 5 minutes is recommended and should be factored into the total baking time. The power light will turn on, and the oven will power off when the timer expires. The pan is typically placed in Position 2 for baking, or Position 1 for larger items like chicken.
The Warm function requires setting the Temperature Dial to 200°F and the Function Dial to Warm. The Timer Dial is then set for the desired warming time.
For Toast, the Oven Rack is placed in Position 2. Food items should be evenly spaced on the rack (e.g., two items centered, four items two in front and two in back, six items three in front and three in back). The Function Dial is set to Toast, the Temperature Dial to Toast/Broil, and the Toast Darkness Dial is adjusted to the desired shade.
For Air Fry, the Air Fryer Basket is placed onto the Baking Pan or Oven Rack, typically in rack Position 2. The Function Dial is set to Air Fry, and the Temperature Dial is set to the desired temperature. The Timer Dial is then turned to the desired cooking time. The Air Fryer Basket is designed with a grated surface to allow air circulation for even cooking and must be used with either the Baking/Drip Pan or on the Wire Rack.
The Crumb Tray must always be in place underneath the bottom heating elements when the oven is in use to catch crumbs and oil. The Baking Pan/Drip Tray can be placed in any of the three rack positions. Oven mitts should always be used when handling hot accessories after cooking.
Cleaning and maintenance are essential for the longevity and proper functioning of the appliance. Before cleaning, the Air Fryer Countertop Oven must be unplugged and allowed to cool completely. Abrasive cleaners should be avoided as they can damage the finish. The exterior should be wiped with a clean, damp cloth and thoroughly dried. Cleaning agents should be applied to a cloth, not directly onto the oven, and excessive pressure should not be used on the control panel to prevent text removal over time.
For the interior walls and bottom of the oven (after removing the Crumb Tray), a damp soapy cloth or sponge should be used. Harsh abrasives, corrosive products, or oven cleaner sprays are strictly prohibited as they can damage the oven surface. Steel wool pads should never be used on the oven or its accessories.
The Oven Rack, Baking/Drip Pan, Air Fryer Basket, and Crumb Tray should be hand-washed in hot, sudsy water, using a nylon scouring pad or brush. These parts are not dishwasher safe. The Crumb Tray should be cleaned after each use to prevent smoking from excess food particles and to make removal easier. For baked-on grease or burnt food, soaking the Crumb Tray in hot, sudsy water or using nonabrasive cleaners is recommended. The oven should never be operated without the Crumb Tray in place.
The top interior of the oven should also be cleaned regularly to remove accumulated grease from cooking fatty foods, which helps prevent smoking during subsequent uses.
| Model Number | FM9011E |
|---|---|
| Type | Air Fryer |
| Power | 1700 Watts |
| Voltage | 120V |
| Timer | 60 minutes |
| Control Type | Digital |
| Pre-set Programs | 8 |
| Material | Plastic, Stainless Steel |