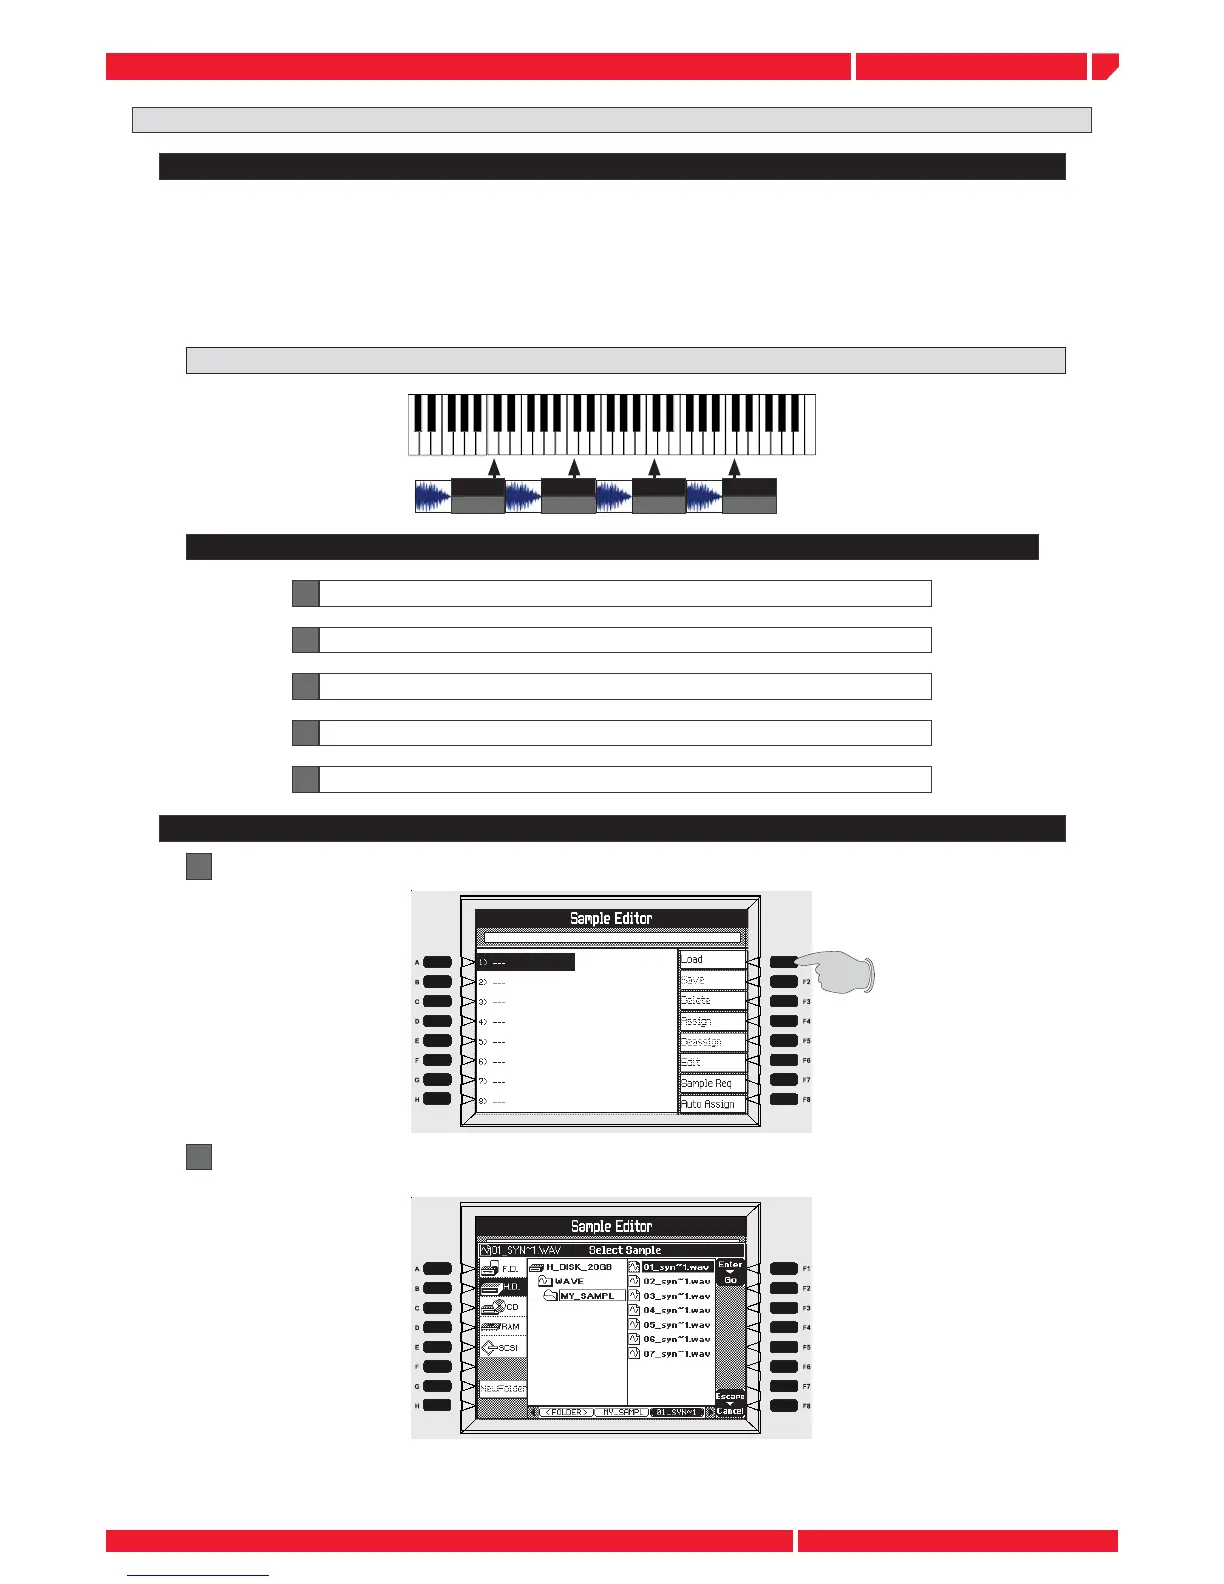
Sample #1
ROOT: C3
Sample #2
ROOT: C4
Sample #3
ROOT: C5
Sample #4
ROOT: C6
sample editor
Page22
release notes Genesys series
Description
1
Enter the SAMPLE EDITOR page, then press [F1] LOAD
2
Locate the driver (fl oppy, cd rom) or the directory where the samples are memorized, press ENTER
to load
The samples can be loaded directly from a media support (CD ROM fl oppy) or copied fi rst in an hard
disk directory, then loaded in memory, as in this example.
The AUTO ASSIGN is a very useful function that allows to shorten the key mapping of the samples
along the keyboard. This function automatically assigning each of the samples you have already
loaded in the list, its separate range of keys. It arranges the samples in order according to the source
note of each sample, (the key on the keyboard which plays back the sample at it’s original pitch) or,
if the source pitches are the same, the order of the samples in the list. To use this function, simply go
to the assign menu after loading your samples and press the AUTO button.
THE AUTO ASSIGN FUNCTION
Concept:
Steps:
A Import WAV fi les in the instrument
B Load the WAV fi les in the sample editor
D Use the AUTO ASSIGN function to set the keyboard area for each sample
C Load each WAV fi les in the sample editor
E Save the multisample
In the next example we create a synth sound multisample including 4 different wave fi les: