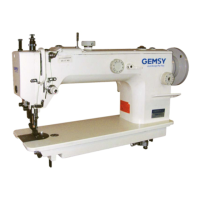
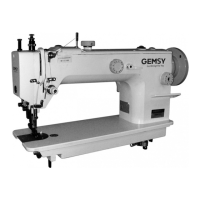
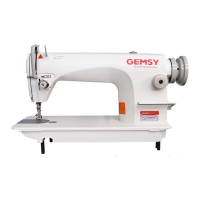
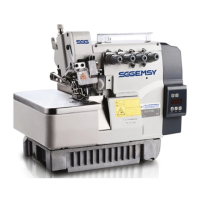
The GEMSY 0311/0611D and 0311/0611E3-Y models are direct drive top and bottom/compound feeding lockstitch sewing machines, designed for industrial use. These machines are also referred to as mechatronic top and bottom/compound feeding lockstitch sewing machines, emphasizing their integrated electronic control systems. They are specifically engineered for energy efficiency, featuring direct drive motors and integrated designs for both top and bottom feeding mechanisms, making them suitable for sewing thick materials.
Function Description:
These industrial sewing machines are designed to produce a 301 stitch, which is a strong and secure lockstitch suitable for a wide range of heavy-duty applications. The core feeding mechanism utilizes a link-type feed, combined with a thread take-up pick-line and a rotating hook line, to ensure consistent and precise material handling. The "direct drive" aspect indicates that the motor is directly integrated into the machine head, eliminating the need for a traditional belt drive. This design contributes to energy efficiency, reduced noise, and less vibration during operation. The "top and bottom/compound feeding" mechanism means that the material is fed simultaneously from above and below the needle, which is crucial for sewing multiple layers of thick or slippery fabrics without shifting or puckering. This compound feed ensures that all layers of material are moved at the same rate, resulting in even and high-quality stitches. The "mechatronic" designation implies that these machines incorporate advanced electronic controls for various functions, potentially including automatic thread trimming, needle positioning, and reverse stitching, enhancing operational efficiency and precision.
Usage Features:
The machines feature an extended nose design, which provides a more spacious working area, allowing operators to handle larger or bulkier materials with greater ease. A long needle bar stroke and a large amount of interaction alternating presser foot contribute to excellent sewing capacity for thick materials. This alternating presser foot action helps the machine climb over varying thicknesses of material smoothly. The machines are equipped with an oil pump for automatic lubrication, ensuring smooth running, low noise, and minimal vibration. This automatic lubrication system reduces maintenance effort and prolongs the machine's lifespan. The optimal operating environment for these machines is within a temperature range of 5°C to 35°C and a relative humidity of 45% to 85%, with no dew formation. It is crucial to avoid strong electrical noise sources, direct sunlight, and lightning storms to ensure correct operation.
For safe operation, it is imperative that only trained personnel use the machine. Safety devices must be attached before use to prevent injury. Operators should wear protective goggles when using the machine, especially when handling lubricating oil or grease, to prevent eye irritation. The machine should not be used for any applications other than sewing.
Key operational adjustments include:
- Thread Tension Adjustment: The upper thread tension can be adjusted by turning the tension adjustment nut clockwise to increase tension and counterclockwise to decrease it. The lower thread tension can be adjusted using a screwdriver on the tension adjustment screw. These adjustments are critical for achieving balanced stitches based on the material and thread type.
- Presser Foot Pressure Adjustment: The pressure of both the inner and outer presser feet can be adjusted. Turning the pressure adjustment screws clockwise increases pressure, while turning them counterclockwise decreases it. Fine adjustments can be made using the auxiliary pressure adjustment screw.
- Feed Dog Adjustment: The height of the feed dog should be 1.0-1.2mm above the needle plate. This can be adjusted by loosening a screw on the crank and moving the feed dog bracket up or down. The angle of the feed dog can also be adjusted by loosening a screw and rotating the eccentric shaft.
- Auxiliary and Upper Feed Presser Foot Adjustment: The interactive movement range of the auxiliary and upper feed presser foot is between 2mm and 5.5mm, adjustable via a dial on the machine casing. The balance of this movement can be changed to increase or decrease the lift of the outer or inner presser foot by rotating the hand wheel and adjusting a screw.
- Feed Dog Synchronous Relationship Adjustment: The timing of the feed dog movement relative to the needle bar is critical. The standard position is when the center of the No. 1 fixing bolt of the presser foot vertical move cam is aligned with the center line of the upper shaft, and the bottom of the No. 1 fixing bolt of the feed cam is aligned with the center line of the upper shaft.
- Needle Stop Position Adjustment: For direct-drive models, the needle stop position (up or down) can be adjusted by loosening screws and moving them within a long hole. Moving the screw towards direction A advances the stop position, while moving it towards direction B delays it. For mechatronic models, the needle stop position can be marked by turning on the switch, pressing the "F" key for 2 seconds, and then pressing "S" after positioning the thread take-up lever.
Important Technical Specifications:
- Models: 0311/0611D, 0311/0611E3-Y
- Application: Thick to extra-thick materials
- Maximum Sewing Speed: 2200 rpm
- Maximum Stitch Length: 9mm
- Needle Bar Stroke: 38mm
- Thread Take-up Lever Stroke: 73mm
- Presser Foot Interactive Quantity: 2.0-5.5mm
- Outer Presser Foot Operating System: Standard plate
- Needle Type: DPx17 22#/23#
- Hook Type: Full-automatic lubrication large hook (for 0311/0611D), Full-automatic lubrication large hook with auto-trimmer (for 0311/0611E3-Y)
- Lubrication System: Automatic lubrication
- Winding Type: Built-in winding device
- Thread Trimming Device: Not available for 0311/0611D, Available for 0311/0611E3-Y
- Reverse Stitching Device: Not available for 0311/0611D, Available for 0311/0611E3-Y
- Automatic Presser Foot Lifter: Optional for 0311/0611D, Available for 0311/0611E3-Y
- Electronic Thread Nipper Device: Not available
- Presser Foot Lifting Height: Hand control (7mm), Knee lift (16mm)
- Motor Power (W): 750W for both models
Maintenance Features:
- Lubrication: Before initial use or after long periods of inactivity, the oil pan must be filled with special oil up to level A. During operation, the oil level should be regularly checked and maintained between levels A and B. The oil lubrication condition can be monitored through the oil window. The rotary hook lubrication can be adjusted by turning a screw clockwise to increase oil flow and counterclockwise to decrease it. After adjustment, the machine should run for at least 30 seconds to check oil flow to the hook. The oil pump adjustment involves ensuring the adjustment plate covers the oil hole sufficiently or opening it to reduce oil supply.
- Needle Replacement: Always turn off the power before replacing the needle to prevent accidental startup and injury. The needle should be inserted to the bottom, and the screw tightened, with the long groove facing left.
- Cleaning: Before cleaning, always turn off the power switch to prevent accidental startup. Regular cleaning of the feed dog, rotary hook, and oil pump hook is recommended to ensure optimal performance and longevity. When handling lubricating oil or grease during cleaning, wear protective goggles and gloves to avoid contact with eyes or skin. Lubricants should be kept out of reach of children and should not be ingested.
- Troubleshooting: The manual provides a comprehensive troubleshooting guide for common issues such as needle breakage, thread breakage, poor threading, thread falling out at the start of sewing, skipped stitches, and trimming misses. For each issue, potential causes (e.g., wrong needle insertion, bad timing, incorrect tension) and corrective actions (e.g., reinsert needle, adjust timing, adjust tension) are detailed. If an error occurs, or abnormal noises or smells are detected, the machine should be immediately turned off, and a qualified technician or dealer should be contacted.
The GEMSY sewing machines are robust and efficient tools for industrial sewing, particularly for heavy materials, offering precision and reliability through their advanced mechatronic design and comprehensive adjustment capabilities.