Do you have a question about the Generac Power Systems 20 kW LP and is the answer not in the manual?
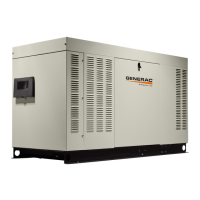
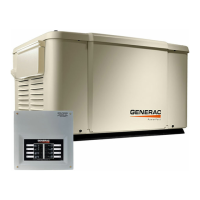
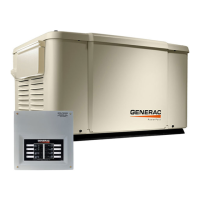
Provides foundational understanding of the generator, its components, and identification.
Details the various parts of the generator for service identification.
Explains how to identify the specific generator model and engine type.
Provides knowledge of installation requirements for home standby systems.
Guidelines for choosing an optimal and safe location for the generator.
Details National Fire Protection Association standards for stationary engines.
Instructions for properly grounding the generator and its components.
Information on natural gas and liquid propane (LP) fuel system requirements.
Details on connecting the transfer switch and load center for system operation.
Instructions for connecting power source and load lines to the transfer switch.
Explains the wiring for system control between the generator and transfer switch.
Ensuring the generator is properly prepared for use before initial startup.
Steps to reconfigure the fuel system from natural gas to liquid propane (LP).
Details on various meters used to measure electrical properties.
Explanation of the VOM's capabilities for measuring voltage and resistance.
Procedure for accurately measuring the generator's AC output voltage.
Guidelines and rules for measuring DC voltages using a voltmeter or VOM.
Explains how AC output frequency is proportional to rotor speed.
Methods for measuring current flow in amperes using clamp-on or in-line ammeters.
How to use a VOM to measure resistance in circuits for testing windings.
Defines electrical units (Ampere, Volt, Ohm) and explains Ohm's Law.
Completing a thorough visual inspection for obvious problems before testing.
Understanding insulation resistance of stator and rotor windings.
Procedure for using a megger to test stator and rotor insulation resistance.
Methods for cleaning dirt and dust from the generator without using water.
Procedure for drying an alternator to resolve moisture-related issues.
Description of the Nexus controller panel functions and modes.
Details on using the controller interface, including exercise time and activation.
Procedure to set the generator for automatic operation with a transfer switch.
Steps for manually transferring loads and starting the generator.
Overview of automatic operation with a transfer switch.
Describes generator behavior during utility failure and engine cranking.
Details on cranking cycles, choke operation, and failure to start conditions.
Defines parameters for load transfer in manual and automatic modes.
Explains the automatic sequence for standby transfer and retransfer.
Details on how the generator's exercise function operates.
Describes the process when utility voltage is restored and re-transfer occurs.
Importance of performing proper maintenance for generator reliability.
Explains how maintenance messages are displayed and reset.
Recommendations for engine oil type and oil/filter change intervals.
Importance of air filter cleanliness for engine performance and longevity.
Guidance on inspecting spark plugs and ensuring correct gapping.
Performing a visual inspection to ensure proper function and prevent hazards.
Recommendations for protecting the enclosure from corrosion.
Importance of proper valve clearance for engine longevity and performance.
Steps for maintaining the battery to ensure proper starting capability.
Describes the basic alerts provided by the wireless monitoring device.
Steps for pairing the generator transceiver with the display unit.
Details on the advanced features of the wireless display system.
Procedures for resynchronizing the radio after battery disconnection.
How to navigate to the main menu and its four sub-menus.
Displays the last 50 alarm and run events with date, time, and description.
Shows generator status, date, time, and displays up to five parameters.
Provides means to edit operating parameters like exercise time and language.
Offers four test tools: Inputs, Outputs, Display, and QT-Test.
Familiarizes technicians with testing and evaluation of generator problems.
Lists essential tools and specialized equipment for diagnostics.
Tips for identifying problems using history logs and understanding operational sequences.
Precautions when using piercing probes and handling connectors to avoid damage.
Overview of the alternator's revolving field type and its AC output capabilities.
Explains the direct coupling of the engine and rotor for AC output.
Details the three basic components: rotor, stator, and brush assembly.
Describes the 2-pole rotor, its function, and magnetic flux generation.
Details the stator's dual power winding, excitation winding, and eight stator leads.
Explains the brush holder and brushes' role in electrical connection to the rotor.
Identifies additional components like the Nexus controller and circuit breakers.
Describes the AVR's role in rectifying and regulating DC excitation voltage.
Explains the MLCB's purpose in protecting the generator from electrical overload.
Explains residual magnetism in the rotor and its role in inducing voltage.
Details the field boost circuit's function during engine cranking.
Describes engine cranking, field excitation, and AC power winding output.
Explains how the AVR regulates excitation voltage for constant AC output.
Analyzes how load changes affect voltage and frequency output.
Guidance on using flow charts and test numbers for problem diagnosis.
Troubleshooting flowchart for generator shutdown due to under-voltage conditions.
Troubleshooting flowchart for generator outputting high voltage.
Flowchart for diagnosing excessive voltage and frequency drop under load.
Troubleshooting flowchart for unstable voltage or incorrect output without shutdown.
Familiarizes technicians with procedures for testing generator problems.
Highlights dangers of high voltages and gaseous fuels during testing.
General steps and questions to guide troubleshooting efforts.
Procedure to check the generator's AC output voltage at the main circuit breaker.
Procedure to adjust generator output voltage if it is too high.
Tests rotor magnetic field and voltage output by supplying fixed DC current.
Verifies the integrity of the sensing circuit for the voltage regulator.
Tests the integrity of the excitation winding within the stator.
Tests the stator windings for open, short-to-ground, or short-circuit conditions.
Verifies rotor circuit resistance and field boost circuit functionality.
Inspects brushes and slip rings for wear, damage, or contamination.
Tests the rotor assembly for open or shorted windings causing voltage loss.
Verifies AC output frequency is proportional to rotor speed (3600 RPM for 60Hz).
Tests the stepper motor and linkage for proper movement and binding.
Assesses voltage and frequency stability when electrical loads are applied.
Tests for overload conditions by measuring amperage against rated capacity.
Diagnoses engine issues like underpowering or excessive speed/frequency drop.
Describes the V-Type CONTACTOR and its operation.
Details NEMA 1 enclosure standards for protection against incidental contact.
Explains the 2-pole CONTACTOR, its contacts, and closing coils.
Describes how the standby closing coil energizes for transfer to the standby position.
Explains how limit switches mechanically actuate to arm circuits for re-transfer.
Details how the transfer relay is controlled by the Nexus controller.
Describes how the utility closing coil uses utility source power to actuate contacts.
Information regarding the ungrounded neutral lug in the transfer switch.
Instructions for manually moving the CONTACTOR using the transfer handle.
Details the 3-point terminal block for interconnecting with the generator.
Explains how N1 and N2 provide utility voltage sensing signals to the controller.
Describes wire T1 connection to the Load side for battery charging.
Explains how wires 194 and 23 provide transfer relay control by the controller.
Details the fuse holder capacity and the purpose of fuses F1, F2, and F3.
Describes the circuit condition when utility source voltage is available.
Explains generator start sequence when utility voltage drops below nominal.
Details the process of transferring loads to the standby generator.
Describes events when utility voltage is restored and re-transfer occurs.
Explains the process of transferring loads back to utility after restoration.
Details the generator shutdown sequence after re-transfer to utility.
Guidance on using flow charts and test numbers for transfer switch problems.
Flowchart for diagnosing failure to transfer to standby when utility fails.
Troubleshooting for generator starting but failing to retransfer to utility.
Flowchart for issues where the unit starts and transfers when utility is on.
Troubleshooting steps for blown F1 or F2 fuses affecting N1/N2 circuits.
Troubleshooting steps for a blown T1 fuse affecting the battery charger.
Familiarizes technicians with procedures for testing transfer switch problems.
Highlights dangers of high voltages and manual operation hazards.
Key questions to ask when evaluating transfer switch problems.
Procedure to check generator voltage availability at transfer switch terminals.
Tests manual operation for binding, sticking, or excessive force.
Verifies the integrity of the switch control wiring for transfer.
Determines if the transfer relay (TR1) is functioning normally.
Checks the standby coil (C2) for proper voltage and operation.
Tests Wire 23 for proper grounding to initiate transfer relay operation.
Verifies the utility coil (C1) receives proper voltage for transfer to utility.
Tests limit switches SW2 and SW3 for proper interruption of transfer circuits.
Inspects fuses F1 and F2 for open conditions affecting N1/N2 circuits.
Inspects fuse F3 for open condition affecting the battery charger circuit.
Tests the main circuit breaker for continuity and proper operation.
Checks N1 and N2 wiring for shorts to ground that may blow fuses.
Tests N1 and N2 voltage at the generator control panel terminal block.
Determines if sensing voltage is reaching the controller for automatic operation.
Verifies utility voltage at transfer switch terminals for controller sensing.
Checks T1 wiring for shorts to ground that could blow the F3 fuse.
Familiarizes readers with components of the Engine and DC Control systems.
Details the terminal strip connecting to the transfer switch for controller connection.
Explains the controller's role in system operations like startup, running, and transfer.
Describes the meaning of the red, yellow, and green LEDs on the display.
Details the battery charger's voltage levels based on ambient temperature.
Explains the fuse's role in protecting the controller from excessive current.
Describes the SCR/SC function for controlling the starter motor.
Explains how the common alarm relay drives external alarm indications.
Provides physical pin connections and circuit functions for J4 and J5 connectors.
Instructions on navigating the controller's menu system using navigation keys.
Explains the necessity of safety devices to prevent engine damage.
Describes the 'Low Battery Voltage' message and its trigger conditions.
Details the function of the oil pressure switch in engine shutdown.
Explains how the high temperature switch initiates engine shutdown.
Describes the controller's logic to shut down the engine upon exceeding speed limits.
Explains the shutdown procedure for loss of RPM signal during cranking or running.
Details the feature that prevents engine damage from continuous starting attempts.
Describes automatic choke control for different engine models.
Explains shutdown procedures when generator frequency drops below set limits.
Procedure for unlatching active faults and clearing corresponding alarm messages.
Familiarizes technicians with DC and AC control system operation for troubleshooting.
Describes circuit conditions when utility power is available and AUTO mode is active.
Details circuit conditions during an initial utility power failure.
Explains the process from utility failure to engine cranking and start.
Describes engine startup, ignition, fuel flow, choke operation, and warm-up timer.
Details the sequence of events for transferring loads to the standby generator.
Explains events occurring when utility voltage is restored and re-transfer initiates.
Describes the engine shutdown process after re-transfer to utility.
Flowchart for diagnosing why the engine won't crank when utility fails.
Troubleshooting flowchart for engine not cranking when switch is manual.
Flowchart for diagnosing why the engine cranks but fails to start.
Troubleshooting flowchart for engine starting issues and performance problems.
Flowchart for diagnosing various shutdown alarms and faults.
Troubleshooting steps for a blown 7.5 amp fuse affecting the controller.
Flowchart for diagnosing why the generator fails to exercise.
Troubleshooting for the low speed exercise function not operating correctly.
Flowchart for diagnosing issues related to a dead battery.
Familiarizes technicians with procedures for testing engine and DC control problems.
Highlights dangers of high voltages, fuels, and moving parts during testing.
Key questions to ask when evaluating engine and DC control problems.
Verifies the AUTO-OFF-MANUAL switch is set to AUTO for automatic operation.
Determines if the engine cranks manually to diagnose starting issues.
Tests the AUTO-OFF-MANUAL switch for proper input to the controller.
Verifies the controller's automatic sequence during utility failure and startup.
Inspects the 7.5 amp fuse for continuity, which protects the control console.
Tests battery voltage, cable connections, and load capability.
Verifies controller delivers 12 VDC to starter relay/contactor for cranking.
Tests the SCR for proper energizing and contact closure for cranking.
Determines if the starter contactor (SC) is working to close contacts for engine crank.
Tests the starter motor for binding, shorts, or weak magnets.
Verifies adequate gas supply and pressure for engine start.
Determines if the controller is properly delivering 12 VDC to the fuel solenoid.
Verifies if the fuel solenoid is operating correctly by checking gas pressure.
Tests the choke solenoid for proper operation during cranking and running.
Checks for ignition spark to diagnose potential ignition system failures.
Inspects spark plugs for fouling, damage, or defective electrodes.
Diagnoses compression loss by checking air leakage and pressure.
Tests Wire 18 for engine RPM signal and shutdown function.
Checks magneto ohm values and adjusts air gap for proper ignition.
Tests the oil pressure switch and wiring for proper shutdown function.
Tests the high temperature switch for proper function in preventing overheating.
Adjusts valve clearance to prevent hard starting and rough running.
Tests Wire 18 continuity for RPM signal and shutdown function.
Verifies the exercise timer and AUTO-OFF-MANUAL switch settings.
Checks circuits that receive battery voltage and could cause main fuse to blow.
Tests the run circuit for 12 VDC delivery and potential faulty relays/solenoids.
Tests the crank circuit for 12 VDC delivery during cranking.
Verifies if the transfer relay (TR1) is functioning correctly.
Confirms if the low speed exercise function is enabled in the controller.
Verifies choke solenoid operation during low speed exercise.
Checks for 120 VAC supply from the load side of the contactor to the controller.
Verifies controller's battery voltage connections via the 'Status' menu.
Tests battery voltage availability to the controller via Wire 13.
Determines if there is a negative draw or positive charge current from the charger.
Checks T1 voltage at the generator's customer connection block.
Verifies T1 voltage at the J5 connector, checking for open wires or bad connections.
Checks T1 voltage within the transfer switch, identifying potential blown T1 fuse.
Tests the F3 fuse circuit for continuity, ensuring battery charger protection.
Overview of essential system tests after installation and periodically.
Tests manual operation of 'W/V-Type' transfer switches for proper function.
Steps for performing complete electrical checks before system testing.
Procedure for testing generator performance with electrical loads applied.
Steps to verify the system's automatic operation sequence during utility failure.
Instructions for setting the generator's weekly exercise timer.
Details the one-time activation process required for automatic operation.
Steps for gaining front engine access by removing covers and components.
Detailed procedures for disassembling major components of the generator.
Step-by-step instructions for removing stator, rotor, and engine assemblies.
Procedures for removing and disassembling the generator's control panel.
Specific disassembly steps for GN990/999 engine models.
Specific disassembly steps for GN530 engine models.
Specific disassembly steps for GN410 engine models.
Detailed wiring diagram for the 8KW 2010 air-cooled HSB model.
Schematic illustrating electrical connections for the 8KW 2010 HSB model.
Wiring diagram for the 10-14KW 2010 air-cooled HSB model.
Schematic detailing electrical connections for 10-14KW HSB models.
Schematic illustrating electrical connections for the 17KW 2010 HSB model.
Wiring diagram for the 20KW 2010 air-cooled HSB model.
Schematic detailing electrical connections for the 20KW 2010 HSB model.
Schematic for HSB transfer switch, drawing 0H6385-A.
Schematic for HSB transfer switch, drawing 0H6386-B.
Worksheet to document troubleshooting steps, results, and failure analysis.
Alphabetical listing of all figures with their corresponding page numbers.
Listing of all tables with their corresponding page numbers.
| Brand | Generac Power Systems |
|---|---|
| Model | 20 kW LP |
| Category | Portable Generator |
| Language | English |