CHECK GUIDE TUBE FOR LEVEL
Note: In some rare instances, the top surface of the guide tube, on which
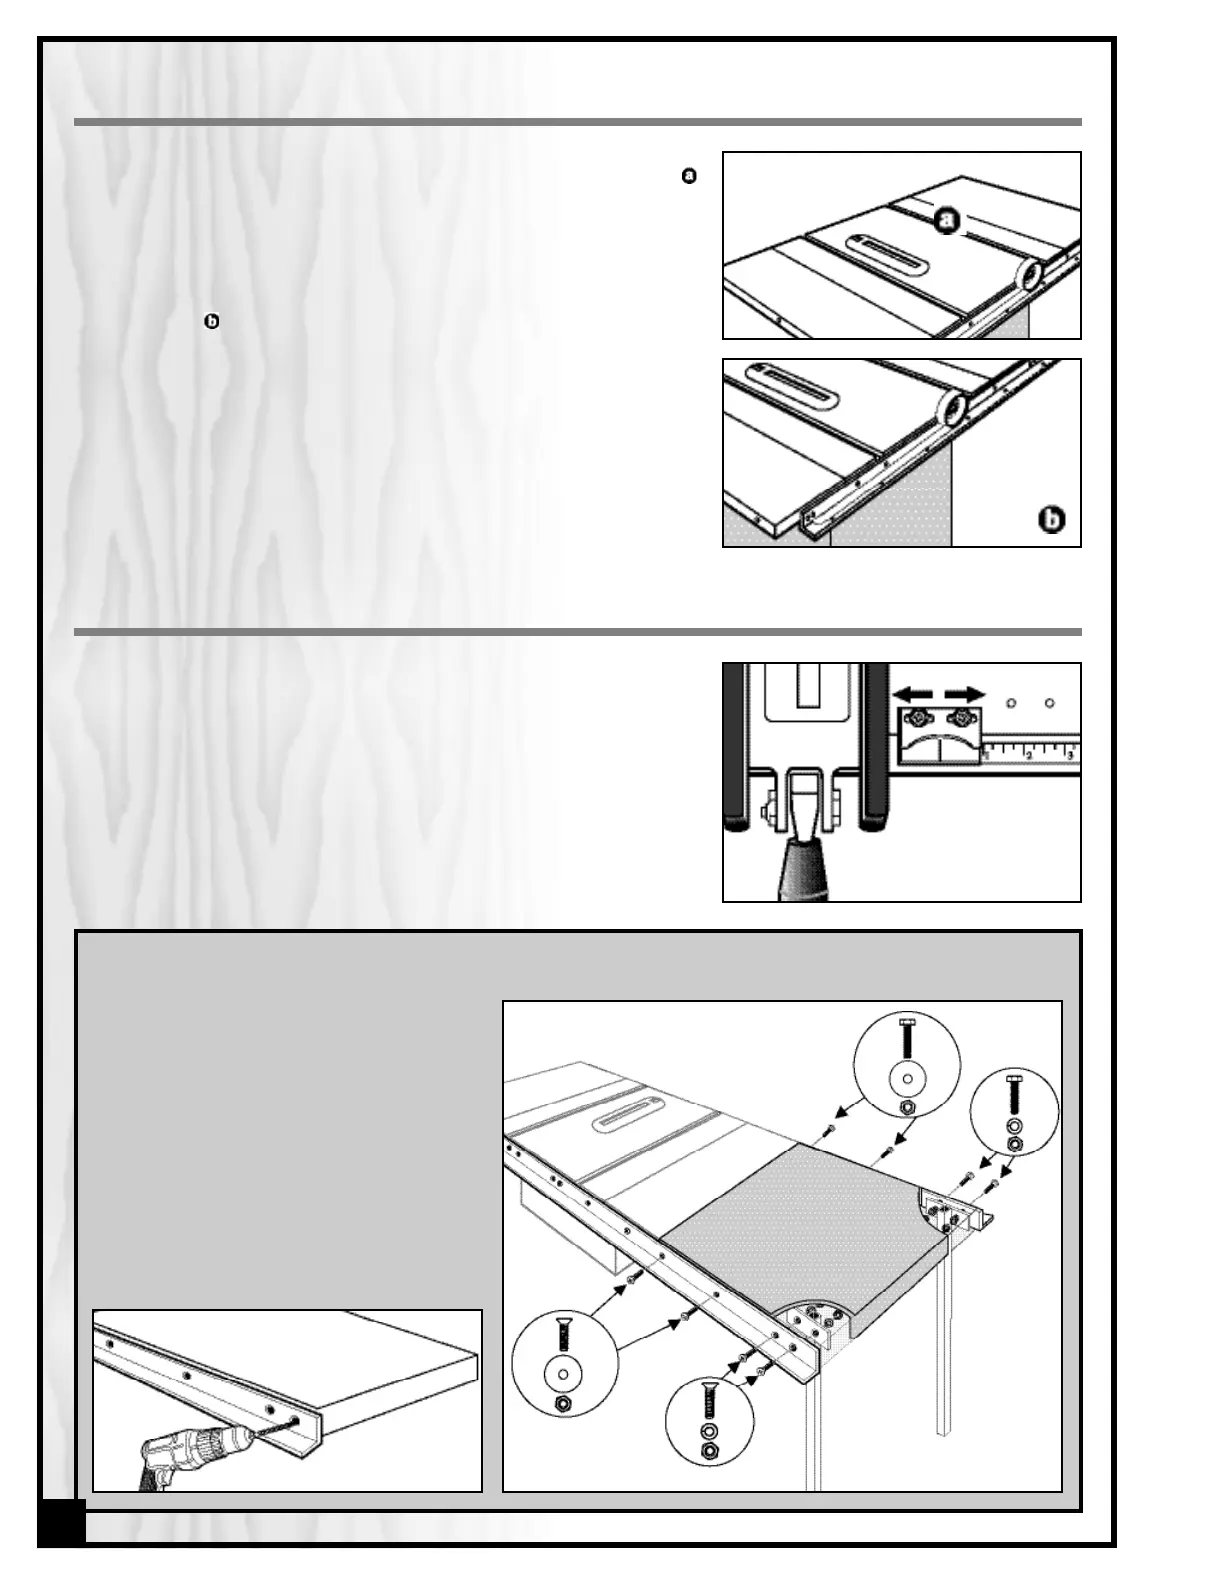
the fence slides, may not be parallel with the top of the saw table, .
This can result in friction when sliding the fence and eventual scraping
damage to the pointer and/or measuring tape.
To correct this situation:
1. Remove the guide tube.
2. Place 2 to 4 layers of masking tape along the back (or front) edge
of the rail, , as needed to shim up the guide tube.
3. Replace the guide tube and check for parallel.
If you find that the guide tube is out of parallel with the table top from
left to right, you should:
1. Refer back to Section II, loosen the screws on the front rail and use
the L-jig again to ensure that the rail is at proper height from
beginning to end.
2. Retighten the screws and replace guide tube.
MAKE TEST CUTS TO CHECK POINTER ACCURACY
1. Once the measuring tape is installed and the fence is perfectly
parallel with the blade and table top,check the pointer’s center line
against the tape’s zero-point. If necessary, loosen the two screws to
slide the pointer left or right into position.
2. For the final check, slide the fence to the right so the pointer points
to the 2-inch mark. Use scrap wood to make several rips. If the cuts
don’t measure exactly 2 inches wide, readjust pointer.
INSTALLING A TABLE EXTENSION
Depending on your saw model and shop
needs you may wish to add an extension
table to your set-up. Whether supplied with
the unit, purchased aftermarket or shop
made, make sure the extension table fits
between the saw rails and can be installed
flush to the saw table. Clamp the extension
table in place on the rails, and using the
remaining holes on the rails as a guide, drill
two mounting holes front and back through
the table apron. Use the supplied washers
along with the spare bolts and nuts to secure
the extension table in place.
10
 Loading...