7
English
UNPACKING AND CONTENTS
IMPORTANT: Due to modern mass production techniques, it is unlikely the tool is
faulty or that a part is missing. If you find anything wrong, do not operate the tool until
the parts have been replaced or the fault has been rectified. Failure to do so could result
in serious personal injury.
CONTENTS IN PACKAGE
Description Q'ty
Belt Sander 1
Dust Bag 1
Operator's Manual 1
ASSEMBLY & ADJUSTMENT
WARNING:
To reduce the risk of serious personal injury, read and follow all
important safety warning and instructions before using this tool.
WARNING: Always be sure the tool is disconnected from the power source
before making any adjustments or setting up prior to operating. Failure to disconnect
or unplug the tool may cause accidental starting, resulting in serious personal injury.
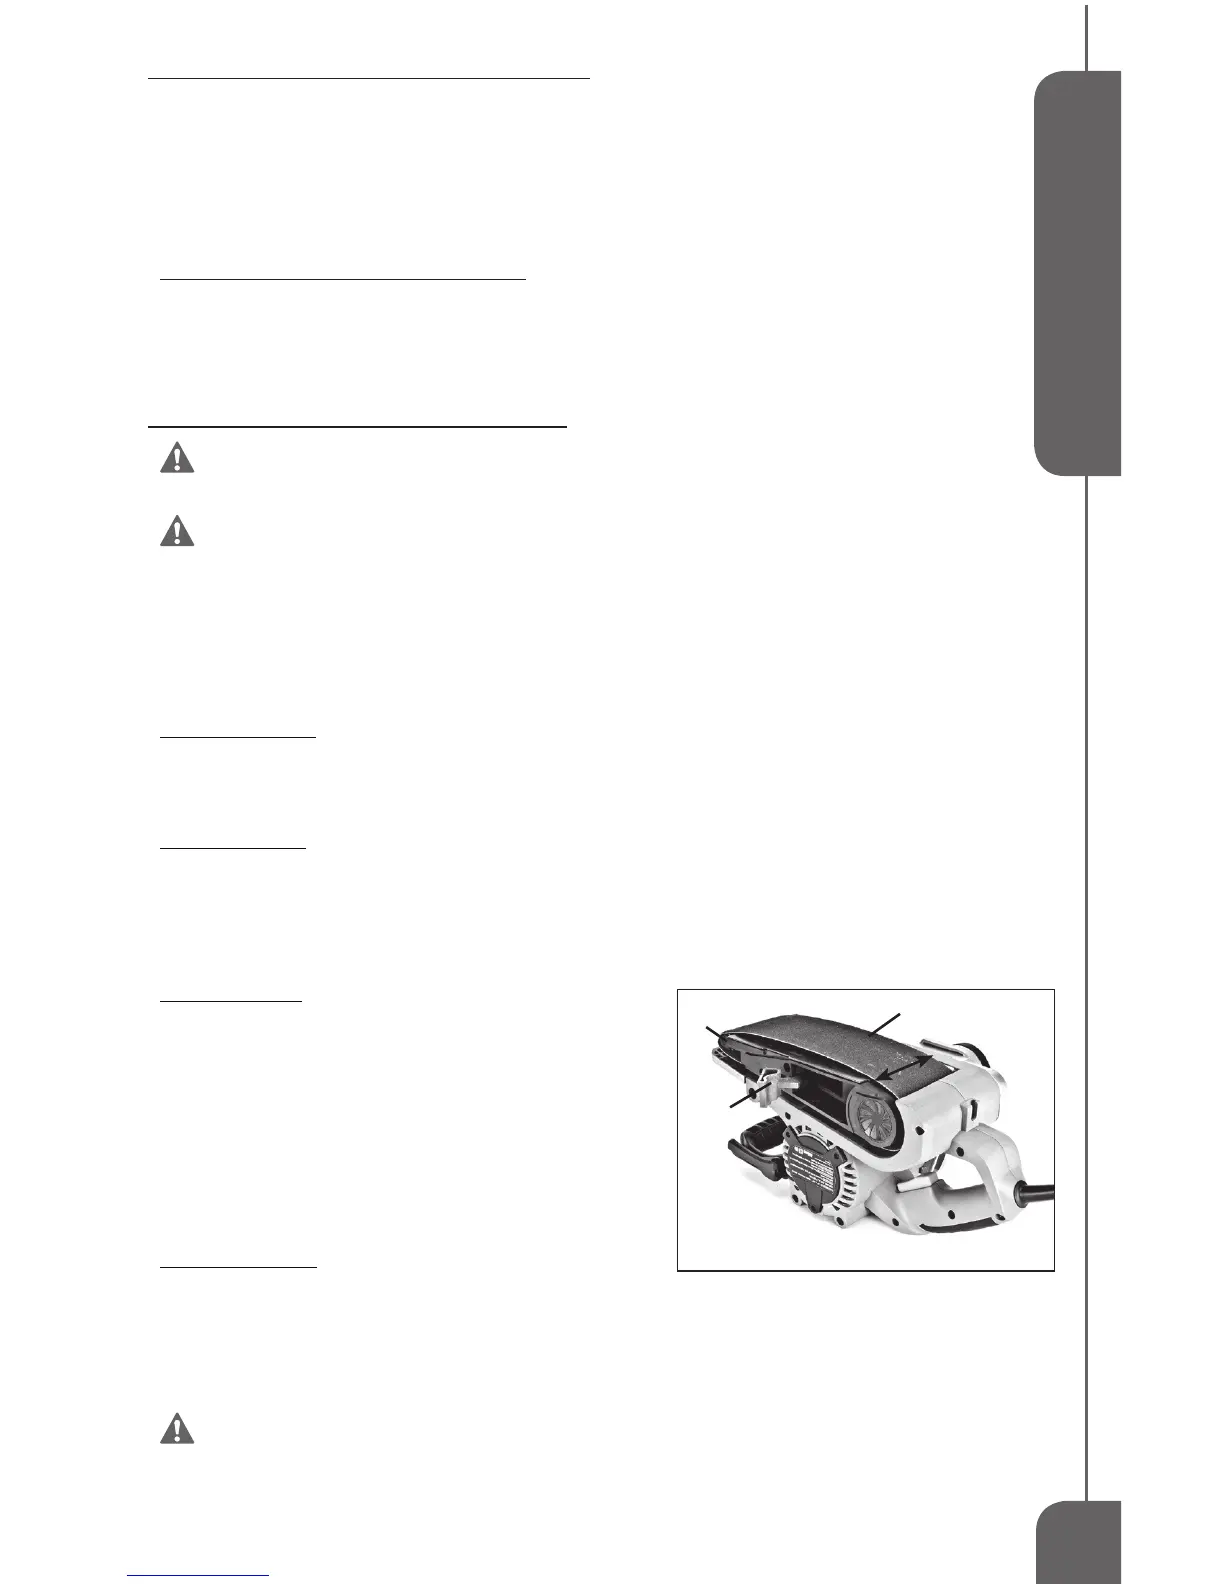
INSTALLING OR REMOVING BELT (FIG 2)
The direction you install a belt to run properly is determined by which of the following types of sanding belts
you are using.
Unidirectional Belt: This type of belt is designed to be installed and run in only one direction on your belt
sander. The proper running direction is indicated by an arrow imprinted on the inside (or back) of the belt. When
installing a unidirectional belt, the direction of arrow on the belt should correspond with the directional arrow
shown on the belt sander.
Bidirectional Belt: This belt is designed so that its performance is unaffected by which direction it is installed
and run on a belt sander. Therefore, you will not find a directional arrow imprinted on the inside (or back) of the
belt.
CAUTION: Before installing a belt, ensure that the direction of the arrow on the back of a unidirectional
sanding belt corresponds to the directional arrow on the tool itself.
To Install the Belt:
1. Unplug the belt sander.
2. Place the sander with sanding belt up as shown in FIG 2.
3. Pull the belt tension release lever (9) outward completely. This
action retracts the front pulley (10).
4. Slide a new sanding belt over both pulleys and platen plate.
Align the belt so it is straight and even with the outer edges of
the front and rear pulleys.
5. Push the belt tension release lever back to its original position
to secure the sanding belt.
To Remove the Belt:
1. Unplug the belt sander.
2. Place the sander with sanding belt up as shown in FIG 2.
3. Pull the belt tension release lever (9) outward completely. This action retracts the front pulley (10) and releases
tension on the sanding belt (7).
4. Remove the sanding belt.
WARNING: To prevent your hands and fingers from being pinched and
possible serious injury, keep them clear of the front pulley and spring mechanism and
position them so they do not get caught beneath belt tension release lever.
FIG 2
9
10
7