English
Hardware Installation
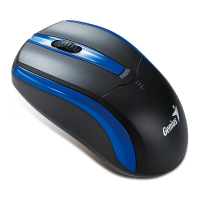
1. Your computer should be off. Now connect the gaming mouse to any USB port of your PC (it takes a few
seconds for your mouse to be properly installed).
2. Turn on your computer.
Remark: Do not use the optical/laser mouse on a desk which is made of glass
or mirror.
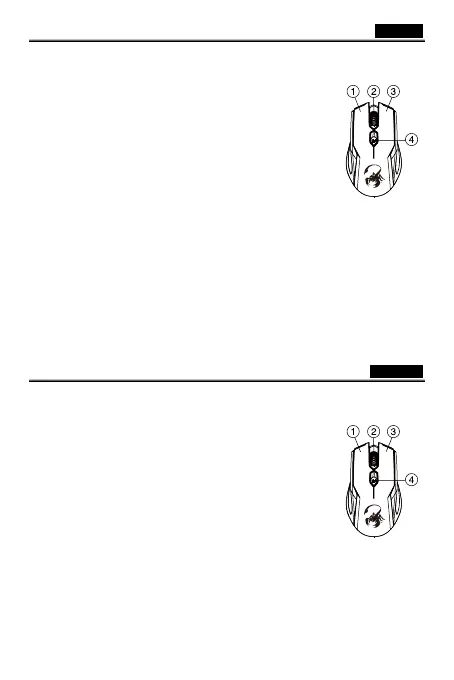
Button Assignment
1. Left Button: Provides traditional mouse functions such as click, double click
or drag.
2. Middle button: Press this button to surf the Internet and Windows
documents.
3. Right Button: You can assign this button to frequently used keyboard and
mouse functions.
4. DPI adjustment: Default is 1200 dpi. DPI in 400/800/1200/3200 for different
needs in the battle field.
Русский
Установка оборудования
1. Компьютер должен быть выключен. Подключите игровую мышь к любому порту USB на компьютере
(на правильную установку мыши потребуется несколько минут).
2. Включите компьютер.
Не пользуйтесь оптической/лазерной мышью на стеклянных и
зеркальных столах.
Назначение кнопок
1. Левая кнопка: традиционные функции мыши (щелчки, двойные
щелчки, перетаскивание).
2. Ролик «Magic Roller»/средняя кнопка: поиск в сети Интернет и
документах Windows (нажмите на ролик).
3. Правая кнопка: можно назначить часто используемые функции
клавиатуры или мыши.
4. Регулировка разрешения DPI: по умолчанию 1200 dpi. Можно
выбрать DPI 400, 800, 1200 или 3200 по необходимости.
 Loading...